
Remember those days of endless summer fun, where creativity flowed as freely as imagination? There’s something so wonderfully nostalgic about playing with slime, isn’t there? It’s that tactile, squishy, stretchy joy that brings smiles to faces of all ages. And today, we’re diving into a recipe that’s a surefire way to recreate that magic right in your own kitchen (or living room!). This Fluffy Slime recipe is ridiculously simple, incredibly quick, and the results are just… wow! Get ready for the softest, stretchiest, most delightful slime you’ve ever made.
Why You’ll Love Fluffy Slime
- Fast: Seriously, you can whip this up in minutes!
- Easy: Perfect for beginners or a quick craft session with the kids.
- Giftable: Package it up in a cute jar, and you have an instant, handmade gift!
- Crowd-pleasing: From toddlers to teens (and even us grown-ups!), everyone loves fluffy slime.
Ingredients
Gathering your supplies is half the fun! Here’s what you’ll need:
- 3 cups Foam Shaving Cream: This is the secret to that amazing fluffy texture! Make sure it’s foam, not gel.
- 1/2 cup Elmer’s White School Glue: The classic for a reason. It provides the perfect base.
- 1/2 tsp Baking Soda: A little bit goes a long way to help activate the slime.
- 1 tbsp Contact Solution: This is our slime activator. Make sure it contains boric acid and sodium borate for it to work!
- 5-10 drops Food Coloring (optional): Get creative with colors!
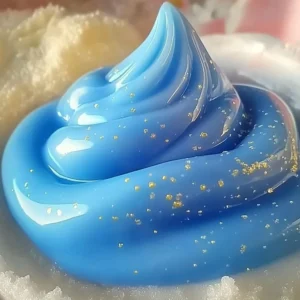
- Glitter (optional): Because what’s slime without a little sparkle?
How to Make Fluffy Slime
Alright, let’s get our hands messy! This is where the magic happens.
- Start with the Fluff: Grab your largest mixing bowl and pour in all 3 cups of the foam shaving cream. Imagine fluffy clouds – that’s the vibe we’re going for!
- Add Some Color (Optional): If you’re feeling colorful, add your food coloring now. Start with about 5-10 drops and mix it in gently until the shaving cream is evenly tinted. You can always add more if you want a deeper shade.
- Introduce the Glue: Now, pour in your 1/2 cup of white school glue. Stir everything together until it’s well combined. It’ll look a bit like a frothy, colorful cloud mixture at this point.
- Baking Soda Boost: Sprinkle in the 1/2 teaspoon of baking soda and give it another good stir. This is crucial for getting the slime to form properly.
- Activate the Slime: Here comes the activator! Slowly drizzle in the 1 tablespoon of contact solution while you stir continuously. You’ll start to see the mixture pulling away from the sides of the bowl and becoming less sticky.
- Knead Your Creation: Once it’s mostly combined in the bowl, it’s time to get your hands in there! Knead the mixture for a few minutes. It might still feel a little sticky at first, and that’s totally normal. If it’s too sticky to handle, add just a tiny bit more contact solution, drop by drop, and keep kneading until it reaches your desired consistency. I find that really working it through your hands is the best way to get it perfectly stretchy.
- Add Some Sparkle (Optional): If you’re adding glitter, now’s the time! Gently knead it in until it’s distributed throughout your fluffy slime.

Substitutions & Additions
Want to take your fluffy slime to the next level? Here are a few ideas:
- Scent: A few drops of essential oil (like lavender for calming or lemon for a fresh scent) can add a lovely fragrance. Just be sure it’s skin-safe.
- Texture: Mix in small foam beads or plastic beads for a different sensory experience.
- Color Combinations: Try swirling two colors together for a marbled effect.
- Glitter Galore: Don’t be shy with the glitter! Fine glitter, chunky glitter, iridescent glitter – the more, the merrier!
Tips for Success
A few little tricks to ensure your fluffy slime turns out perfectly:
- Use the Right Contact Solution: Make sure your contact solution contains boric acid and sodium borate. Without these ingredients, your slime won’t activate.
- Don’t Add Too Much Activator at Once: It’s always better to add a little at a time. You can always add more, but you can’t take it away! Too much activator can make your slime rubbery and breakable.
- Kneading is Key: Be patient with the kneading process. It really helps to bring the slime together and make it less sticky.
- Clean Workspace: Slime can be a bit sticky, so working on a protected surface like a placemat or parchment paper can save you some clean-up time.
- Prep Ahead: If you’re making slime for a party or a craft day, you can mix the glue, shaving cream, and baking soda ahead of time. Add the contact solution and knead just before you want to play!
How to Store Fluffy Slime
To keep your delightful fluffy slime fresh and fun, store it in an airtight container or a resealable plastic bag. This will prevent it from drying out. Properly stored, your slime should last for several weeks. If it starts to feel a little stiff, you can try kneading in a tiny bit of lotion or water to revive it.
FAQs
Got questions? We’ve got answers!
-
Is this slime recipe safe for young children?
This recipe uses common household ingredients, but adult supervision is always recommended, especially during the mixing and kneading stages. Ensure children do not ingest the slime.
-
My slime is too sticky. What should I do?
Add a tiny bit more contact solution, just a few drops at a time, and knead it in thoroughly. It might take a minute or two of kneading for the solution to fully incorporate and reduce stickiness.
-
Can I use a different type of glue?
While Elmer’s white school glue is recommended for its reliable results, you can experiment with other white craft glues. However, results may vary.
Making fluffy slime is such a fantastic way to spend an afternoon. It’s a simple activity that sparks so much joy and creativity. Whether you’re looking for a fun craft project, a cool party activity, or just a way to de-stress, this recipe has you covered. It’s a wonderful reminder that sometimes the simplest things bring the most happiness, just like a perfectly fluffy batch of slime or a delightful treat like fluffy blueberry lemon ricotta pancakes.
For more creative crafts and delicious recipes, be sure to follow us on Pinterest!
DIY Fluffy Slime
Equipment
- Large mixing bowl
- Measuring cups and spoons
- Airtight container or resealable plastic bag (for storage)
Ingredients
For the Fluffy Slime
- 3 cups foam shaving cream Make sure it's foam, not gel.
- 1/2 cup Elmer's white school glue
- 1/2 tsp baking soda
- 1 tbsp contact solution Must contain boric acid and sodium borate.
- 5-10 drops food coloring optional
- Glitter optional
Instructions
- Step 1: Pour all 3 cups of the foam shaving cream into your largest mixing bowl.
- Step 2: If using, add 5-10 drops of food coloring to the shaving cream and mix gently until evenly tinted.
- Step 3: Pour in 1/2 cup of white school glue and stir everything together until well combined.
- Step 4: Sprinkle in 1/2 teaspoon of baking soda and stir again.
- Step 5: Slowly drizzle in 1 tablespoon of contact solution while stirring continuously. The mixture will start to pull away from the sides of the bowl.
- Step 6: Once mostly combined, knead the mixture with your hands for a few minutes until it reaches your desired consistency. If it's too sticky, add a tiny bit more contact solution, drop by drop, and keep kneading.
- Step 7: If adding glitter, gently knead it in until distributed throughout the slime.