
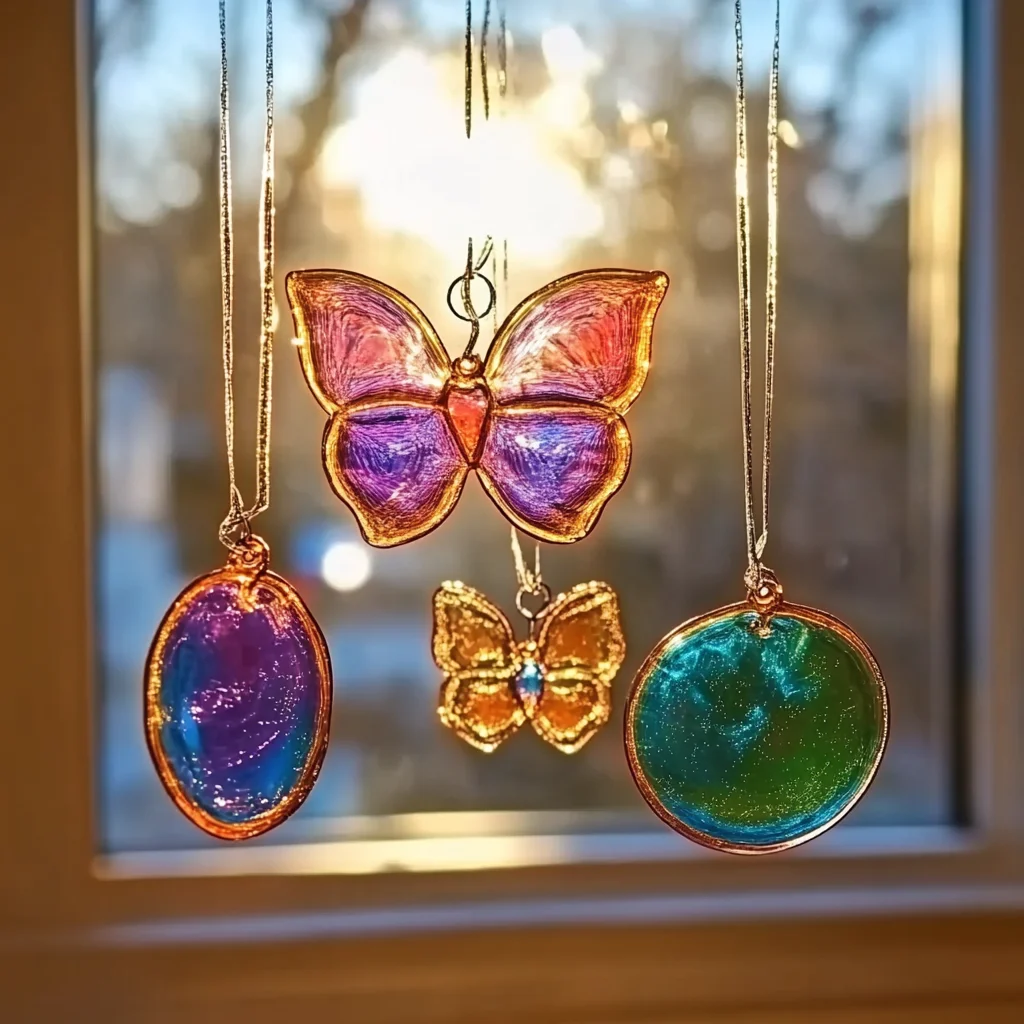
There’s something truly magical about creating art that dances with the sunlight. DIY Glue Suncatchers invite you to explore your creativity while basking in the warmth of your own home. As you gather around the table, the gentle sounds of glue being squeezed and laughter fill the air, bringing back sweet memories of childhood crafting sessions. Imagine the joy of seeing vibrant colors sparkling on your windows, casting beautiful shadows that transform your space into a kaleidoscope of light. This project is not just about making something pretty; it’s about the experience of creating and the smiles it brings.
Why You’ll Love DIY Glue Suncatchers
- Beginner-friendly
- Budget-friendly
- Creative and fun
- Great for kids and families
- Perfect for gifts or decorations
- Customizable
The Heart Behind This DIY
Making DIY Glue Suncatchers is more than just a fun craft; it’s a way to connect with yourself and those around you. As you mix colors, squeeze glue, and watch your unique designs come to life, you engage in a mindful activity that encourages relaxation and creativity. Children and adults alike can experience the joy of self-expression, building confidence through their creations. Plus, there’s a wonderful sense of community when you share your colorful suncatchers with family and friends, brightening not just your windows, but their hearts as well.
A Gentle Look at the Process
As you embark on this crafting journey, you’ll find a calming rhythm in the process. You’ll begin by mixing your glue and colors, feeling the smooth texture in your hands. The anticipation builds as you create your designs on wax paper, and soon, you’ll be rewarded with beautiful suncatchers that come to life in the sunlight. It’s a wonderful blend of art and science, and every step is filled with joy and discovery.
Materials You’ll Need
- Clear school glue: The main ingredient that will bring your colors together.
- Food coloring: For adding vibrancy and personality to your suncatchers.
- Wax paper: A non-stick surface for your designs.
- Plastic squeeze bottles or pipettes: Perfect tools for applying your glue with precision.
- Paintbrush (optional): Use it to spread the glue for a different texture.
- Scissors: For cutting your suncatchers into fun shapes.
- String or ribbon: To hang your beautiful creations.
Step-by-Step Directions
Step 1
In a mixing container, combine clear school glue with a few drops of your chosen food coloring. Stir gently until you achieve your desired color. Don’t hesitate to mix and match colors to create beautiful shades!
Step 2
Lay a piece of wax paper on a flat surface, ensuring it’s smooth and wrinkle-free. This will be the canvas for your masterpiece.
Step 3
Using a plastic squeeze bottle or pipette, start squeezing or dropping the colored glue onto the wax paper to create your desired design. Feel free to use a paintbrush to spread the glue for a different effect, allowing your creativity to flow.
Step 4
Allow the glue to dry completely for several hours or until it is firm and no longer sticky. This is the perfect time to enjoy a cup of tea or dive into another fun project!
Step 5
Once dry, carefully peel the suncatcher off the wax paper. You’ll feel like an artist unveiling their latest creation!
Step 6
If desired, use scissors to cut the suncatcher into fun shapes. This adds an extra layer of whimsy to your artwork.
Step 7
Finally, attach a string or ribbon to the top for hanging. Now your beautiful suncatcher is ready to dance with the sunlight!
Creative Ways to Use DIY Glue Suncatchers
Once you’ve created your stunning suncatchers, the fun doesn’t have to stop there! Hang them in windows to catch the light in your home, or give them as heartfelt gifts to brighten someone else’s day. You could even create a colorful mobile by hanging several suncatchers at different heights. They also make delightful decorations for parties or seasonal celebrations, bringing a touch of handmade charm to any gathering.
How to Store, Preserve, or Reuse DIY Glue Suncatchers
To keep your suncatchers looking vibrant, store them in a cool, dry place away from direct sunlight when not in use. If you want to reuse them, simply peel them off the wax paper and carefully reattach them with tape or a new piece of string whenever you’re ready to display them again.
Creative Variations and Customizations
- Color variations: Experiment with different food coloring combinations for unique hues.
- Themes: Create suncatchers for holidays, seasons, or special occasions.
- Seasonal adaptations: Use fall colors for autumn or pastels for spring.
- Kid-friendly modifications: Let little ones use their hands to create fun prints.
- Advanced creative upgrades: Try layering colors or adding glitter for extra sparkle!
Tips for Success
- Common mistakes to avoid: Don’t use too much glue, as it can take longer to dry.
- Safety tips: Always supervise children, especially when using scissors.
- Preparation suggestions: Set up your crafting area with all materials within reach.
- Cleanup recommendations: Keep a damp cloth handy to wipe up any spills quickly.
- Expert crafting tips: Don’t be afraid to experiment; the beauty of crafting lies in exploration!
FAQs About DIY Glue Suncatchers
Can beginners make this?
Absolutely! This project is perfect for crafters of all skill levels, including beginners.
Can children participate?
Yes! This is a great family-friendly activity that kids will love. Just be sure to supervise them during the cutting phase.
How long does it last?
When stored properly, your glue suncatchers can last for a long time, bringing joy and color to your home.
Can I customize it?
Definitely! Customize your suncatchers with different colors, shapes, and themes to make them uniquely yours.
A Final Creative Note
As you complete your DIY Glue Suncatchers, take a moment to appreciate the joy you’ve created with your own hands. This simple yet beautiful project celebrates creativity, self-expression, and the joy of crafting. So, gather your materials, invite some friends or family, and let the magic of making something special brighten your day! For more delicious recipes, check out blueberry lemon ricotta pancakes or easy key lime pie cookies for treats you will love!
For more DIY inspiration, be sure to follow Pinterest!
Garlic Butter Chicken Bites with Creamy Parmesan Pasta
Equipment
- Large skillet
- Large Pot
- Tongs or Spatula
Ingredients
For the Garlic Butter Chicken Bites
- 1 lb boneless chicken breasts cut into bite-sized pieces
- 2 tbsp olive oil
- 3 tbsp unsalted butter
- 3 cloves garlic minced
For the Creamy Parmesan Pasta
- 12 oz fettuccine or linguine
- 1.5 cups heavy cream
- 1 cup Parmesan cheese grated
Instructions
- Step 1: Cook pasta in a large pot of salted water until al dente. Reserve 1/2 cup of pasta water. Drain and set aside.
- Step 2: In a skillet, heat olive oil over medium-high. Season chicken with paprika, Italian seasoning, salt, and pepper. Sear for 3-4 minutes per side until golden and cooked through. Remove and set aside.
- Step 3: In the same skillet, melt butter and add minced garlic. Saute for 1 minute. Return chicken to the pan and toss in garlic butter.
