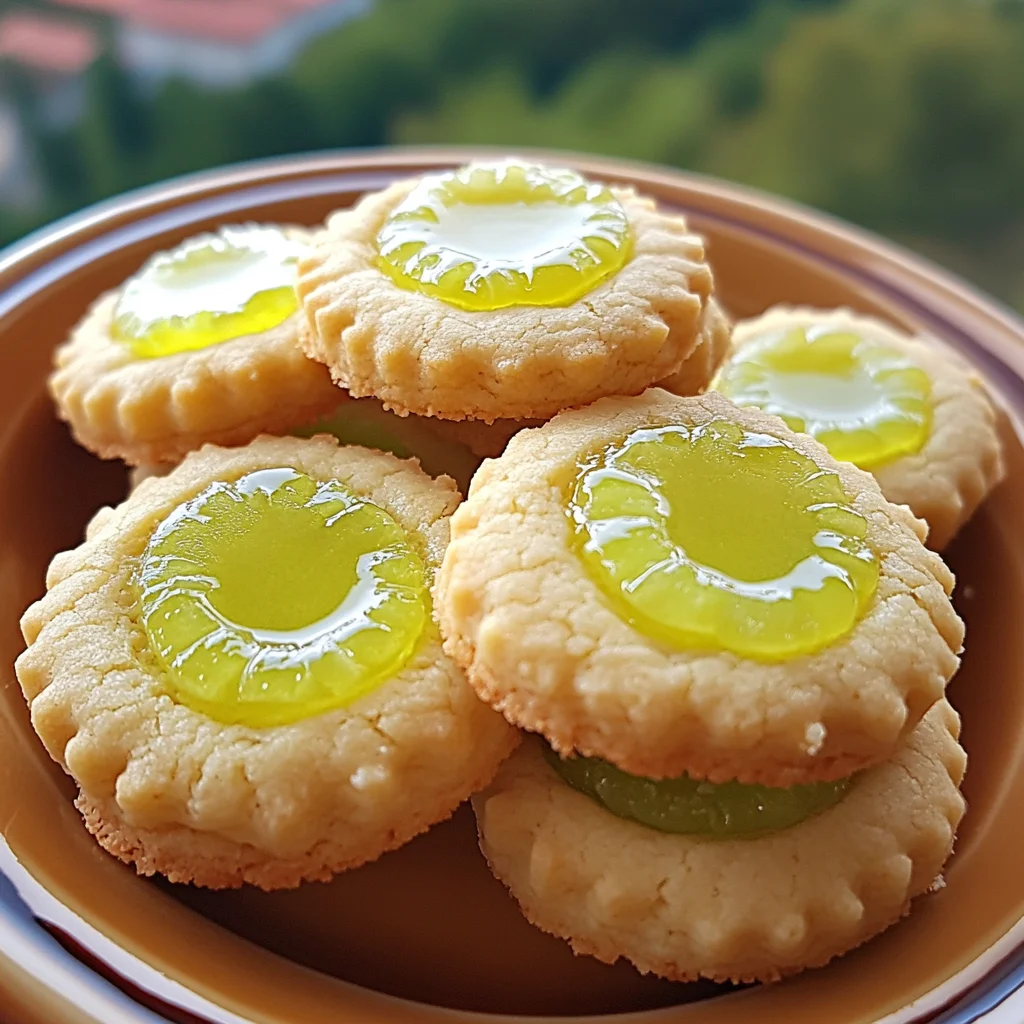
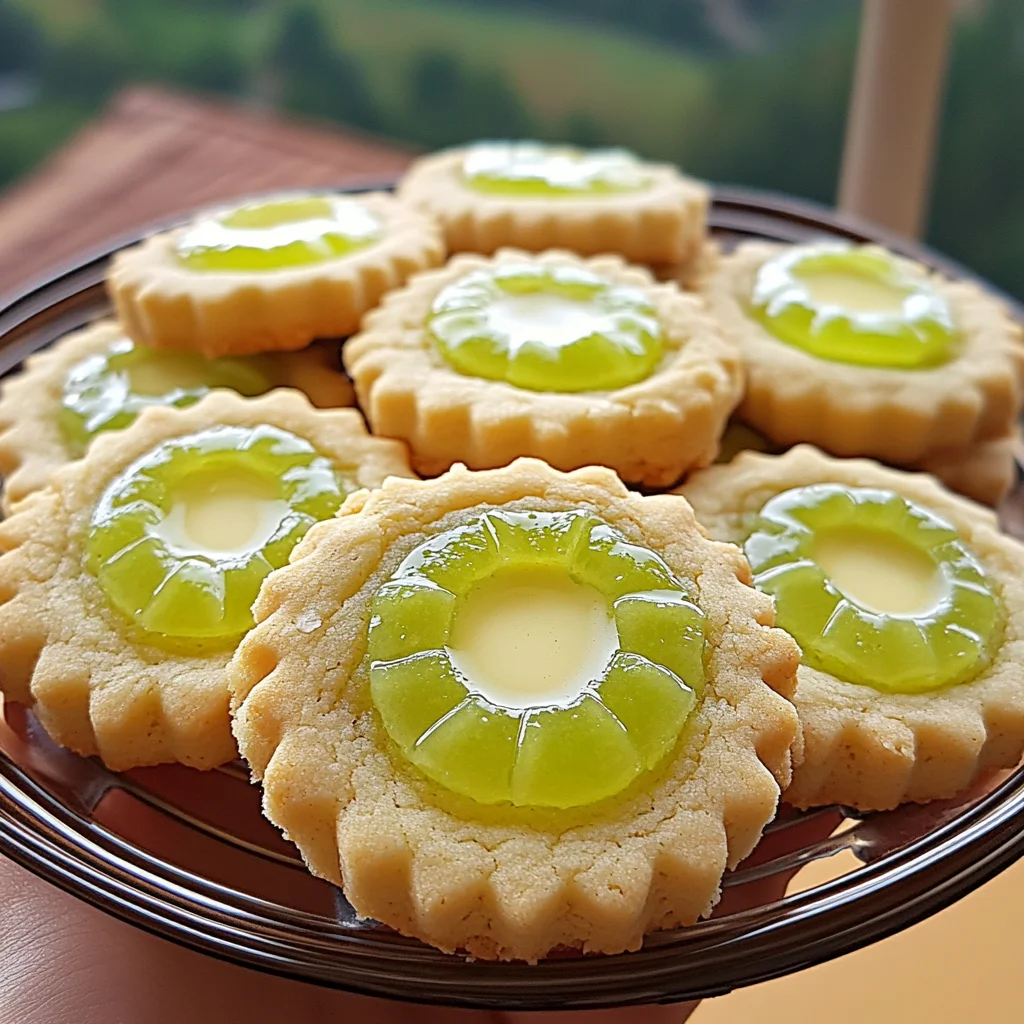
Hey there, baking buddies! Does the thought of sunny Florida beaches and tangy-sweet key lime pie just make you smile? Me too! There’s something so special about that classic dessert. But sometimes, making a whole pie feels like a big undertaking, right? What if I told you you could capture all that zesty, creamy, buttery magic in a tiny, perfect cookie? These Key Lime Pie Cookies are exactly that – little bites of sunshine that are way easier and quicker than baking a pie. They’re totally memorable, and honestly, they disappear fast whenever I make them!
Why You’ll Love This Recipe
- Fast: Skip the lengthy pie steps; these cookies come together surprisingly quickly!
- Easy: No fancy techniques here, just simple cookie making and filling.
- Giftable: Pack these up in a cute box or tin – they make the perfect homemade gift!
- Crowd-pleasing: Seriously, who can resist a mini key lime pie in cookie form? Everyone asks for the recipe!
Ingredients
Gather ’round the counter! Here’s what you’ll need to whip up these little beauties. Good news: it’s mostly pantry staples!
- Unsalted butter: Make sure it’s fridge-cold for the cookie dough – this is key for that tender texture! For the filling, you’ll need it at room temperature, soft and ready to beat.
- All-purpose flour: Just regular ol’ flour works perfectly here.
- Icing sugar (powdered sugar): This sweetens the cookies and gives them a lovely melt-in-your-mouth feel. You’ll also use it for the buttercream filling.
- Limes: You’ll need the zest and some fresh juice. Don’t skimp on the zest – that’s where so much of the limey flavor comes from! Fresh is definitely best here.
- Egg yolk: This helps bind the dough together and adds richness.
- Lime curd: This is the star of the filling! You can make your own or use good quality store-bought. It adds that signature tangy, creamy key lime pie filling taste.
How to Make It
Alright, let’s get baking! Don’t be intimidated; we’ll go step by step. You got this!
- First things first, grab a big bowl for your cookie dough. Add the flour in there. Now, cut your super cold butter into small cubes. Use your fingertips to rub the butter into the flour until it looks like coarse breadcrumbs. Think sandy texture! This helps create that lovely tender biscuit.
- Next, stir in the icing sugar and all that lovely lime zest. Give it a quick mix to distribute the flavors.
- Add the egg yolk and the lime juice. Now, use your hands to gently bring the dough together. Squish and press it just enough until it forms a ball. Be careful not to overwork it – we want tender cookies, not tough ones!
- Divide that dough ball in half. Shape each half into a flat disc, wrap them up in plastic wrap, and pop them in the fridge for at least 30 minutes. This chilling time is important; it makes the dough easier to roll out and helps the cookies hold their shape.
- While the dough is chilling, preheat your oven to 320°F (that’s 160°C Fan). Line two baking sheets with parchment paper.
- Once your dough is nice and chilled, take one disc out. Lightly flour your work surface and your rolling pin. Roll out the dough evenly to about ⅛ inch (that’s 3 mm) thickness. This is a thin cookie, which is part of its charm! Use a 2-inch (5cm) round cutter to cut out as many circles as you can. You’ll need to re-roll the scraps once or twice.
- Now, for the tops! Take half of the discs you just cut out and use a smaller cutter (or even a thimble or bottle cap!) to cut out the centers. These will be the “lids” with the little window for the lime curd.
- Carefully transfer the cut-out cookies (both the full discs and the ones with holes) to your prepared baking sheets.
- Bake for 12-13 minutes. I always rotate the baking sheets halfway through to make sure everything bakes evenly. You’re looking for the edges to be just starting to turn a pale golden color. Don’t overbake them!
- Let the cookies cool completely on the baking sheets. They’ll be delicate when warm, so be patient!
- While the cookies cool, let’s make the filling! In a bowl, beat the room temperature butter and icing sugar together until it’s light and fluffy. This creates a simple, sweet buttercream border.
- Now for the assembly line! Pick up a solid cookie (one without a hole). Spoon or pipe the fluffy buttercream around the outer edge of the cookie. It acts like glue and a little dam for the curd.
- Carefully place a cookie with a hole on top of the buttercream border, pressing ever so lightly.
- Spoon or pipe a small dollop of lime curd into the center hole of each cookie. Don’t overfill, or it’ll spill out!
- If you like, give them a little dusting of extra icing sugar just before you serve them. It looks pretty and adds a touch more sweetness!
Substitutions & Additions
Want to play around a little? Here are some ideas to make these cookies your own:
- Lemon Love: Swap out the lime zest and juice for lemon! You’ll get delicious Lemon Pie Cookies.
- Different Curd: Not a fan of lime? Try these with lemon curd, passion fruit curd, or even a raspberry jam filling for a different vibe.
- Add Coconut: Mix a little shredded coconut into the cookie dough or sprinkle some toasted coconut flakes over the lime curd filling before adding the top cookie. Key lime and coconut are a match made in heaven!
- White Chocolate Drizzle: Once the cookies are assembled, melt some white chocolate and drizzle it over the tops. It’s a beautiful addition!
- Extra Zest: If you REALLY love lime, you can add a tiny pinch of extra lime zest to the buttercream filling too.
Tips for Success
A few little pointers to make sure your Key Lime Pie Cookies turn out perfectly:
- Keep that Butter Cold: For the biscuit dough, seriously, start with cold butter and work quickly with your fingertips. Warm butter makes tough cookies.
- Don’t Overwork the Dough: Mix just until it comes together. The less you handle it, the more tender your cookies will be.
- Chill Time is Non-Negotiable: Don’t skip the chilling step! It makes rolling SO much easier and prevents the cookies from spreading too much in the oven.
- Roll Evenly: Try to roll your dough to a consistent thickness so all your cookies bake at the same rate.
- Cool Completely: I know it’s tempting, but let those cookies cool fully before you try to fill them. They’re delicate, and warm cookies will just make a mess.
- Prep Ahead: You can make the cookie dough up to 2 days in advance and keep it wrapped in the fridge. You can also bake the cookies ahead of time and store them in an airtight container for a few days, then assemble with the filling right before serving.
How to Store It
Once assembled, these cookies are best stored in a single layer in an airtight container in the refrigerator due to the lime curd filling. They should keep well for 3-4 days. If you need to stack them, place a layer of parchment paper between them to prevent sticking.
FAQs
Got questions? Let’s answer a couple common ones:
Q: Can I use bottled lime juice?
A: While you can, fresh lime juice and zest make a huge difference in flavor. I highly recommend using fresh limes for the best results!
Q: Can I make the cookies without the filling?
A: Absolutely! The lime biscuits are delicious on their own, maybe just dusted with icing sugar. They’re like a shortbread with a zesty twist.
Q: Can I freeze these cookies?
A: Yes, you can freeze the UNFILLED baked cookies in an airtight container for up to a month. Thaw at room temperature and then assemble with the fresh filling. I don’t recommend freezing them after they’ve been filled with the curd, as the texture can change.
Easy Homemade Key Lime Pie Cookies
Equipment
- large bowl
- Rolling pin
- 2-inch round cutter
- Small cutter
- Baking sheets
- parchment paper
Ingredients
- Unsalted butter fridge-cold for dough, room temperature for filling
- All-purpose flour
- Icing sugar also called powdered sugar; for cookies and buttercream
- Limes zest and fresh juice
- Egg yolk
- Lime curd homemade or good quality store-bought
Instructions
- Step 1: First things first, grab a big bowl for your cookie dough. Add the flour in there. Now, cut your super cold butter into small cubes. Use your fingertips to rub the butter into the flour until it looks like coarse breadcrumbs. Think sandy texture! This helps create that lovely tender biscuit.
- Step 2: Next, stir in the icing sugar and all that lovely lime zest. Give it a quick mix to distribute the flavors.
- Step 3: Add the egg yolk and the lime juice. Now, use your hands to gently bring the dough together. Squish and press it just enough until it forms a ball. Be careful not to overwork it – we want tender cookies, not tough ones!
- Step 4: Divide that dough ball in half. Shape each half into a flat disc, wrap them up in plastic wrap, and pop them in the fridge for at least 30 minutes. This chilling time is important; it makes the dough easier to roll out and helps the cookies hold their shape.
- Step 5: While the dough is chilling, preheat your oven to 320°F (that's 160°C Fan). Line two baking sheets with parchment paper.
- Step 6: Once your dough is nice and chilled, take one disc out. Lightly flour your work surface and your rolling pin. Roll out the dough evenly to about ⅛ inch (that's 3 mm) thickness. This is a thin cookie, which is part of its charm! Use a 2-inch (5cm) round cutter to cut out as many circles as you can. You'll need to re-roll the scraps once or twice.
- Step 7: Now, for the tops! Take half of the discs you just cut out and use a smaller cutter (or even a thimble or bottle cap!) to cut out the centers. These will be the "lids" with the little window for the lime curd.
- Step 8: Carefully transfer the cut-out cookies (both the full discs and the ones with holes) to your prepared baking sheets.
- Step 9: Bake for 12-13 minutes. I always rotate the baking sheets halfway through to make sure everything bakes evenly. You're looking for the edges to be just starting to turn a pale golden color. Don't overbake them!
- Step 10: Let the cookies cool completely on the baking sheets. They'll be delicate when warm, so be patient!
- Step 11: While the cookies cool, let's make the filling! In a bowl, beat the room temperature butter and icing sugar together until it's light and fluffy. This creates a simple, sweet buttercream border.
- Step 12: Now for the assembly line! Pick up a solid cookie (one without a hole). Spoon or pipe the fluffy buttercream around the outer edge of the cookie. It acts like glue and a little dam for the curd.
- Step 13: Carefully place a cookie with a hole on top of the buttercream border, pressing ever so lightly.
- Step 14: Spoon or pipe a small dollop of lime curd into the center hole of each cookie. Don't overfill, or it'll spill out!
- Step 15: If you like, give them a little dusting of extra icing sugar just before you serve them. It looks pretty and adds a touch more sweetness!
Notes
- Keep that Butter Cold: For the biscuit dough, seriously, start with cold butter and work quickly with your fingertips. Warm butter makes tough cookies.
- Don't Overwork the Dough: Mix just until it comes together. The less you handle it, the more tender your cookies will be.
- Chill Time is Non-Negotiable: Don't skip the chilling step! It makes rolling SO much easier and prevents the cookies from spreading too much in the oven.
- Roll Evenly: Try to roll your dough to a consistent thickness so all your cookies bake at the same rate.
- Cool Completely: I know it's tempting, but let those cookies cool fully before you try to fill them. They're delicate, and warm cookies will just make a mess.
- Prep Ahead: You can make the cookie dough up to 2 days in advance and keep it wrapped in the fridge. You can also bake the cookies ahead of time and store them in an airtight container for a few days, then assemble with the filling right before serving.
- Lemon Love: Swap out the lime zest and juice for lemon! You'll get delicious Lemon Pie Cookies.
- Different Curd: Not a fan of lime? Try these with lemon curd, passion fruit curd, or even a raspberry jam filling for a different vibe.
- Add Coconut: Mix a little shredded coconut into the cookie dough or sprinkle some toasted coconut flakes over the lime curd filling before adding the top cookie. Key lime and coconut are a match made in heaven!
- White Chocolate Drizzle: Once the cookies are assembled, melt some white chocolate and drizzle it over the tops. It's a beautiful addition!
- Extra Zest: If you REALLY love lime, you can add a tiny pinch of extra lime zest to the buttercream filling too.