Remember those long summer days, dreaming of the ocean and all its wonders? There’s something truly magical about the sea, isn’t there? Today, we’re going to capture a little bit of that enchantment and bring it right into your home with a super fun and surprisingly simple craft: a Glow-in-the-Dark Ocean Jar! This project is perfect for a rainy afternoon, a kids’ craft party, or even as a unique gift. It’s quick, easy, and the results are absolutely mesmerizing.
Why You’ll Love Glow-in-the-Dark Ocean Jar
- Fast: You can create this charming jar in under 30 minutes!
- Easy: Perfect for all ages, with minimal steps and readily available materials.
- Giftable: Imagine gifting these to friends or family – they’re so unique!
- Crowd-pleasing: Whether you’re crafting with kids or just want a bit of whimsical decor, everyone loves a glowing ocean in a jar!
Ingredients
Here’s what you’ll need to create your own glowing underwater world:
- 1 clear jar with a tight lid: A mason jar works perfectly, but any clear glass or sturdy plastic container will do. Make sure it seals well to prevent leaks.
- Warm water: This helps the ingredients mix smoothly.
- 1–2 tablespoons clear glue or baby oil: This gives the jar that lovely, swirling, ocean-like effect. Clear school glue is a great, budget-friendly option.
- A few drops blue food coloring or non-toxic glow-in-the-dark paint: To give your ocean its signature blue hue and that magical glow!
- Glow-in-the-dark beads, glitter, or sequins: These are our stars that will really make your ocean shine in the dark.
- Small plastic sea creatures: Think little fish, starfish, or even dolphins!
- Optional: Mini aquarium plants or tiny seashells: For extra detail and a more realistic underwater feel.
- Optional: A few drops of glycerin: This can help the glitter and beads float and swirl more slowly, creating a more mesmerizing effect.
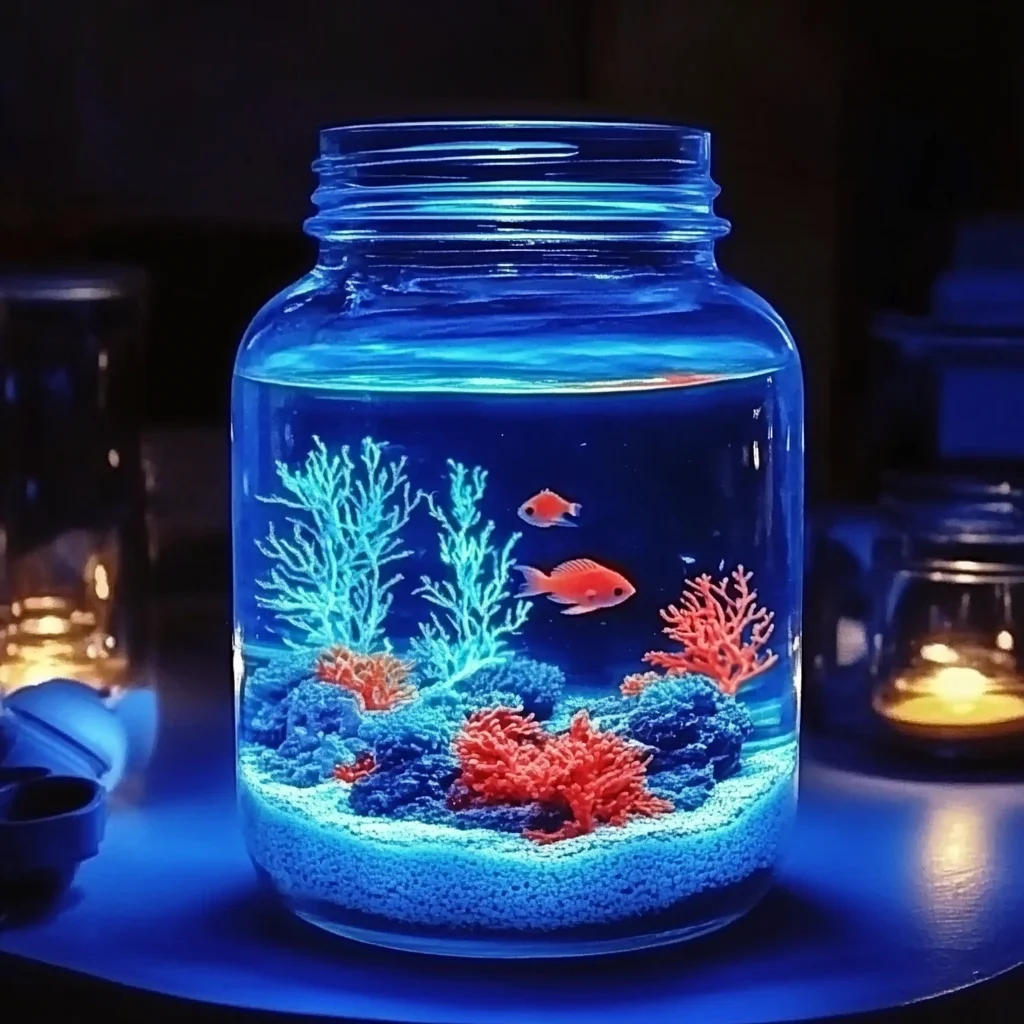
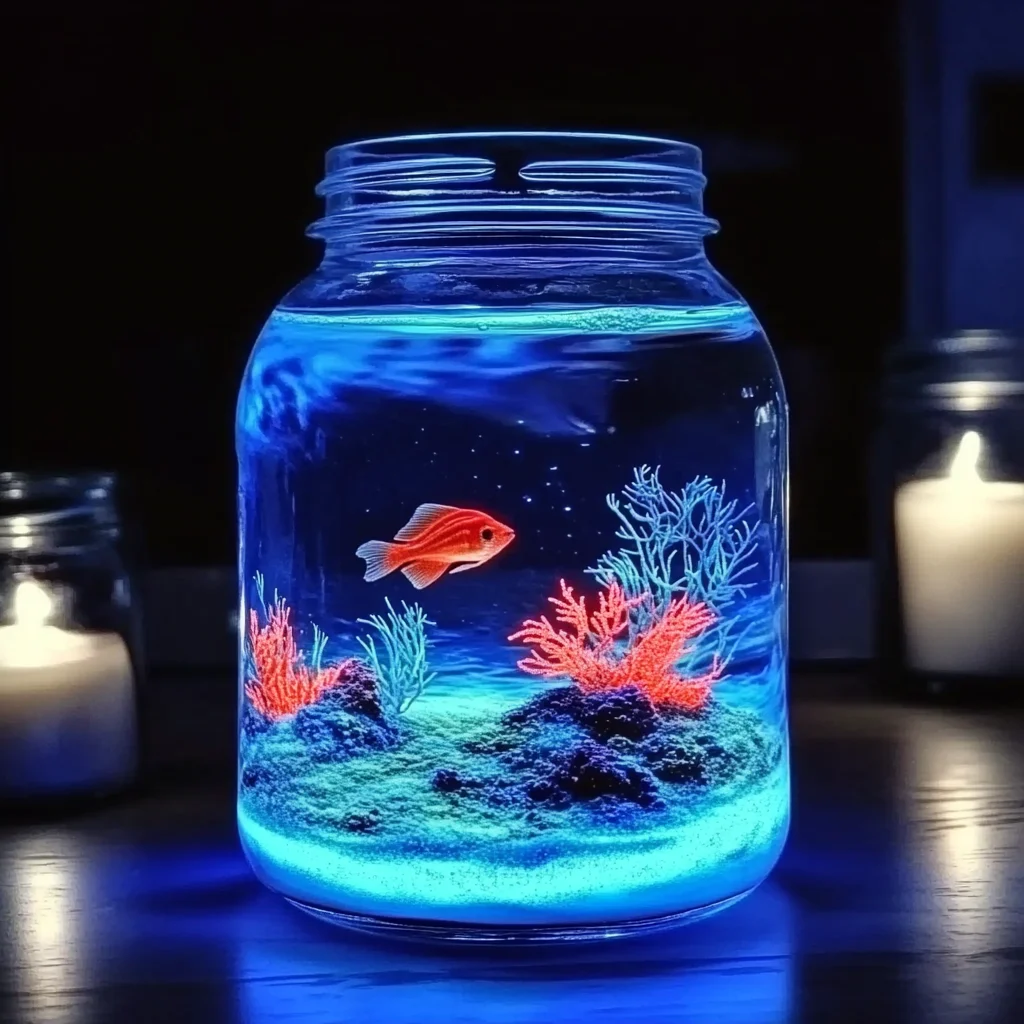
How to Make Glow-in-the-Dark Ocean Jar
Let’s get crafting! It’s as easy as 1-2-3… well, 7!
- Prep your jar: Start by filling your clean, clear jar with warm water. You’ll want to leave about an inch of space at the top so you have room to add your treasures and give it a good shake.
- Add the swirl factor: Stir in 1–2 tablespoons of clear glue or baby oil. This is what gives our ocean its dreamy, wavy look.
- Color and glow: Now for the magic! Add a few drops of blue food coloring or your non-toxic glow-in-the-dark paint. Stir gently until the water has a nice, uniform color. If you’re using paint, be careful not to over-stir and create too many bubbles.
- Populate your ocean: Time to add all the fun stuff! Toss in your glow-in-the-dark beads, glitter, sequins, small plastic sea creatures, and any optional goodies like mini aquarium plants or tiny seashells. Let your creativity flow!
- Seal the deal: Make sure the lid is screwed on TIGHTLY. We don’t want any leaks on our watch!
- Give it a gentle shake: Gently swirl the jar to see all your ocean elements come to life. Watch the creatures and glitter dance in the blue depths!
- Charge up the glow: This is the exciting part! Place your jar under a UV blacklight or in direct sunlight for a few minutes. This “charges” the glow-in-the-dark elements, making them shine brightly when the lights are low.
Once charged, find a dim spot and marvel at your glowing ocean in a jar! It’s like having a little piece of the deep sea right on your shelf. If you’re looking for more enchanting DIY projects, you might enjoy creating your own DIY Ocean in a Jar Craft for a slightly different, but equally captivating, experience.
Substitutions & Additions
Feeling inspired to get a little more creative? Here are some ideas:
- Different Colors: Don’t feel limited to blue! Try green for a kelp forest vibe or even purple for a more mystical ocean.
- Natural Elements: If you have tiny real seashells or smooth sea glass, you can add those too for an extra touch of authenticity.
- Floating Fun: For a truly dynamic effect, try adding a tiny bit of clear soap or a drop of dish soap. It can help create more bubbles and movement.
- Glitter Galore: Layer different sizes and colors of glitter for extra sparkle!
- Scents: A drop or two of a calming essential oil (like lavender or chamomile) could add another sensory element, though be mindful it might affect the glow slightly.
This project is incredibly forgiving, so feel free to experiment! If you enjoy creative crafts, you might also like our guide on how to make DIY Bioplastic Suncatchers for another fun home-decor project.
Tips for Success
A few little pointers to make your Glow-in-the-Dark Ocean Jar even better:
- Glow Power: The brighter the light source you use to charge it, and the longer you leave it, the brighter and longer-lasting the glow will be. A blacklight works wonders!
- Avoid Cloudiness: Don’t over-stir, especially after adding food coloring or paint. Too much agitation can make the water cloudy instead of clear.
- Leak Check: Before gifting or placing it somewhere precious, test the lid by inverting the jar for a few minutes.
- Kid-Friendly Glow: If making this with younger children, ensure all paints and glitters are non-toxic and supervise them closely. For a fun, edible craft, you might want to check out our Kool-Aid Gummy Treats.
- Prep Ahead: You can assemble the jars and have them ready to be charged right before you want to display them or gift them.
How to Store Glow-in-the-Dark Ocean Jar
Your glowing ocean is pretty low maintenance!
- Store your jar in a cool, dry place away from direct sunlight when not in use. This prevents the colors from fading over time.
- To “recharge” the glow, simply expose it to natural or artificial light whenever needed.
- The jar should last for a very long time, as long as the lid remains sealed and it’s not exposed to extreme temperatures.
FAQs
Q: How long does the glow last?
A: The glow duration depends on how long you “charge” it and the quality of the glow-in-the-dark materials used. Typically, it can glow for several minutes to an hour after a good charge, with the intensity gradually fading.
Q: Can I use regular glitter?
A: Yes, you can! However, only the glow-in-the-dark beads, glitter, or paint will actually glow. Regular glitter will still add sparkle but won’t emit light in the dark.
Q: My water looks cloudy. What did I do wrong?
A: This can happen if you use too much glue or stir too vigorously, especially if using paint. Try using less glue or baby oil next time, and stir more gently. Ensure your jar and all additions are clean before starting.
Q: Can I make this a drinking beverage?
A: Absolutely not! This craft is for decoration only and is NOT edible. Please ensure you use appropriate warning labels if gifting to children.
We hope you have a blast creating your very own Glow-in-the-Dark Ocean Jar! It’s a simple yet magical craft that brings a little bit of wonder into your world. For more delightful crafts and recipes, be sure to follow us on Pinterest at https://www.pinterest.com/foodknightcom/. Happy crafting!

DIY Glow-in-the-Dark Ocean Jar
Equipment
- Clear jar with a tight lid
- UV blacklight or direct sunlight (for charging)
Ingredients
- 1 clear jar with a tight lid A mason jar works perfectly, but any clear glass or sturdy plastic container will do. Make sure it seals well to prevent leaks.
- Warm water This helps the ingredients mix smoothly.
- 1-2 tablespoons clear glue or baby oil This gives the jar that lovely, swirling, ocean-like effect. Clear school glue is a great, budget-friendly option.
- A few drops blue food coloring or non-toxic glow-in-the-dark paint To give your ocean its signature blue hue and that magical glow!
- Glow-in-the-dark beads, glitter, or sequins These are our stars that will really make your ocean shine in the dark.
- Small plastic sea creatures Think little fish, starfish, or even dolphins!
- Mini aquarium plants or tiny seashells Optional: For extra detail and a more realistic underwater feel.
- Glycerin Optional: A few drops can help the glitter and beads float and swirl more slowly, creating a more mesmerizing effect.
Instructions
- Step 1: Prep your jar: Start by filling your clean, clear jar with warm water. You’ll want to leave about an inch of space at the top so you have room to add your treasures and give it a good shake.
- Step 2: Add the swirl factor: Stir in 1–2 tablespoons of clear glue or baby oil. This is what gives our ocean its dreamy, wavy look.
- Step 3: Color and glow: Now for the magic! Add a few drops of blue food coloring or your non-toxic glow-in-the-dark paint. Stir gently until the water has a nice, uniform color. If you’re using paint, be careful not to over-stir and create too many bubbles.
- Step 4: Populate your ocean: Time to add all the fun stuff! Toss in your glow-in-the-dark beads, glitter, sequins, small plastic sea creatures, and any optional goodies like mini aquarium plants or tiny seashells. Let your creativity flow!
- Step 5: Seal the deal: Make sure the lid is screwed on TIGHTLY. We don’t want any leaks on our watch!
- Step 6: Give it a gentle shake: Gently swirl the jar to see all your ocean elements come to life. Watch the creatures and glitter dance in the blue depths!
- Step 7: Charge up the glow: This is the exciting part! Place your jar under a UV blacklight or in direct sunlight for a few minutes. This “charges” the glow-in-the-dark elements, making them shine brightly when the lights are low.