Hey there, friend! You know those nights when you’re craving something warm, comforting, and utterly delicious, but you barely have the energy to boil water? Yep, we’ve all been there. That’s exactly why I first whipped up these Cheesy Garlic Chicken Wraps. They’re like a warm hug in a tortilla, packed with flavor, and shockingly easy to pull together. They remind me of grabbing a quick, satisfying bite, but made right in my own cozy kitchen. Trust me, once you try these, they’ll be on repeat in your meal rotation!
Why You’ll Love This Recipe
- Fast: Seriously, if you’ve got cooked chicken ready, you can be eating these in under 15-20 minutes. Perfect for those crazy busy evenings!
- Easy: It’s mostly mixing, rolling, and a quick pan-fry. No complicated techniques or fancy equipment needed. You got this!
- Giftable (Okay, maybe not ‘giftable’ like cookies, but crowd-pleasing!): Need a quick lunch for the family or a snack for game day? These disappear FAST.
- Crowd-pleasing: Who doesn’t love cheesy garlic and chicken all wrapped up in a crispy tortilla? It’s comfort food magic!
Ingredients
Gather ’round, here’s what you’ll need to make this magic happen. Most of these might already be hanging out in your pantry and fridge!
- 2 cups cooked shredded or chopped chicken: This is your shortcut hero! Leftover roast chicken, rotisserie chicken from the store, or even chicken you quickly boiled or baked works great.
- 1 tbsp olive oil: Just a little drizzle to help those spices blend. Any neutral oil is fine.
- 1 tsp garlic powder: Gives that lovely, even garlic flavor throughout the filling.
- ½ tsp onion powder: Onion’s best friend, adds another layer of savory goodness.
- Salt to taste: Start with a pinch and add more if needed after you mix.
- Black pepper to taste: Freshly ground is always lovely if you have it!
- 1½ cups shredded mozzarella cheese: The ultimate melty cheese champion.
- ½ cup shredded cheddar cheese: Adds a little sharp flavor kick. You can use mild or sharp depending on your preference.
- ¼ cup cream cheese, softened: This is key for that extra creamy, dreamy filling! Make sure it’s softened so it mixes easily.
- 2 tbsp mayonnaise or sour cream: Either works beautifully to bind everything together and add moisture. Use what you have!
- 2 tbsp chopped fresh parsley (or 1 tsp dried): Adds a pop of freshness and color. Fresh is best, but dried works in a pinch.
- 4 large flour tortillas: Choose the soft, pliable kind that are easy to roll without cracking. Burrito-sized works well.
- 2 tbsp melted butter: For brushing the outside and getting that gorgeous golden crust!
- 1 tsp minced garlic (for brushing): Mixed with the butter, this creates the most amazing garlicky aroma as they cook. Freshly minced is perfect.
- Optional: baby spinach, lettuce, or sliced tomatoes: Want to sneak in some greens or freshness? Now’s your chance!
How to Make It
Alright, let’s get cooking! It’s super simple, promise.
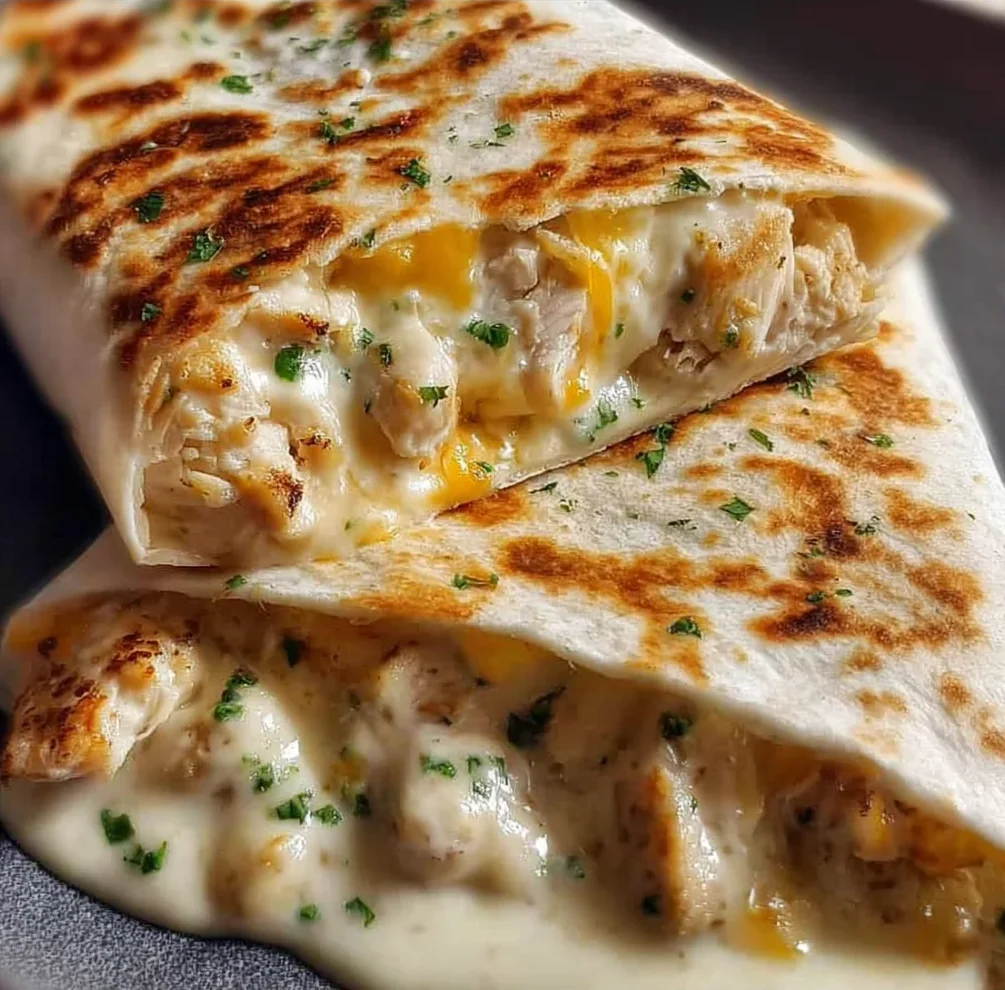
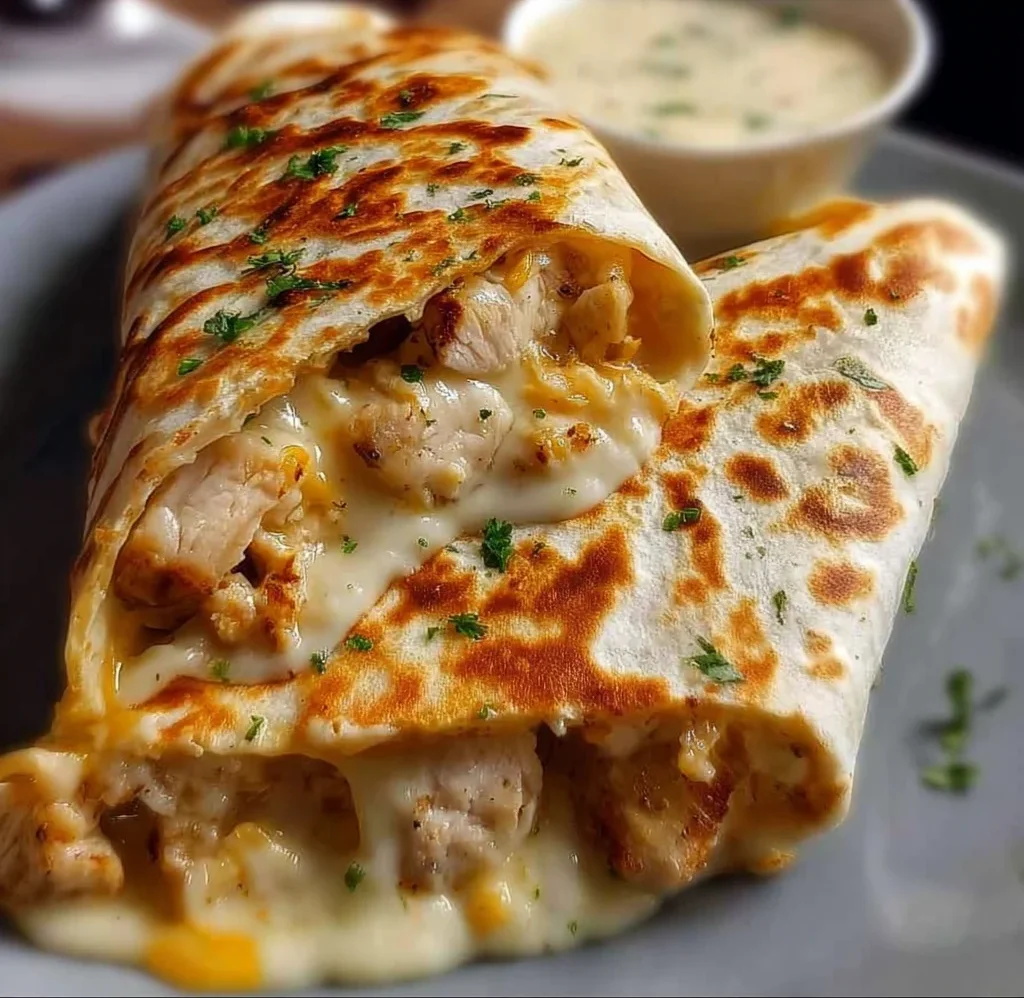
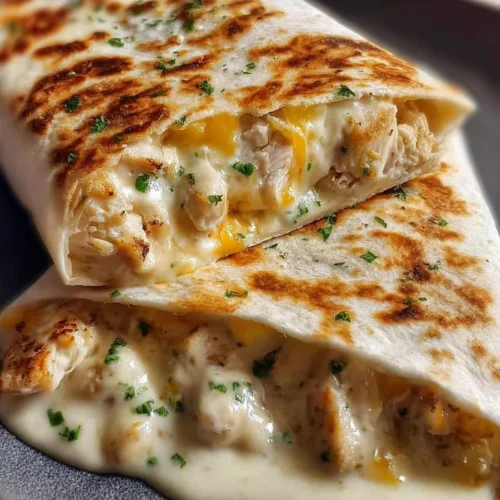
Grab a big bowl, because we’re mixing all the goodness together first. Toss in your cooked chicken, olive oil, garlic powder, onion powder, salt, pepper, mozzarella, cheddar, softened cream cheese, your choice of mayonnaise or sour cream, and the chopped parsley. Now, get in there with a spoon or spatula and mix everything up really well until it’s all combined and the chicken is coated in that lovely, cheesy, creamy mixture. Give it a little taste here to see if you need a tiny bit more salt or pepper – trust your instincts!
Lay your tortillas out flat. Divide the cheesy chicken filling evenly among the four tortillas, spooning it down the center of each one. Try not to overfill them, or they’ll be tricky to roll! If you’re adding any optional veggies like spinach or tomatoes, layer them over the chicken filling now.
Now, let’s roll ’em up! Fold the sides of the tortilla in first, over the filling, like you’re wrapping a present. Then, starting from the end closest to you, roll the tortilla up tightly away from you. Tucking in those sides helps keep all that yummy filling inside while they cook.
In a small separate bowl, whisk together your melted butter and the minced garlic. This is where the magic really happens! Use a pastry brush to generously brush this garlic butter mixture all over the outside of each rolled-up wrap. Don’t be shy – this creates the most delicious, crispy, flavorful crust.
Heat a non-stick skillet or griddle over medium heat. You don’t typically need extra oil here because of the butter you brushed on. Once the pan is warm, carefully place the wraps in the skillet seam-side down first. This helps seal the seam shut as it cooks. Cook for about 2-3 minutes per side, or until each side is golden brown and crispy and you see some cheese starting to get melty and maybe even peek out a little. You’ll get the hang of the timing based on your pan and heat.
Once they’re beautifully golden and heated through, remove them from the skillet. Let them sit for just a minute before slicing (if you want!) and serving. Be careful, the filling will be hot and gooey!
Substitutions & Additions
This recipe is super flexible! Feel free to get creative.
- Different Protein: Cooked ground chicken, turkey, or even leftover cooked shrimp could work! Pulled pork is also delicious.
- Cheese Please: Swap cheddar for Monterey Jack, provolone, or a Mexican blend. Add a sprinkle of Parmesan to the butter brush!
- Spice It Up: Add a pinch of cayenne pepper or red pepper flakes to the chicken mixture for a little heat.
- Herb Power: No parsley? Try chives, cilantro (if you like it!), or even a little dried Italian seasoning in the filling.
- Veggies Galore: Sautéed mushrooms, bell peppers, onions, or corn would be tasty additions to the filling.
- Sauce Swaps: Instead of mayo/sour cream, a tablespoon of pesto or even a drizzle of buffalo sauce could totally change the flavor profile!
- Dipping Fun: Serve these with ranch dressing, marinara sauce, extra sour cream, or hot sauce for dipping!
Tips for Success
A few little pointers to make sure your wraps turn out perfect every time!
- Don’t Overfill: It’s tempting, but too much filling makes them hard to roll and prone to bursting. Stick to the recommended amount.
- Roll Tightly: A snug roll ensures the filling stays put and gives you a nice, compact wrap. Folding in the sides before rolling is key!
- Medium Heat is Your Friend: Too high heat will burn the tortillas before the inside is heated through. Medium allows them to crisp up beautifully while the cheese gets gooey inside.
- Don’t Crowd the Pan: Cook only as many wraps as comfortably fit in a single layer without touching. This ensures they brown nicely instead of steaming.
- Prep Ahead: You can mix the chicken filling up to a day in advance and keep it covered in the fridge. Roll and cook just before serving for the best texture!
How to Store It
Got leftovers? Lucky you!
Let the wraps cool completely. Wrap each individual wrap tightly in plastic wrap or foil, or store them in an airtight container in the refrigerator for up to 3-4 days. For best results when reheating, pop them back in a skillet over medium heat for a few minutes per side, or use an air fryer until they’re hot and crispy again. Microwaving works too, but you’ll lose that crispy texture.
FAQs
Can I use raw chicken?
No, the chicken needs to be fully cooked before you mix it into the filling, as the wraps only cook for a short time on the skillet. This recipe is perfect for using up pre-cooked or leftover chicken!
Can I bake these instead of pan-frying?
Yes! Preheat your oven to 400°F (200°C). Place the brushed wraps on a baking sheet and bake for 15-20 minutes, flipping halfway through, until golden brown and heated through. They might not get quite as crispy as pan-frying, but it’s a great option if you’re making a bigger batch!
Can I freeze these?
You can freeze the uncooked, rolled, and brushed wraps! Wrap each one tightly in plastic wrap, then again in foil or place in a freezer bag. They can be frozen for up to 2-3 months. To cook from frozen, you can often bake them at 400°F (200°C) for a bit longer (maybe 25-35 minutes), or thaw them in the fridge first and then pan-fry as directed.
Easy Cheesy Garlic Chicken Wraps
Equipment
- Big Bowl
- spoon or spatula
- Small bowl
- whisk
- Pastry Brush
- Non-stick Skillet or Griddle
Ingredients
- 2 cups cooked shredded or chopped chicken
- 1 tbsp olive oil
- 1 tsp garlic powder
- ½ tsp onion powder
- salt to taste
- black pepper to taste
- 1½ cups shredded mozzarella cheese
- ½ cup shredded cheddar cheese
- ¼ cup cream cheese softened
- 2 tbsp mayonnaise or sour cream
- 2 tbsp fresh parsley chopped (or 1 tsp dried)
- 4 large flour tortillas
- 2 tbsp melted butter for brushing
- 1 tsp minced garlic for brushing
- baby spinach, lettuce, or sliced tomatoes optional
Instructions
- Step 1: In a big bowl, combine the cooked chicken, olive oil, garlic powder, onion powder, salt, pepper, mozzarella, cheddar, softened cream cheese, mayonnaise or sour cream, and chopped parsley. Mix well until everything is thoroughly combined and the chicken is coated in the cheesy, creamy mixture. Taste and adjust seasoning if needed.
- Step 2: Lay the four tortillas out flat. Divide the cheesy chicken filling evenly among the tortillas, spooning it down the center of each. If adding optional veggies, layer them over the chicken filling now.
- Step 3: To roll the wraps, first fold the sides of the tortilla in over the filling. Then, starting from the end closest to you, tightly roll the tortilla up away from you.
- Step 4: In a small separate bowl, whisk together the melted butter and minced garlic. Use a pastry brush to generously brush this garlic butter mixture all over the outside of each rolled wrap.
- Step 5: Heat a non-stick skillet or griddle over medium heat. Carefully place the wraps in the skillet seam-side down first. Cook for about 2-3 minutes per side, or until each side is golden brown and crispy and the cheese is melty. Cook in batches if necessary to avoid crowding the pan.
- Step 6: Remove the wraps from the skillet and let them sit for a minute before slicing (if desired) and serving. The filling will be hot!