
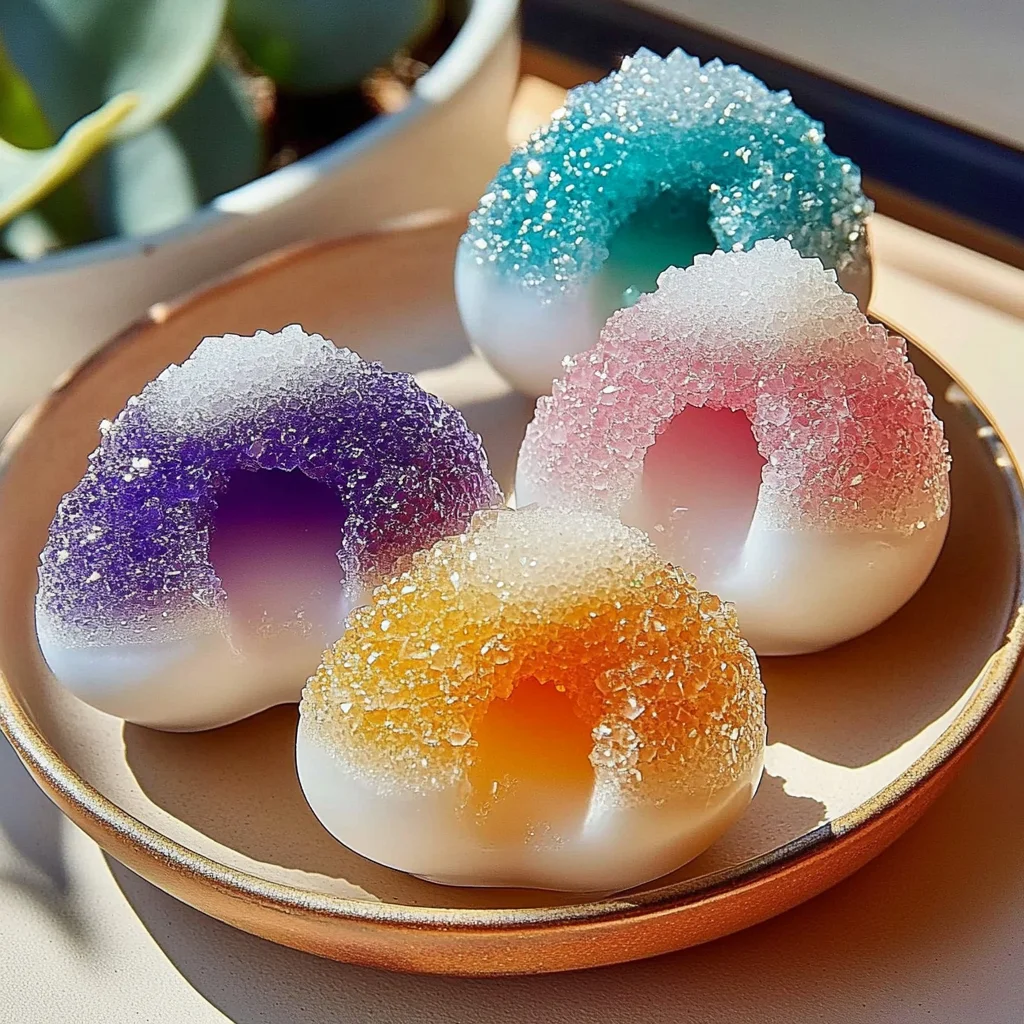
Imagine sitting in a cozy corner of your home, surrounded by the warm glow of creativity. You’ve gathered together with friends or family, and the air is filled with excitement as you embark on a delightful DIY adventure. Today, we’re diving into the enchanting world of Sugar & Glue Crystals, a project that not only sparks joy but also leads to beautiful, shimmering geodes that will brighten up any space. As you mix, stir, and watch the magic unfold, you’ll find a sense of accomplishment that comes from crafting something with your own hands.
Why You’ll Love Sugar & Glue Crystals / Geodes
- Beginner-friendly: Perfect for crafters of all skill levels.
- Budget-friendly: Simple ingredients that won’t break the bank.
- Creative and fun: Let your imagination run wild with colors and shapes.
- Great for kids and families: A wonderful bonding experience for all ages.
- Perfect for gifts or decorations: Beautiful pieces to share or showcase.
- Customizable: Endless possibilities for personalization.
The Heart Behind This DIY
Creating Sugar & Glue Crystals is about more than just the end product; it’s a delightful journey that nurtures your creativity. Crafting fosters mindfulness, allowing you to focus on the task at hand, and encourages self-expression. As you immerse yourself in the process, you may find that your worries drift away, replaced by a sense of calm and joy. Plus, the excitement of watching the crystals form—each one unique and beautiful—brings a sense of wonder that’s hard to beat. This project is perfect for connecting with loved ones, sharing laughter, and creating lasting memories together.
A Gentle Look at the Process
As you prepare to embark on this crafting adventure, picture the vibrant colors swirling together in your mixture, the sound of gentle stirring, and the anticipation building as the crystals begin to form. You’ll start by creating a sweet syrup, then blend it with glue, pouring it into a dish where the transformation will happen. It’s a wonderfully tactile experience, where you can feel the textures of the ingredients, see the mixtures come to life, and witness the magic of crystallization over the days to come.
Materials You’ll Need
- 1 cup sugar: The main ingredient that will form our beautiful crystals.
- 1/2 cup water: To help dissolve the sugar and create the syrup.
- 1/4 cup white school glue: This holds everything together and helps the crystals form.
- Food coloring (optional): To add a splash of color to your geodes.
- A shallow dish or bowl: This will be your crystal-making canvas.
- A stick or toothpick: Perfect for creating fun shapes in your mixture.
Step-by-Step Directions
Step 1
In a saucepan, combine the sugar and water. Heat over medium heat, stirring continuously until the sugar is fully dissolved. You’ll notice the mixture becoming clear and syrupy—this is where the magic begins!
Step 2
Remove the mixture from heat and allow it to cool slightly. If you want to add a bit of pizzazz, now is the time to drop in a few drops of food coloring. Stir well until the color is evenly mixed, making your syrup as vibrant as you desire.
Step 3
In a separate bowl, mix the white school glue with an equal amount of water (1/4 cup glue to 1/4 cup water) to create a diluted glue solution. This will help the crystals adhere and form beautifully.
Step 4
Combine the sugar syrup with the diluted glue solution and stir well. The textures will blend, creating a thick, gooey mixture that’s both fun to handle and mesmerizing to watch.
Step 5
Pour the mixture into a shallow dish or bowl, allowing it to settle evenly. This will become your geode base, so make sure it’s spread out nicely.
Step 6
Using a stick or toothpick, create shapes or designs in the mixture if desired. This is a fun way to express your creativity—let your imagination run wild!
Step 7
Allow the mixture to sit undisturbed at room temperature for several days until crystals form. You’ll want to peek at it occasionally, but remember to be patient—the magic happens slowly!
Step 8
Once the crystals have formed, carefully remove them from the dish and let them dry completely. You’ll be amazed at the stunning, sparkling creations you’ve made!
Step 9
Your sugar and glue crystals/geodes are now ready to be displayed! Set them somewhere special where they can catch the light and shine.
Creative Ways to Use Sugar & Glue Crystals / Geodes
Now that you have these beautiful crystals, how can you enjoy them? Here are some creative ideas:
- Display them on a sunny windowsill to catch the light and create a dazzling effect.
- Use them as unique decorations for parties or special occasions.
- Gift them to friends or family as a thoughtful handmade present.
- Incorporate them into art projects or as part of a centerpiece.
- Let kids use them in their imaginative play—these crystals can become anything from treasure to magical gems!
How to Store, Preserve, or Reuse Sugar & Glue Crystals / Geodes
To keep your sugar and glue crystals looking great, store them in a cool, dry place. Avoid moisture, as it can cause the crystals to dissolve. If you want to reuse them, simply dissolve them back into a mixture of sugar and water, and start the process again!
Creative Variations and Customizations
- Color variations: Experiment with different food coloring to create vibrant or pastel geodes.
- Theme ideas: Tailor your crystals to match seasonal themes—think pastel colors for spring or warm tones for autumn.
- Seasonal adaptations: Add glitter or metallic paint for a festive touch during holidays.
- Kid-friendly modifications: Let children choose their favorite colors and designs for a personal touch.
- Advanced creative upgrades: Experiment with adding glitter or using different types of glue for unique textures.
Tips for Success
- Common mistakes to avoid: Ensure the sugar is fully dissolved before combining it with the glue solution.
- Safety tips: If children are involved, supervise them closely, especially when using heat.
- Preparation suggestions: Gather all materials before starting to ensure a smooth crafting experience.
- Cleanup recommendations: Clean spills immediately, as sugar can become sticky once dry.
- Expert crafting tips: Don’t rush the drying process; patience is key for beautiful crystal formation.
FAQs About Sugar & Glue Crystals / Geodes
Can beginners make this?
Absolutely! This project is perfect for beginners and requires only a few simple ingredients.
Can children participate?
Yes! With adult supervision, kids can enjoy this fun and creative project.
How long does it last?
When stored properly, your crystals can last for a long time. Just keep them dry and cool!
Can I customize it?
Definitely! Feel free to experiment with colors, shapes, and sizes to make your crystals uniquely yours.
A Final Creative Note
As you wrap up your Sugar & Glue Crystals project, take a moment to celebrate your creativity and the joy of making something special. Remember, every craft is an opportunity to express yourself and connect with those around you. So, gather your loved ones, embrace the process, and let your imagination soar! For more delicious recipes, check out the delightful Blueberry Lemon Ricotta Pancakes or the mouthwatering Grilled Chicken Bites for treats you will love!
For more DIY inspiration, follow our Pinterest account!
Sugar & Glue Crystals / Geodes
Equipment
- saucepan
- Stirring spoon
- Clean Glass Jars or Containers
- Wooden Skewers or Food-Safe String
- Clips
Ingredients
For the Sugar Crystals
- 2 cups granulated sugar
- 1 cup water
- 1 tbsp corn syrup
- food coloring optional
- edible glitter optional for decoration
Instructions
- Step 1: Combine 2 cups of granulated sugar, 1 cup of water, and 1 tablespoon of corn syrup in a saucepan. Stir until evenly combined.
- Step 2: Place the saucepan over medium heat and stir until the sugar has completely dissolved and the solution becomes clear. Avoid unnecessary overheating.
- Step 3: Remove from the heat and add a few drops of food coloring if desired. Stir gently until evenly distributed.
- Step 4: Allow the hot solution to cool for approximately 10 minutes. Keep children away from the hot sugar solution during this stage.
- Step 5: Carefully pour the cooled sugar solution into clean food-safe glass jars or containers, filling each approximately two-thirds full.
- Step 6: Insert a wooden skewer or food-safe string into each container. Use a clip or suitable support to keep the skewer suspended without touching the bottom or sides.
- Step 7: Loosely cover each container with a clean paper towel or cloth and place it in an undisturbed location where it can remain stable while moisture evaporates.
- Step 8: Observe the crystals as they gradually form along the skewer, string, and sides of the container over several days to several weeks.
- Step 9: Once the crystals reach the desired size, carefully remove them from the container and allow them to drain and dry completely. Add edible glitter after drying if desired.
