Hey there, friend! Remember those days when you’d walk into a room and just feel… calm? Maybe it was the smell of fresh cookies baking, or perhaps a gentle floral scent wafting through the air. Creating a lovely atmosphere in your home shouldn’t feel like a chore, and it definitely doesn’t need to involve complicated gadgets or expensive store-bought things. What if I told you that with just a few simple pantry staples, you could whip up your own little scent boosters that are not only easy and quick but also totally customizable? Get ready to fall in love with these DIY Aroma Stones – your new secret weapon for a fresh, inviting space! They’re seriously simple, perfect for gifting, and they make your house smell absolutely divine.
Why You’ll Love DIY Aroma Stones
- Fast: Seriously, mixing them up takes minutes.
- Easy: No special skills needed, just simple stirring and shaping! It’s as easy as making homemade worry stones.
- Giftable: Tie them up with a ribbon and they make the sweetest little handmade present.
- Crowd-pleasing: Who doesn’t love a nice-smelling home?
Ingredients
Gathering your ingredients for these little wonders is super straightforward. You likely have most of this stuff hanging out in your kitchen already!
- 2 cups baking soda: This is the star of our show, providing the structure for the stones. Plus, baking soda is a natural odor absorber!
- 1 cup cornstarch: Our trusty binding agent that helps everything hold together nicely.
- 1 1/4 cups water: Just plain old water to bring it all into a lovely, workable paste.
- Food coloring: Totally optional, but adding a few drops lets you match the stones to your decor or make them fun colors! Think soft pastels or vibrant hues.
- Essential oils of your choice: Ah, the magic makers! This is where you get to personalize the scent. Lavender for relaxation, citrus for energy, peppermint for focus… the possibilities are endless!
How to Make DIY Aroma Stones
Alright, let’s get our hands a little dirty (in the best way!). Making these aroma stones is truly a breeze.
1. Mix the Dry Stuff: Grab a nice big mixing bowl. Toss in your 2 cups of baking soda and 1 cup of cornstarch. Give them a good whisk until they’re completely combined. You want them friends before the wet ingredients show up!
2. Add the Water: Now, slowly, and I mean gradually, pour in the 1 1/4 cups of water while you keep stirring. Keep at it! It will start to look like a thick paste, kind of like wet sand you’d use to build a sandcastle. You’re looking for a consistency that’s moldable but not too sticky.
3. Color Your World (Optional): If you’re using food coloring and want multiple colors, divide your mixture into separate bowls now. Add a few drops of food coloring to each portion. Start with just a couple of drops – you can always add more! Stir, stir, stir until the color is nice and even throughout the paste.
4. Scent It Up: This is my favorite part! Add about 10-15 drops of your chosen essential oils to the mixture. Give it another really good stir to make sure that wonderful scent is spread all through the dough. You can always add a couple more drops later if you want a stronger smell, but start here.
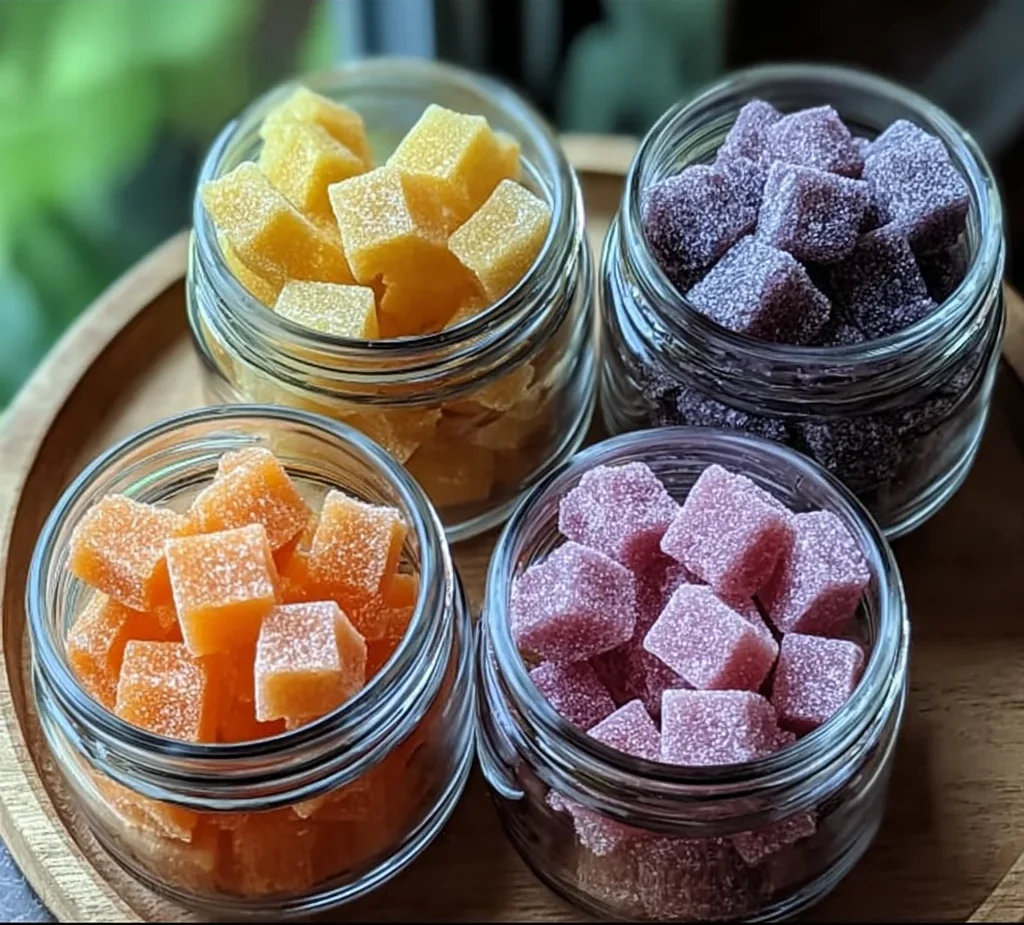
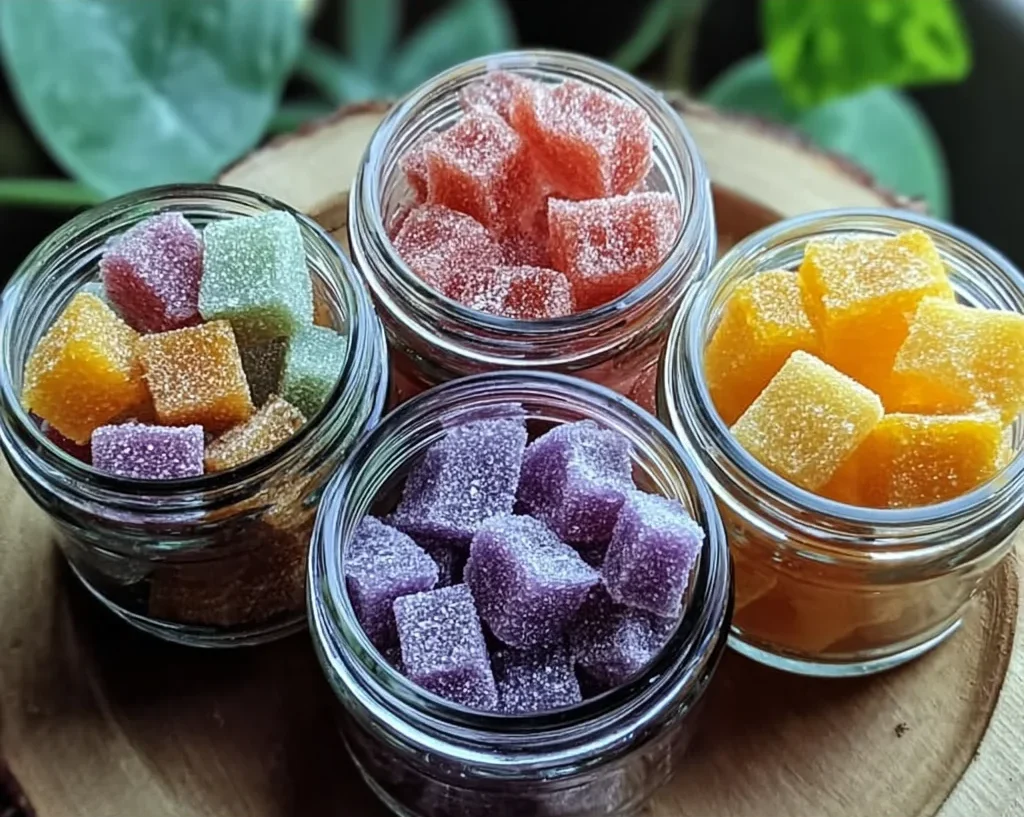
5. Shape Your Stones: Now for the fun part – shaping! You can just take small portions of the dough in your hands and roll them into rustic, natural-looking stone shapes. Or, if you want something more uniform or fun, press the mixture into silicone molds (like ice cube trays, candy molds, or even muffin tins!). Fill them up and smooth the tops.
6. Let Them Dry: Carefully place your formed stones or molds onto wax paper or a wire drying rack. Find a spot where they won’t be disturbed. They need air circulation to dry properly.
7. Patience, Patience: This is the hardest step – waiting! Allow your aroma stones to dry completely. This usually takes 24-48 hours, but it really depends on how big you made them and how humid it is where you live. They should feel hard and solid all the way through. If they still feel cool or slightly damp in the center, give them more time.
8. Place and Enjoy: Once they are totally hardened, your beautiful, scented stones are ready to go! Place them in small dishes, bowls, or directly on surfaces in closets, drawers, bathrooms, or any room you want to freshen up. Enjoy the gentle aroma they release!
Substitutions & Additions
This basic recipe is wonderfully forgiving and super easy to customize!
- Natural Colorants: Instead of food coloring, you could try a pinch of turmeric (for yellow), paprika (for orange/reddish), or even a tiny bit of spirulina powder (for green), though these might affect the scent subtly.
- Spice it Up: Add a tiny pinch of ground cinnamon, nutmeg, or clove with your dry ingredients for a warm, spicy base scent, especially lovely with orange or vanilla essential oils.
- Add Some Sparkle: A little bit of fine glitter added with the food coloring can make them extra pretty, perfect for making beautiful suncatchers or gifts!
- Texture: You could try adding a tiny bit of fine sand for a more stone-like texture, but experiment in a small batch first to make sure it doesn’t affect the binding.
Tips for Success
- Consistency is Key: The “wet sand” consistency in step 2 is important. If it feels too dry and crumbly, add water very slowly, just a tablespoon at a time. If it’s too wet and sticky, add a little more baking soda and cornstarch (about a tablespoon each) and mix well until you get the right texture.
- Drying Time Varies: Don’t rush the drying! If they aren’t completely dry, they can crumble or even mold. Make sure they are hard all the way through.
- Molds: If using silicone molds, they should pop out pretty easily once dry. For harder molds, you might need to gently loosen the edges.
- Refreshing the Scent: Over time, the scent will fade. Just add a few more drops of essential oil directly onto the stone to refresh it!
How to Store DIY Aroma Stones
Once fully dry, your aroma stones can be placed out immediately. If you’ve made a big batch and want to store some for later or for gifting, keep them in an airtight container or jar away from direct sunlight and moisture. They don’t really “go bad,” but the scent will fade over time. You can easily refresh them as needed!
FAQs
Got questions? I’ve got answers!
Q: Can I use plaster of Paris instead of baking soda and cornstarch?
A: While plaster can be used for similar projects, this recipe specifically uses baking soda and cornstarch, which are non-toxic and easily found in the kitchen, keeping it simple and food-safe (though you won’t be eating these!). Stick to the recipe for best results with this method.
Q: Are these safe to use around pets or kids?
A: The ingredients themselves are generally safe, but essential oils can be harmful if ingested, especially by pets. Place the aroma stones in locations where curious hands or paws can’t reach them. Always use essential oils safely and do your research regarding specific oils and their safety around children and pets.
Q: Why did my stones crack while drying?
A: Cracking can sometimes happen if the mixture was a bit too wet or if they dried too quickly in a very warm or drafty spot. Try to let them dry slowly at room temperature. A slightly wetter mix might also need a bit longer to dry properly.
Q: How long does the scent last?
A: The strength and duration of the scent depend on the quality and type of essential oil used and the environment they are in. Generally, you’ll notice the scent for a week or two, but you can easily refresh them by adding more drops of oil whenever you like!
I hope you have as much fun making these DIY Aroma Stones as I do! They are a simple pleasure that brings a little bit of calm and freshness into your everyday. Happy crafting!
For more easy recipes and DIY fun, be sure to follow us on Pinterest!