Does the thought of baking bring back warm memories of cozy kitchens and the sweet aroma of something delicious baking? I know it does for me! There’s something so special about creating treats that are not only delicious but also bring a smile to everyone’s face. Today, we’re diving into a recipe that’s as fun to make as it is to eat – Witches’ Hats! These little delights are so simple, they’re perfect for when you need a quick sweet fix or a charming addition to any gathering. Get ready to add a little magic to your kitchen!
Why You’ll Love Witches’ Hats
- Fast: Seriously, these come together in a flash!
- Easy: No fancy techniques or complicated steps here.
- Giftable: Package them up for a sweet surprise for friends and family.
- Crowd-pleasing: Who can resist a cute and tasty treat?
Ingredients
Gathering your ingredients is half the fun, and for Witches’ Hats, it couldn’t be easier. Here’s what you’ll need:
- 2 (16 ounce) packages fudge stripe cookies: These cookies are the base of our hats, providing a fantastic chocolatey flavor and that iconic stripe.
- ¼ cup honey, or as needed: This is our magic glue! It’s just enough to hold everything together perfectly.
- 1 (9 ounce) bag milk chocolate candy kisses, unwrapped: These are the pointed tops of our witches’ hats. Make sure they’re unwrapped and ready to go!
- 1 (4.5 ounce) tube decorating gel: This is for adding that adorable little bow. You can pick your favorite color to make them extra special!
How to Make Witches’ Hats
Alright, let’s get down to making these adorable Witches’ Hats. It’s so straightforward, you might want to get the kids involved!
-
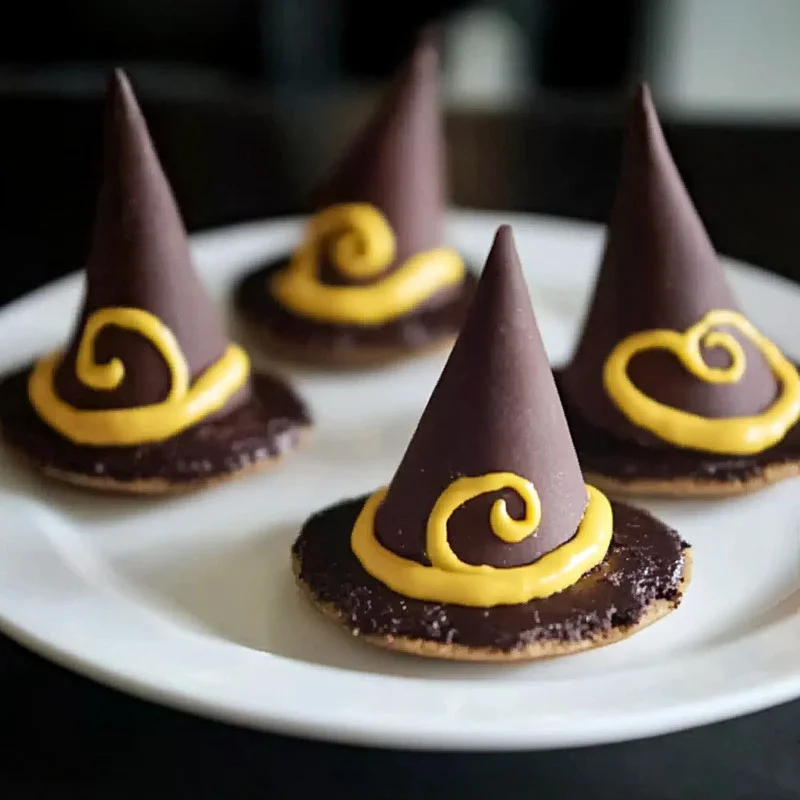
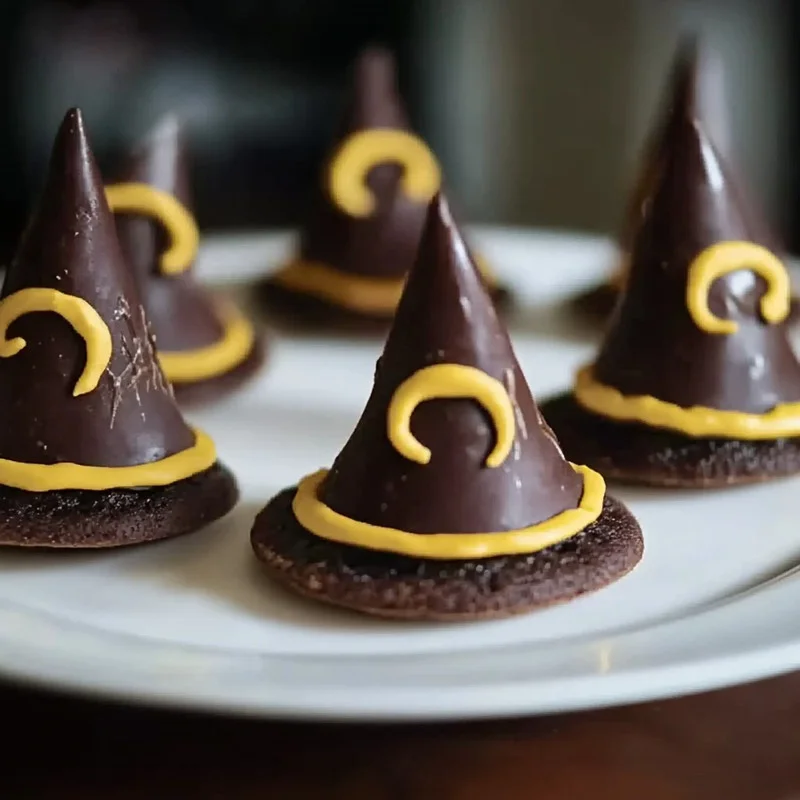
First things first, grab a fudge stripe cookie and place it bottom-side up on your clean work surface. Think of this as the brim of your witch’s hat.
-
Now, take a chocolate kiss. Dab just a tiny bit of honey onto the flat, bottom side of the kiss. We’re talking about 1/8 of a teaspoon – just enough to create a sticky surface.
-
Carefully press the honey-coated side of the chocolate kiss onto the center of the fudge stripe cookie. Give it a gentle press to make sure it’s nice and secure, covering that little hole in the cookie.
-
Time for the finishing touch! Grab your decorating gel and pipe a cute little bow right where the chocolate kiss meets the cookie. This really makes them look like tiny witches’ hats!
-
And that’s it! Keep repeating these steps until all your ingredients are used up. You’ll have a whole coven of witches’ hats in no time!
Substitutions & Additions
While these Witches’ Hats are perfect as is, I love a good creative twist! If you’re feeling adventurous:
- For the Bow: Instead of decorating gel, you could use a dab of frosting or even a tiny piece of colorful candy.
- For the Glue: If you don’t have honey, a bit of melted chocolate or even a small dab of peanut butter (if you’re a peanut butter lover!) can work in a pinch. Just be sure it’s not too runny.
- For the Hat Top: Try using different shaped candies or even miniature peanut butter cups for a different look.
- Edible Glitter: For an extra touch of magic, a tiny sprinkle of edible glitter on the bow can make them sparkle!
Tips for Success
Even the simplest recipes can benefit from a few handy tips. Here’s how to ensure your Witches’ Hats turn out perfectly:
- Don’t Over-Honey: Too much honey can make the kisses slide around. A little goes a long way!
- Cookie Consistency: Make sure your fudge stripe cookies are fresh and not crumbly. This will give you a nice, sturdy base.
- Decorating Gel Flow: If your decorating gel is a bit stiff, you can try running the tube under warm water for a minute to soften it up.
- Prep Ahead: You can definitely make these a day in advance! They hold up beautifully. If you’re making a big batch, I find it helps to have a designated “cookie assembly line.”
How to Store Witches’ Hats
Once your magical Witches’ Hats are all assembled, you’ll want to store them properly to keep them fresh. I usually store mine in an airtight container at room temperature. They’re best enjoyed within 3-5 days. If your kitchen tends to be on the warmer side, you might want to pop them in the fridge, but be aware that the chocolate might develop a slight bloom (a whitish coating) which is perfectly fine to eat but not as pretty. I’ve found they stay wonderfully intact on the counter for a good few days, making them a great make-ahead treat.
FAQs
Here are a few quick questions you might have:
- Can I use different kinds of cookies?
- Absolutely! While fudge stripe cookies offer a great flavor and visual, you can experiment with other cookies that have a flat surface. Just ensure they are sturdy enough to hold the chocolate kiss.
- Are these suitable for kids to make?
- Yes! This is a fantastic recipe for kids. It’s a great way to practice fine motor skills with the decorating gel, and the honey gluing is simple enough for even younger children with supervision.
- Can I freeze Witches’ Hats?
- I haven’t tried freezing them, as they are so quick to make. However, chocolate can sometimes change texture when frozen and thawed, so it might alter the appearance and crispness of the cookie. I’d recommend enjoying them fresh or storing them at room temperature.
- What can I do if my chocolate kisses won’t stick?
- Make sure you’re using just a small dab of honey. If the cookie is too large or the kiss feels loose, add another tiny bit of honey to secure it better. Sometimes, a quick press for about 10-15 seconds helps the honey bond.
These Witches’ Hats are such a delightful treat, perfect for any occasion. They’re so easy to whip up, you’ll find yourself making them again and again! For more fun and easy recipes, be sure to follow us on Pinterest!

Magical Witches' Hats
Equipment
- Work Surface
Ingredients
- 2 packages fudge stripe cookies 16 ounce each
- 1/4 cup honey or as needed
- 1 bag milk chocolate candy kisses 9 ounce, unwrapped
- 1 tube decorating gel 4.5 ounce, for bow
Instructions
- First things first, grab a fudge stripe cookie and place it bottom-side up on your clean work surface. Think of this as the brim of your witch's hat.
- Now, take a chocolate kiss. Dab just a tiny bit of honey onto the flat, bottom side of the kiss. We’re talking about 1/8 of a teaspoon – just enough to create a sticky surface.
- Carefully press the honey-coated side of the chocolate kiss onto the center of the fudge stripe cookie. Give it a gentle press to make sure it’s nice and secure, covering that little hole in the cookie.
- Time for the finishing touch! Grab your decorating gel and pipe a cute little bow right where the chocolate kiss meets the cookie. This really makes them look like tiny witches' hats!
- And that’s it! Keep repeating these steps until all your ingredients are used up. You’ll have a whole coven of witches' hats in no time!