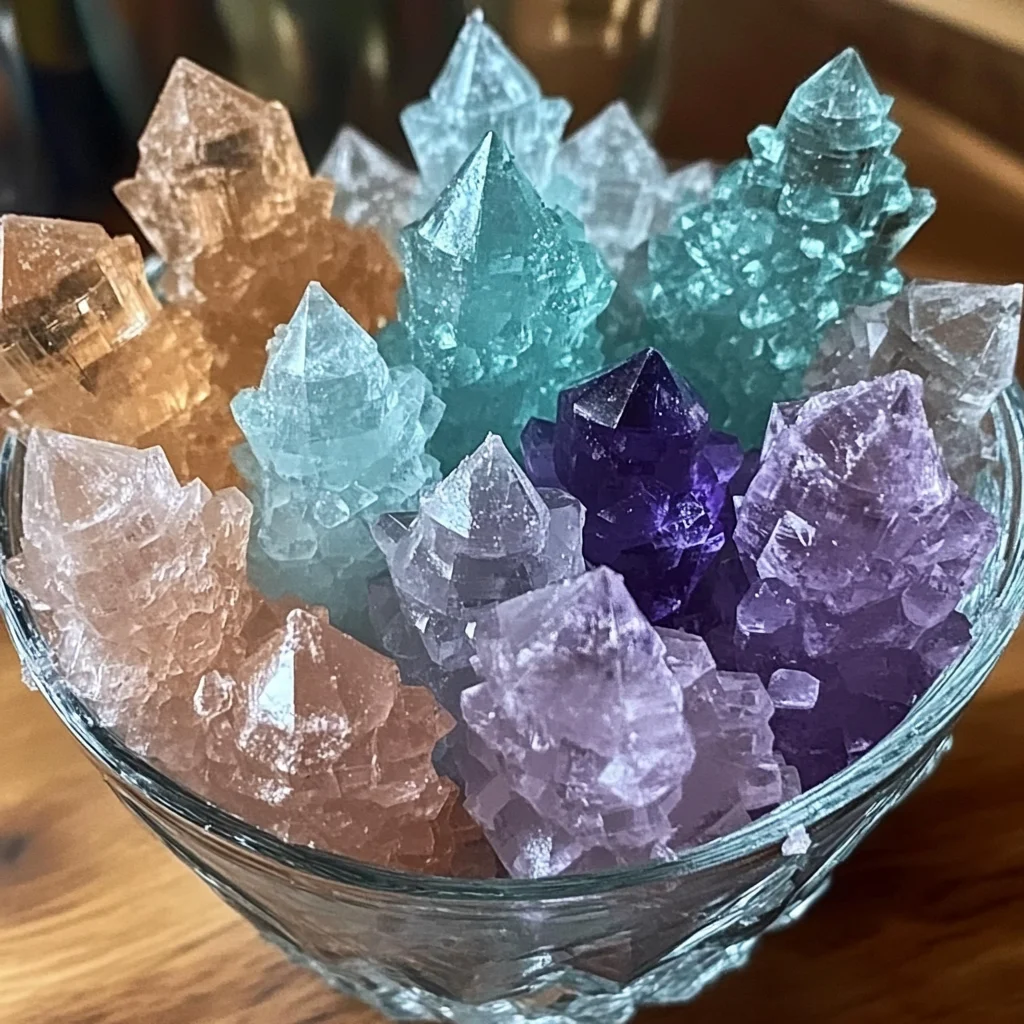
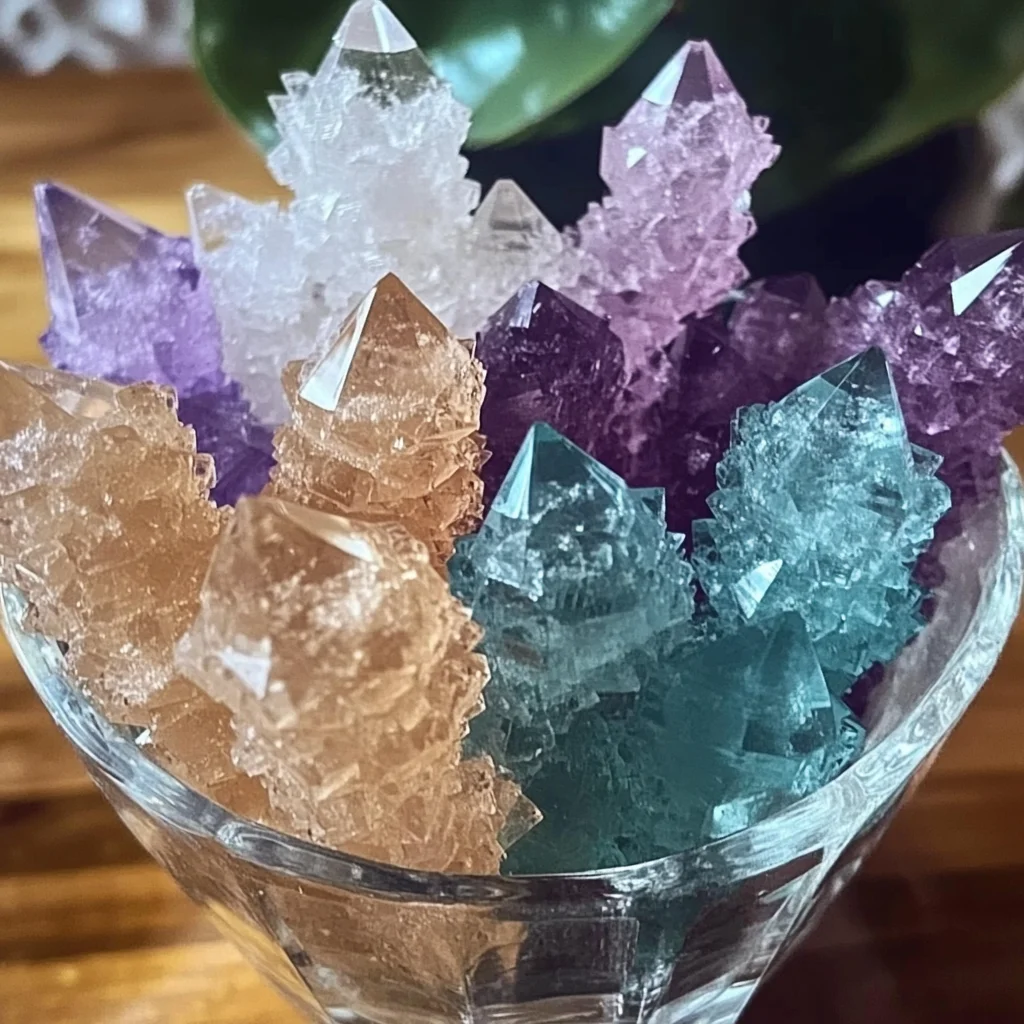
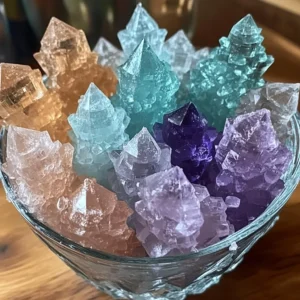
Remember being a kid and doing science experiments that felt like pure magic? That’s exactly how I feel about growing Borax crystals! There’s something so utterly captivating about watching tiny sparkles transform into dazzling, geometric wonders right before your eyes. It feels like you’re making treasure or capturing a bit of starry night in a jar. The best part? It’s SO incredibly simple, you probably have everything you need in your pantry and craft box already. Get ready to unleash your inner scientist and create something truly beautiful!
Why You’ll Love DIY Borax Crystals
- Fast
- Easy
- Giftable
- Crowd-pleasing
Ingredients
Okay, let’s gather our supplies. You’ll need just a few simple things to get your crystal-growing adventure started:
- 3 tablespoons borax powder: You can usually find this in the laundry aisle at your grocery store. It’s the key ingredient for growing these gorgeous crystals!
- 1 cup boiling water: Gotta get it nice and hot to dissolve all that borax.
- 1 clean glass jar or container: A mason jar or even an old pickle jar works perfectly. Just make sure it’s clean so nothing interferes with your crystal growth.
- Pipe cleaners: These are your crystal canvases! You can use any color you like, or even combine colors for fun effects. They’re easy to shape into anything you can imagine.
- String: Just a simple piece of kitchen twine or thread will do the trick.
- 1 pencil or stick: This will act as your anchor, holding your pipe cleaner creation suspended in the solution.
How to Make DIY Borax Crystals
Alright, let’s make some magic happen! Follow these steps, and you’ll have beautiful crystals sparkling in no time:
Step 1: Shape Your Crystal Canvas
Grab your pipe cleaners and twist them, bend them, and shape them into whatever design your heart desires! Stars, hearts, animals, geometric shapes – the possibilities are endless. Just make sure your shape is small enough to fit through the mouth of your jar and hang freely inside without touching the bottom or sides. This is crucial for even crystal growth!
Step 2: Get Ready to Suspend
Now, take one end of your string and tie it securely around your pipe cleaner shape. On the other end of the string, tie it to the center of your pencil or stick. Rest the pencil across the top of your glass jar. Gently lower your pipe cleaner shape into the jar, making sure it hangs in the middle and isn’t touching anything. Adjust the string length as needed. This setup is key to letting the crystals form all over your shape.
Step 3: Make the Crystal Solution
Time for the science part! Carefully boil 1 cup of water. Once it’s boiling, pour it into a heat-safe cup or directly into your glass jar (if the jar is heat-safe!). Add the 3 tablespoons of borax powder to the hot water. Stir, stir, stir! You want to dissolve as much borax as possible. Keep stirring until it looks like no more powder will dissolve, and you might still see a little settled at the bottom – that’s okay. This super-saturated solution is what’s going to make your crystals grow.
Step 4: The Great Lowering
Carefully pour the hot borax solution into your clean glass jar (if you didn’t mix it directly in there). Now, gently lower your pipe cleaner design, suspended from the pencil, into the borax solution. Double-check that it’s hanging freely and not touching the sides or bottom of the jar. This is where the magic really begins!
Step 5: Patience, Young Crystal Grower
Find a quiet spot where your jar won’t be disturbed and place it there. Now, you wait! Leave it for at least 24 hours. As the water cools, the borax will come out of the solution and cling to your pipe cleaner, forming beautiful crystals. You might even start to see tiny crystals forming within just a few hours!
Step 6: The Grand Reveal!
After 24 hours (or even 48 for bigger crystals!), carefully remove your crystallized pipe cleaner from the jar. It will be heavier and covered in sparkly goodness! Let it dry completely on a paper towel or a drying rack for a few hours. Once dry, you have a gorgeous, homemade crystal creation!
Substitutions & Additions
Want to play around and make your crystals extra special? Here are a few ideas:
- Color Fun: Use colored pipe cleaners for different colored crystals. Or, add a few drops of food coloring to your hot borax solution for a splash of color!
- Sparkle Boost: Sprinkle a little glitter onto your wet pipe cleaner shape before you dip it in the borax solution. Some glitter might stick and get encased in the crystals!
- Different Bases: While pipe cleaners are the easiest, you can experiment with other porous objects like string, yarn, or even small plastic toys (though results may vary!).
Tips for Success
To make sure your crystal growing goes smoothly, keep these tips in mind:
- Use Boiling Water: The hotter the water, the more borax you can dissolve, leading to bigger, better crystals.
- Super-Saturate: Make sure you add enough borax that some remains undissolved at the bottom. This indicates your solution is saturated and ready to grow crystals.
- Don’t Touch! Once your pipe cleaner is in the solution, resist the urge to move the jar or touch the shape. Disturbing it can mess up the crystal formation.
- Check for Clearance: Double, triple-check that your shape isn’t touching the sides or bottom of the jar. Crystals will form where the object touches the glass, creating a less defined shape.
- Consider Container Size: Use a jar that’s deep enough for your shape to be fully submerged without touching the bottom.
- Safety First: Borax isn’t meant to be eaten. Supervise children closely and wash hands thoroughly after handling borax or the solution. While these aren’t food-related like our fun Edible Aquarium or Galaxy Grape Frappuccino, it’s important to know these are for looking, not eating!
How to Store DIY Borax Crystals
Once your crystals are completely dry, they are pretty durable! You can display them on a shelf, hang them as ornaments, or even tie them onto gifts. They don’t require any special storage, just keep them away from moisture and direct sunlight if you’re worried about colors fading over time (though with just borax, this isn’t usually an issue). They’re a beautiful, lasting reminder of your fun science project!
FAQs
Got questions? I’ve got answers!
- Q: Is Borax safe? A: Borax (Sodium Tetraborate) is a mineral commonly used in laundry and cleaning products. It is not edible and should be kept out of reach of children and pets. Always supervise kids when using it and wash hands afterward.
- Q: Why didn’t my crystals grow? A: The most common reasons are not using boiling hot water, not adding enough borax (the solution wasn’t saturated), or the solution cooling too quickly (try wrapping the jar in a towel). Make sure your shape wasn’t touching the jar!
- Q: Can I reuse the borax solution? A: Yes, you can gently reheat the solution (be careful!) and add more borax if needed, then grow more crystals. However, the solution can get cloudy or contain residue over time.
- Q: How long does it take to grow crystals? A: You’ll start seeing small crystals form within a few hours, but for the best results, leave your project undisturbed for at least 24 hours, or even 48 hours for larger crystals.
Creating these sparkling borax crystals is such a fun and rewarding project. It’s amazing how simple ingredients can turn into something so visually stunning. Whether you make them for yourself, as gifts, or just for a cool science demonstration, you’re going to love watching them grow! For more fun DIY projects, check out our guide to Easy Homemade Worry Stones or learn how to make DIY Swirl Glow Bouncy Balls!
For even more delicious recipes and fun ideas, be sure to follow us on Pinterest!
DIY Borax Crystals
Equipment
- Clean glass jar or container
- Pipe cleaners
- String
- Pencil or stick
- Large pot or heat-safe cup
Ingredients
For the Borax Crystal Solution
- 3 tablespoons borax powder
- 1 cup boiling water
- food coloring optional, for color
- glitter optional, for sparkle
Instructions
- Step 1: Shape Your Crystal Canvas Grab your pipe cleaners and twist them, bend them, and shape them into whatever design your heart desires! Stars, hearts, animals, geometric shapes – the possibilities are endless. Just make sure your shape is small enough to fit through the mouth of your jar and hang freely inside without touching the bottom or sides. This is crucial for even crystal growth!
- Step 2: Get Ready to Suspend Now, take one end of your string and tie it securely around your pipe cleaner shape. On the other end of the string, tie it to the center of your pencil or stick. Rest the pencil across the top of your glass jar. Gently lower your pipe cleaner shape into the jar, making sure it hangs in the middle and isn’t touching anything. Adjust the string length as needed. This setup is key to letting the crystals form all over your shape.
- Step 3: Make the Crystal Solution Time for the science part! Carefully boil 1 cup of water. Once it’s boiling, pour it into a heat-safe cup or directly into your glass jar (if the jar is heat-safe!). Add the 3 tablespoons of borax powder to the hot water. Stir, stir, stir! You want to dissolve as much borax as possible. Keep stirring until it looks like no more powder will dissolve, and you might still see a little settled at the bottom – that’s okay. This super-saturated solution is what’s going to make your crystals grow. You can optionally add food coloring here.
- Step 4: The Great Lowering Carefully pour the hot borax solution into your clean glass jar (if you didn’t mix it directly in there). Now, gently lower your pipe cleaner design, suspended from the pencil, into the borax solution. Double-check that it’s hanging freely and not touching the sides or bottom of the jar. This is where the magic really begins! Optionally, sprinkle glitter onto the wet pipe cleaner shape before dipping.
- Step 5: Patience, Young Crystal Grower Find a quiet spot where your jar won’t be disturbed and place it there. Now, you wait! Leave it for at least 24 hours. As the water cools, the borax will come out of the solution and cling to your pipe cleaner, forming beautiful crystals. You might even start to see tiny crystals forming within just a few hours! For bigger crystals, leave it for 48 hours.
- Step 6: The Grand Reveal! After 24 hours (or even 48 for bigger crystals!), carefully remove your crystallized pipe cleaner from the jar. It will be heavier and covered in sparkly goodness! Let it dry completely on a paper towel or a drying rack for a few hours. Once dry, you have a gorgeous, homemade crystal creation!