
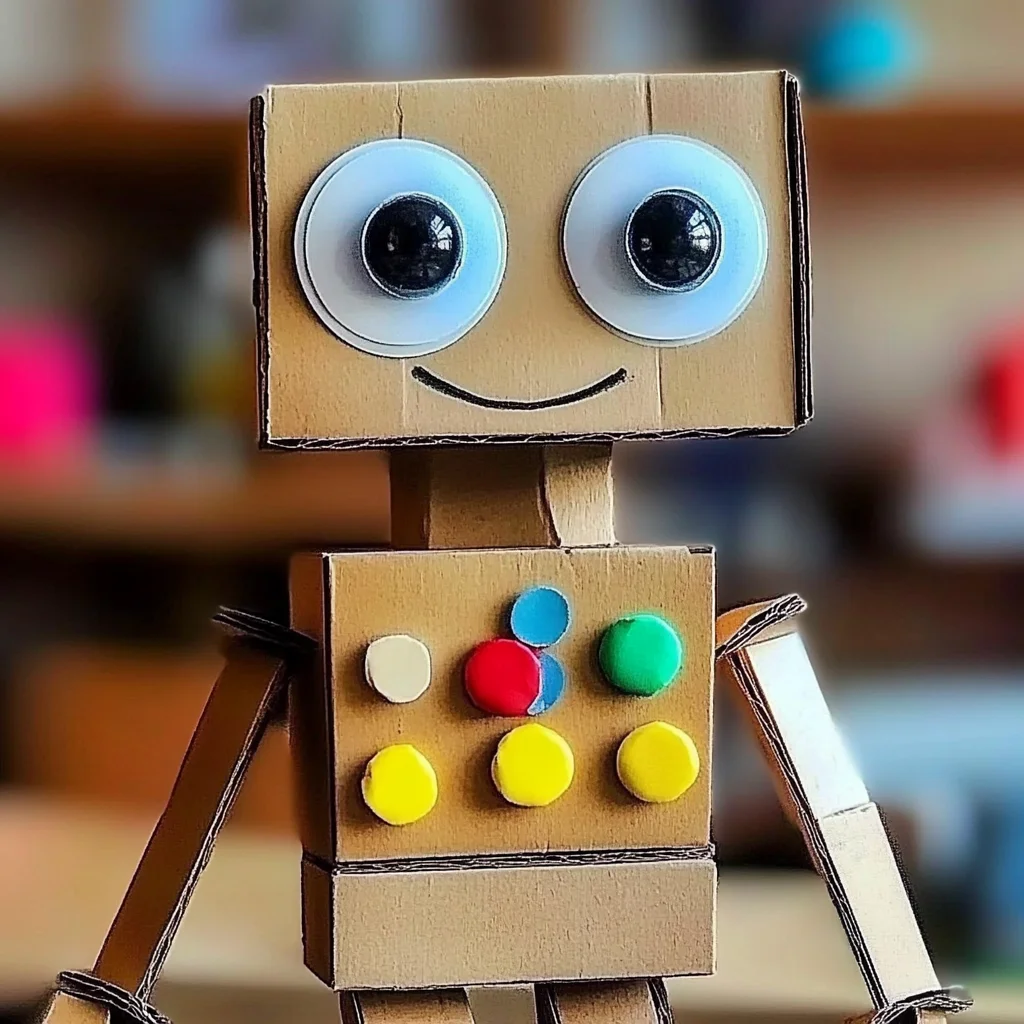
Picture this: a cozy afternoon filled with laughter, creativity, and the delightful rustle of cardboard. Today, we’re diving into a fun and imaginative project that transforms ordinary cardboard into a whimsical robot that sparks joy and creativity! Creating your own DIY Cardboard Robot is not just about crafting; it’s an opportunity to express yourself, bond with family, and unleash your creativity. Imagine the feeling of pride as you look at your finished creation, a charming robot that reflects your unique personality. So, grab a cup of your favorite drink, and let’s get crafting together!
Why You’ll Love DIY Cardboard Robot
- Beginner-friendly
- Budget-friendly
- Creative and fun
- Great for kids and families
- Perfect for gifts or decorations
- Customizable
The Heart Behind This DIY
Crafting your own DIY Cardboard Robot is incredibly rewarding. It’s not just a project; it’s an experience that inspires creativity and encourages mindfulness. As you cut, glue, and decorate, you’ll find your worries melting away, replaced by the joy of creating something from scratch. This project is perfect for all ages, making it a wonderful way to connect with loved ones while fostering confidence and imaginative play. Plus, using your hands to create can be so fulfilling, allowing you to engage with the textures of the cardboard and the vibrant colors of your chosen decorations.
A Gentle Look at the Process
Creating your cardboard robot is a step-by-step journey filled with laughter and discovery. You will gather materials, cut out shapes, and assemble your robot’s form. As you work, you’ll find yourself lost in the delightful world of your imagination, envisioning the personality of the robot you’re bringing to life. This experience is all about enjoying the process, so don’t rush—take your time and let your creativity flow!
Materials You’ll Need
- Cardboard boxes – These will form the structure of your robot.
- Scissors – For cutting out the desired shapes.
- Glue or tape – To hold your robot together.
- Markers or paint – For decorating and adding personality.
- Googly eyes (optional) – To give your robot a fun, animated look.
- Decorative items (e.g., buttons, stickers) – For adding unique flair.
Step-by-Step Directions
Step 1
Start by selecting and gathering various cardboard boxes. Think about the sizes you want for your robot’s body, arms, legs, and head. You can mix and match to create a truly unique design!
Step 2
Using scissors, carefully cut out the desired shapes from the cardboard. It’s okay if they are not perfect—embrace the imperfections, as they add character to your robot!
Step 3
Now, it’s time to assemble your robot! Use glue or tape to attach the pieces together, forming the structure of your robot. Picture it starting to come to life as you secure the pieces.
Step 4
Grab your markers or paint and let your creativity shine! Decorate your robot, adding facial features and designs that make it uniquely yours. This is where the magic happens, so have fun!
Step 5
If you have googly eyes or other decorative items, attach them now to give your robot a playful look. Imagine the joy it will bring when you see those eyes staring back at you!
Step 6
Finally, allow your glue or paint to dry completely before you play with or display your fabulous cardboard robot. Take a moment to admire your creation; you’ve earned it!
Creative Ways to Use DIY Cardboard Robot
Once your cardboard robot is complete, the fun doesn’t have to stop there! Here are some creative ideas on how you can use or display your new friend:
- Make it a part of your room decor—place it on a shelf or desk to brighten up the space.
- Use it as a fun toy for imaginative play, letting your robot go on adventures.
- Gift it to a friend or family member to spread joy and handmade charm.
- Host a cardboard robot party where everyone makes their own robot and shares ideas!
How to Store, Preserve, or Reuse DIY Cardboard Robot
To preserve your cardboard robot, keep it in a dry, cool place away from direct sunlight. If you want to reuse the materials later, gently disassemble the robot without damaging the cardboard, and store the pieces for future projects. Remember, creativity knows no bounds!
Creative Variations and Customizations
- Color variations: Experiment with different paints or colors for a vibrant look.
- Theme ideas: Create robots based on your favorite characters or themes.
- Seasonal adaptations: Decorate your robot for different holidays or seasons.
- Kid-friendly modifications: Let kids choose their own colors and decorations for a personal touch.
- Advanced creative upgrades: Use additional materials like lights or sound modules for a high-tech robot!
Tips for Success
- Avoid common mistakes by measuring and planning your designs before cutting.
- Safety first: Always supervise children when using scissors or glue.
- Prepare your workspace with all materials handy to keep the creative flow going.
- Cleanup is easy—keep a trash bag nearby for any cardboard scraps.
- Don’t be afraid to experiment! The best creations often come from trying something new.
FAQs About DIY Cardboard Robot
Can beginners make this?
Absolutely! This project is perfect for beginners and can be tailored to any skill level.
Can children participate?
Yes! Kids will love this project, especially with a little guidance and supervision. It’s a great way for them to express their creativity.
How long does it last?
With proper care, your cardboard robot can last for many months, bringing joy to your space!
Can I customize it?
Definitely! Customization is a huge part of the fun. Use your imagination to make it truly yours.
A Final Creative Note
As you step back and admire your DIY Cardboard Robot, remember that the joy of crafting is not just in the final product but in the memories made along the way. Celebrate your creativity, embrace self-expression, and cherish the moments spent creating with loved ones. For more delicious recipes, check out the blueberry lemon ricotta pancakes or grilled chicken creamy pasta bowl for treats you will love! Let your imagination run wild, and happy crafting!
For even more DIY inspiration, be sure to follow our Pinterest account!
DIY Cardboard Robot
Equipment
- Scissors
- Glue or Tape
- Markers or Paint
Ingredients
Materials You'll Need
- cardboard boxes
- scissors
- glue or tape
- markers or paint
- googly eyes (optional)
- decorative items (e.g., buttons, stickers)
Instructions
- Step 1: Start by selecting and gathering various cardboard boxes. Think about the sizes you want for your robot's body, arms, legs, and head.
- Step 2: Using scissors, carefully cut out the desired shapes from the cardboard. Embrace the imperfections!
- Step 3: Assemble your robot! Use glue or tape to attach the pieces together.
- Step 4: Decorate your robot with markers or paint, adding facial features and designs.
- Step 5: Attach googly eyes or other decorative items to give your robot a playful look.
- Step 6: Allow your glue or paint to dry completely before displaying your fabulous cardboard robot.
