
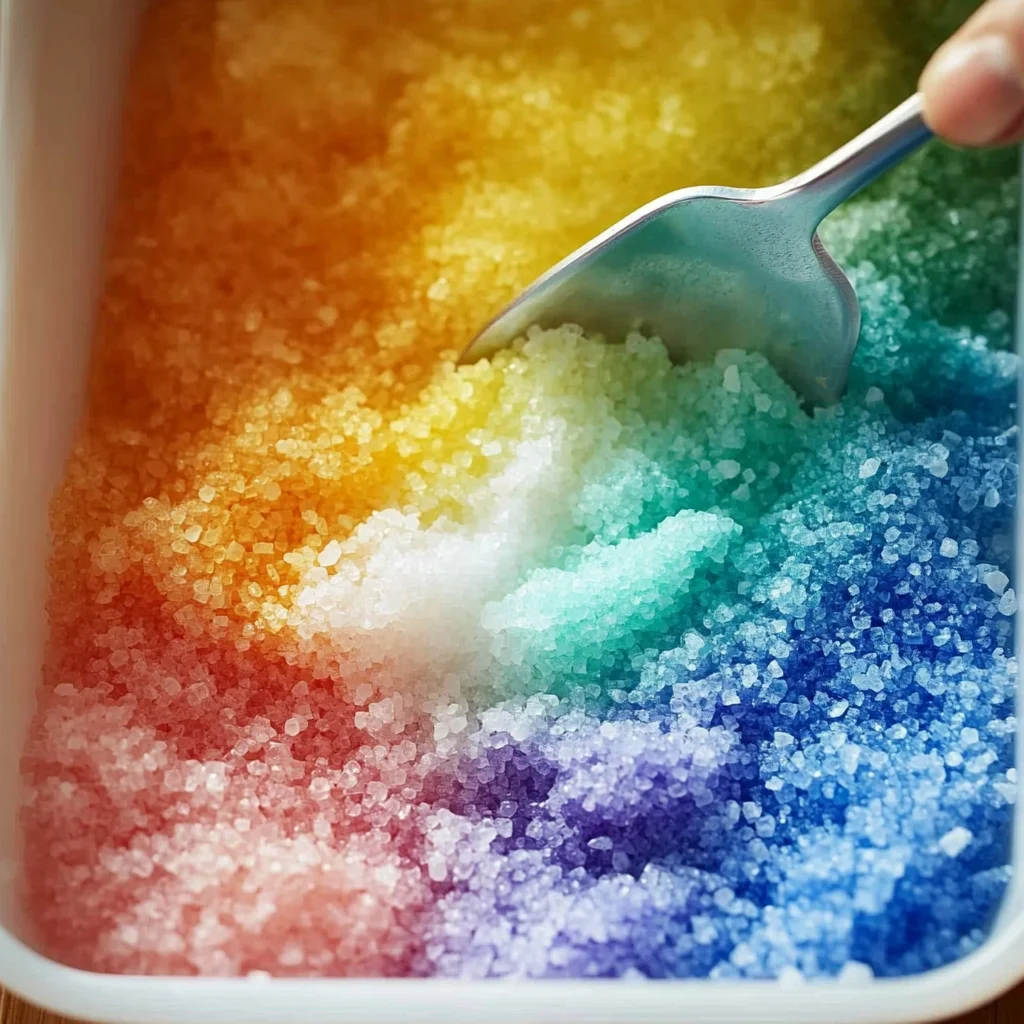
There’s something undeniably magical about creating something beautiful with your own hands. Do you remember the joy of mixing colors and watching them come to life as a child? This DIY Dyed Salt Tray project captures that feeling perfectly, offering you a wonderful way to express your creativity while engaging in a delightful crafting session. Imagine the vibrant hues of the salt sparkling in the light, a unique centerpiece for your home or a lovely gift for someone special. Not only is this project relaxing and easy to do, but it also invites you to explore colors, textures, and the simple pleasure of making something from scratch.
Why You’ll Love DIY Dyed Salt Tray
- Beginner-friendly
- Budget-friendly
- Creative and fun
- Great for kids and families
- Perfect for gifts or decorations
- Customizable
The Heart Behind This DIY
Crafting has a unique way of bringing us into the present moment, encouraging mindfulness and connection with our creative selves. When you dive into this DIY Dyed Salt Tray project, you’re not just making art; you’re also taking a break from the hustle and bustle of everyday life. The tactile experience of mixing salt and colors engages your senses, providing a soothing rhythm as you create. Plus, it fosters creativity and confidence, especially when you see your finished work shimmering beautifully. It’s the perfect opportunity to spend quality time with family or friends, sharing laughter and inspiration along the way.
A Gentle Look at the Process
As you embark on this DIY journey, you can expect a colorful and enjoyable experience. You’ll start by preparing your materials, creating a vibrant array of dyed salt, and then transforming it into a charming display. The process is straightforward, and I promise you’ll feel a sense of accomplishment as your vision comes to life. Each step invites you to engage with your artistic side, and the best part? There are no strict rules—just let your imagination guide you!
Materials You’ll Need
- 1 cup of salt: This is the base of your project, ready to be transformed into a colorful masterpiece.
- Food coloring (various colors): Choose your favorite shades to create the perfect blend for your salt tray.
- Baking sheet: A flat surface to dry your dyed salt, making it easy to spread out.
- Parchment paper or wax paper: This will prevent the salt from sticking and make cleanup a breeze.
Step-by-Step Directions
Step 1
Preheat your oven to 350°F (175°C). This will help dry the salt quickly and evenly.
Step 2
In separate bowls, add 1 cup of salt to each bowl you want to dye. The more bowls you have, the more colors you can create, so feel free to get creative!
Step 3
Add a few drops of food coloring to each bowl of salt and mix until the color is evenly distributed. Watching the colors swirl and blend is part of the fun!
Step 4
Spread the dyed salt evenly on a baking sheet lined with parchment paper or wax paper. The colors will look so vibrant against the white background.
Step 5
Place the baking sheet in the preheated oven for about 10 minutes to dry the salt. You will enjoy the subtle warmth of the oven as it fills your space with a cozy atmosphere.
Step 6
Remove the baking sheet from the oven and let the salt cool completely. Be careful—it’s hot! This is a perfect time to take a moment to appreciate your work.
Step 7
Once cooled, transfer the dyed salt to a tray for display or use in sensory play. Imagine the soft crunch of the salt beneath your fingers as you enjoy your creation!
Creative Ways to Use DIY Dyed Salt Tray
Your beautiful dyed salt tray can be used in so many delightful ways! Display it on a coffee table as a colorful centerpiece, or use it as a calming sensory tray for children, inviting them to explore different textures and colors. You might even sprinkle some of the colored salt into candles for a unique touch or use it in art projects. It also makes for a thoughtful and personalized gift, perfect for birthdays or housewarming parties. The possibilities are endless!
How to Store, Preserve, or Reuse DIY Dyed Salt Tray
To keep your dyed salt tray looking fresh, store it in a sealed container when not in use. If you want to reuse the salt, simply transfer it back into the bowls and re-dye it with new colors for another round of creativity. The salt can last for a long time, but if it ever loses its vibrancy, don’t hesitate to refresh it with more food coloring!
Creative Variations and Customizations
- Color variations: Experiment with shades like pastels for a soft look or bold colors for a vibrant tray.
- Theme ideas: Create trays based on seasons, holidays, or favorite color palettes.
- Seasonal adaptations: Use autumn colors for fall or bright pastels for spring.
- Kid-friendly modifications: Let little ones choose their colors and help with mixing.
- Advanced creative upgrades: Add glitter or essential oils for an extra sensory experience.
Tips for Success
- Avoid common mistakes by ensuring the salt is evenly spread on the baking sheet for uniform drying.
- Keep safety in mind—be careful with hot items and supervise children during the process.
- Preparation suggestions: Gather all your materials before starting to keep the process smooth.
- Cleanup is easy! Just wipe down surfaces and put away any leftover materials.
- My expert tip: Don’t hesitate to mix colors! Creating new shades can lead to unexpected beauty.
FAQs About DIY Dyed Salt Tray
Can beginners make this?
Absolutely! This project is perfect for beginners of all ages, and the steps are simple to follow.
Can children participate?
Yes! Kids will love mixing colors and creating their own unique salt. Just make sure to supervise during the oven step.
How long does it last?
If stored properly, your dyed salt can last indefinitely, but the colors may fade over time.
Can I customize it?
Definitely! The beauty of this project is in its customization—choose any colors and themes that resonate with you!
A Final Creative Note
As you wrap up your DIY Dyed Salt Tray project, take a moment to celebrate your creativity and self-expression. Each piece you create is a reflection of your unique personality and style. Whether you keep it for yourself or gift it to someone special, remember that crafting is all about joy and connection. So, gather your materials, invite a friend or family member to join you, and let the colors inspire your creativity. For more delicious recipes, check out Blueberry Lemon Ricotta Pancakes or Kool-Aid Gummy Treats for treats you will love! And for even more DIY inspiration, be sure to follow our Pinterest account at https://www.pinterest.com/foodknightcom.
DIY Dyed Salt Tray
Equipment
- oven
- Bowls
- baking sheet
- parchment paper
Ingredients
For the Dyed Salt
- 1 cup salt base of the project
- Food coloring (various colors)
Instructions
- Step 1: Preheat your oven to 350°F (175°C).
- Step 2: In separate bowls, add 1 cup of salt to each bowl you want to dye.
- Step 3: Add a few drops of food coloring to each bowl of salt and mix until the color is evenly distributed.
- Step 4: Spread the dyed salt evenly on a baking sheet lined with parchment paper.
- Step 5: Place the baking sheet in the preheated oven for about 10 minutes to dry the salt.
- Step 6: Remove the baking sheet from the oven and let the salt cool completely.
- Step 7: Once cooled, transfer the dyed salt to a tray for display or use in sensory play.
