
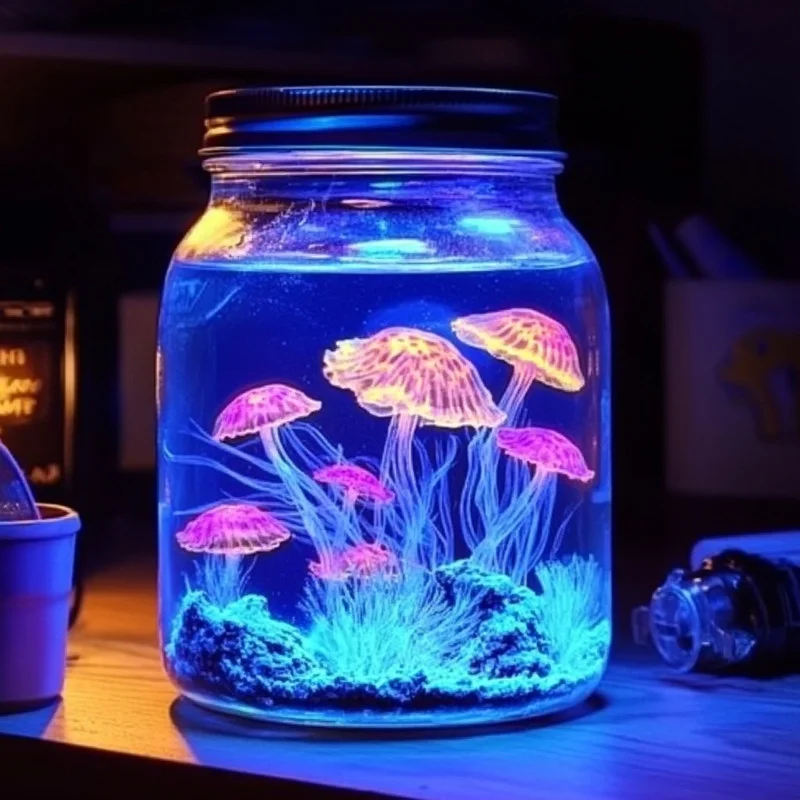
Hey there, friend! Remember those lazy summer evenings or rainy afternoons when you just wished for a little bit of magic? Or maybe you’re looking for that perfect, easy craft project to do with the kids that feels truly special? Well, get ready, because I’ve got something that will light up your world – literally! This Glow-in-the-Dark Aquarium Jar is pure, simple joy captured in a jar. It’s super easy to put together, takes hardly any time, and the payoff when the lights go down? Absolutely enchanting. It’s the kind of project that creates instant wonder and makes you feel like a kid again, discovering a secret, glowing world under the sea.
Why You’ll Love Glow-in-the-Dark Aquarium Jar
- Fast: Whip this up in under an hour!
- Easy: So simple, anyone can do it – perfect for little hands (with adult supervision!).
- Giftable: Make a few and give them as unique, thoughtful presents.
- Crowd-pleasing: Who doesn’t love something that glows in the dark and looks like an underwater adventure?
Ingredients
Gathering your supplies for this magical jar is half the fun! You probably have some of these things lying around already.
- 1 clear glass jar or plastic mason jar (with lid): Any size works, but I love a classic mason jar! Make sure it’s clean and has a tight-fitting lid.
- Water (enough to fill jar ¾ full): Just regular tap water will do the trick.
- 1–2 Tbsp glow-in-the-dark or fluorescent paint (non-toxic): This is the magic ingredient! Look for craft paints specifically labeled as glow-in-the-dark or fluorescent. Make sure it’s non-toxic, especially if little ones are helping.
- Small plastic sea creatures: Think little fish, turtles, dolphins, or anything else that lives in the water!
- Aquarium gravel or blue decorative stones (about ¼ cup): This adds weight to the bottom and gives it that authentic aquarium look. Blue stones enhance the underwater feel!
- Glitter (optional): A little sparkle goes a long way to make it extra dreamy. Choose fine glitter for less clumping.
- Small plastic plants or aquarium decorations (optional): If you want to add more detail to your underwater scene.
- UV blacklight or strong flashlight: You’ll need this to “charge” the glow paint and really make it pop!
- Blue food coloring (optional): Just a tiny drop can make the water look more like the ocean, but it’s totally fine to skip if you prefer clear water.
How to Make Glow-in-the-Dark Aquarium Jar
Alright, let’s get this glowing show on the road! It’s as easy as pie, I promise.
First things first, you’ll want to get your little sea buddies ready. Take your plastic sea creatures and carefully paint them using your glow-in-the-dark or fluorescent paint. Don’t glob it on too thick, just a nice even coat. Let them dry completely. This usually takes about 30–60 minutes, depending on the paint and humidity. Patience is key here for the best glow!
While your creatures are drying, grab your clean jar. Pour the aquarium gravel or decorative stones into the bottom. This creates the seabed. If you’re using glitter or small plastic plants, now’s the time to add those in too. Sprinkle in some glitter if you like – I find it makes the glow effect even more magical! This part reminds me a bit of making those fun DIY bioplastic suncatchers, starting with simple components to create something beautiful.
Once your painted sea creatures are good and dry, gently place them into the jar, arranging them how you like. Now, carefully fill the jar about ¾ full with water. If you decided to use blue food coloring, add just one drop now and gently stir the water with a spoon or stick until it’s a light ocean blue hue. Be careful not to stir too vigorously or you’ll disturb your carefully placed seabed!
Here comes the glowing goodness! Add 1–2 tablespoons of your glow-in-the-dark paint to the water. Seal the jar tightly with the lid. Now, gently swirl and shake the jar to disperse the paint throughout the water. You want it cloudy and glowing!
The final step to unleash the glow is to charge it up! Place the sealed jar under a bright light source. Direct sunlight works wonders, or you can use a strong lamp. For the most intense glow, shine a UV blacklight directly onto the jar for a few minutes. The longer you charge it, the brighter and longer it will glow. It’s kind of like making glow-in-the-dark bubbles – you need that light source to activate the fun!
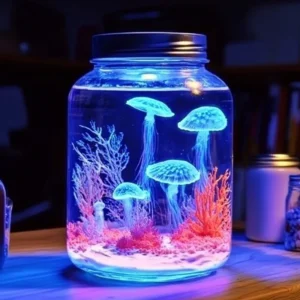
Once charged, take it into a dark room and watch the magic happen! You’ve created your very own mini glowing aquarium.
Substitutions & Additions
- Different Colors: Use different colors of glow paint for a multi-colored effect!
- Other Treasures: Instead of just sea creatures, add smooth stones, seashells, or even small waterproof plastic beads to the bottom.
- Glitter Types: Try chunky glitter or iridescent glitter for different light-catching effects.
- Floating Elements: A drop of clear glue can help lightweight plastic creatures float a bit higher, but test this first as it might affect the paint.
Tips for Success
- Use Non-Toxic Paint: This is especially important if kids are involved in the crafting process.
- Ensure Paint is Fully Dry: Painting wet creatures will just result in the paint washing off into the water before it can properly glow.
- Seal Tightly: Make sure that lid is on securely, especially if little hands will be handling the jar. You don’t want any glowing leaks!
- Charge Well: Don’t skip the charging step! The glow paint needs light exposure to activate. A blacklight gives the quickest and brightest charge.
- Experiment with Paint Amount: Start with 1 tablespoon of paint, swirl, and see if you like the glow intensity. Add the second tablespoon if you want a stronger effect. Too much paint might make the water too opaque.
How to Store Glow-in-the-Dark Aquarium Jar
Storing your glowing aquarium is simple! Just keep the lid on tightly. The magic doesn’t fade away, but the glow needs recharging. Whenever you want to see it glow again, just expose it to light (especially a blacklight) before taking it into a dark space. Think of it like one of those fun DIY mason jar aquariums, designed to be enjoyed again and again!
FAQs
Q: How long does the glow last?
A: The intensity and duration of the glow depend heavily on the type and quality of glow paint used and how well it was charged. Usually, you’ll get a bright glow for 15-30 minutes, with a dimmer glow lasting longer.
Q: Is it safe if the jar breaks?
A: Use a plastic jar for maximum safety, especially with kids. If you use a glass jar, handle with care and supervise children. The paint should be non-toxic, but avoid ingestion.
Q: Can I add real fish?
A: Absolutely NOT. This is a craft project, not a real habitat. The water is treated with paint and not suitable for living creatures.
Q: Can I recharge it multiple times?
A: Yes! Just expose it to light again whenever you want to see it glow.
Follow us on Pinterest for more fun ideas!
Glow-in-the-Dark Aquarium Jar
Equipment
- Jar (with lid)
- UV Blacklight or Strong Flashlight
- Spoon or Stick (for stirring)
Ingredients
- 1 clear glass jar or plastic mason jar with lid
- enough to water fill jar ¾ full
- 1-2 Tbsp glow-in-the-dark or fluorescent paint non-toxic
- small plastic sea creatures
- 1/4 cup aquarium gravel or blue decorative stones
- glitter optional
- small plastic plants or aquarium decorations optional
- 1 drop blue food coloring optional
Instructions
- Step 1: Paint plastic sea creatures with glow-in-the-dark paint. Apply a nice even coat. Let them dry completely (30–60 minutes).
- Step 2: While creatures dry, pour aquarium gravel or decorative stones into the clean jar. Add glitter and small plastic plants or decorations if using.
- Step 3: Once the painted creatures are dry, gently place them into the jar. Carefully fill the jar about ¾ full with water. If using blue food coloring, add one drop and gently stir.
- Step 4: Add 1–2 tablespoons of glow-in-the-dark paint to the water. Seal the jar tightly with the lid. Gently swirl and shake the jar to disperse the paint.
- Step 5: Charge the jar by placing it under a bright light source like direct sunlight, a strong lamp, or a UV blacklight for a few minutes.
- Step 6: Take the charged jar into a dark room and watch it glow!