
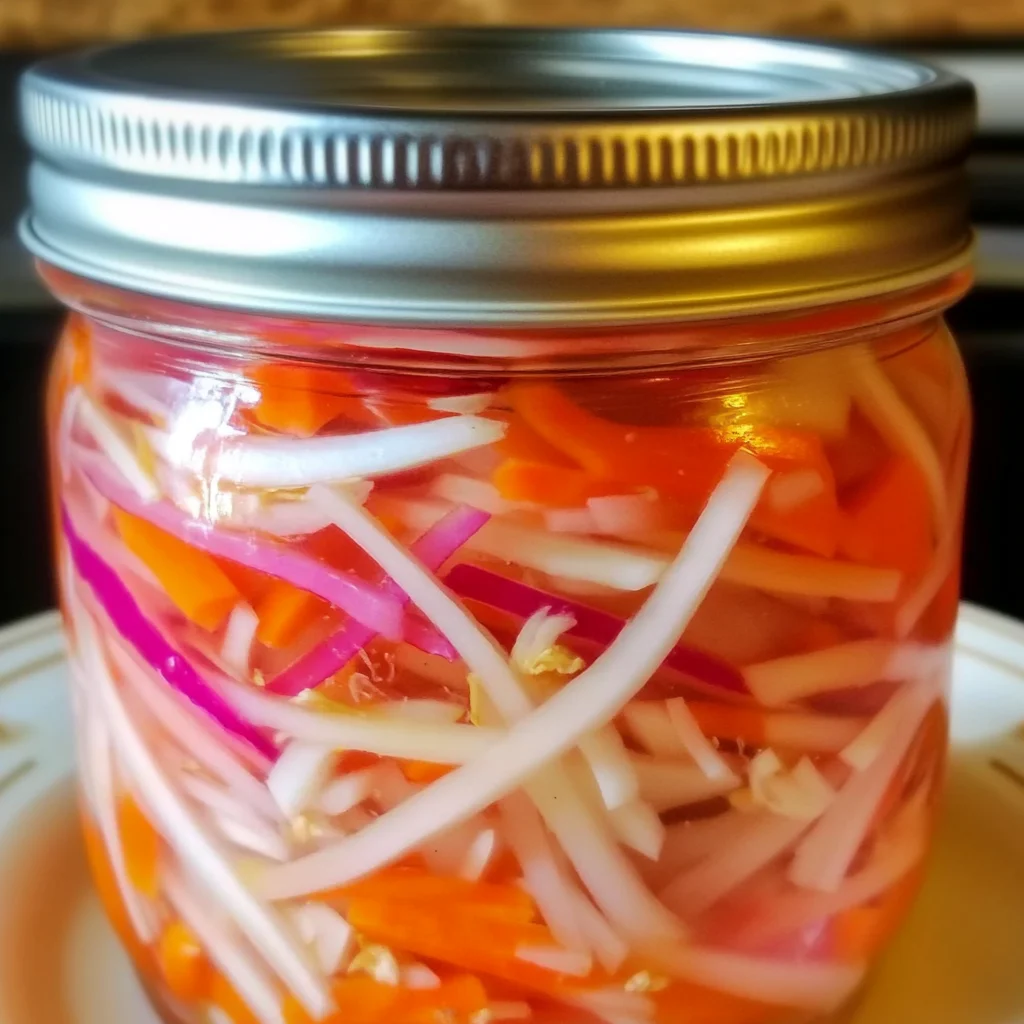
Remember those vibrant, tangy pickles you’d find alongside your favorite bánh mì or pho? That burst of flavor that just wakes up your taste buds? Well, get ready to recreate that magic right in your own kitchen! This homemade pickled daikon, carrot, and onion recipe is so incredibly simple, you’ll wonder why you haven’t been making it all along. It’s a little bit sweet, a little bit tangy, and packed with that satisfying crunch that makes every meal sing. Plus, they’re gorgeous to look at, adding a pop of color to anything they accompany!
Why You’ll Love Homemade Pickled Daikon with Carrots and Onions
- Fast: Ready to enjoy in just a couple of hours!
- Easy: Seriously, minimal effort for maximum flavor.
- Giftable: Jar these up and share the deliciousness with friends and family.
- Crowd-pleasing: A fantastic addition to sandwiches, salads, bowls, or just as a snack.
Ingredients
- 1 ½ cups boiling water: Our base for the brine.
- 1 ½ cups apple cider vinegar: The star of the show for that perfect tang.
- ½ cup sugar: To balance the acidity and add a touch of sweetness.
- 1 tablespoon salt: Essential for preserving and flavor.
- ⅓ red onion, thinly sliced: Adds a beautiful color and a nice bite.
- 1 medium carrot, julienned: For that classic crunch and sweetness.
- 1 daikon (8-10 inches long), julienned: The star of the show! Make sure to peel it first.
- 1 banana pepper, sliced (optional): If you like a little extra zing and a touch of heat, add this in!
How to Make Homemade Pickled Daikon with Carrots and Onions
Let’s get pickling! It’s a wonderfully satisfying process that takes minimal time. You’ll be amazed at how quickly you can transform simple veggies into something truly special.
- Prep Your Jars: Grab three clean 1-pint jars. Make sure they’re sterilized for the best results.
- Combine the Veggies: In a large bowl, gently toss together your thinly sliced red onion, julienned carrot, julienned daikon, and the banana pepper slices if you’re using them. Get everything nicely mixed up.
- Pack the Jars: Carefully divide the vegetable mixture evenly among your prepared jars. You want to leave about 1 inch of space at the top of each jar – this is called headspace, and it’s important for proper sealing and pickling.
- Make the Brine: In a saucepan, bring your water to a rolling boil. Once it’s boiling, add the salt and sugar. Stir them in really well until they’ve completely dissolved. No graininess allowed!
- Add the Vinegar: Now, stir in the apple cider vinegar. Give it a good mix to ensure everything is well combined. This is your magical pickling liquid!
- Fill the Jars: Very carefully, pour the hot vinegar mixture over the vegetables in each jar. Make sure all those beautiful veggies are completely submerged in the brine. This is crucial for them to pickle properly.
- Cool Down: Let the filled jars sit on your countertop and cool down for at least 2 hours. This allows the flavors to start mingling and the vegetables to soften just a bit.
- Chill Out: Once they’ve cooled, pop those jars into the refrigerator. They need a good chill before you can dig in.
- Store and Enjoy: Your delicious homemade pickled daikon, carrots, and onions will keep in the refrigerator for up to 1 month. Just before serving, remember to drain off the brine.
Substitutions & Additions
The beauty of pickling is how customizable it is! Don’t be afraid to play around with this recipe. If you’re out of daikon, you could try using kohlrabi or even more carrots. For a different kind of kick, swap the banana pepper for a jalapeño or a serrano pepper. I’ve also heard that adding a few peppercorns or a bay leaf to the brine can impart a lovely depth of flavor. If you love a good tangy slaw, you might also enjoy this Mexican street corn coleslaw for a different kind of crunchy, flavorful side!
Tips for Success
- Peel the Daikon: Don’t forget to peel your daikon radish before julienning. It has a tougher outer skin.
- Slice Uniformly: Try to cut your vegetables into similar sizes for even pickling.
- Hot Brine is Key: Pouring the hot brine over the vegetables helps them absorb the flavors more effectively and begins the pickling process.
- Patience is a Virtue: While these are quick pickles, letting them chill for at least a few hours (or even overnight) will result in a more developed flavor.
- Prep Ahead: These are perfect for making ahead of time for parties or just to have on hand throughout the week. They’re a fantastic accompaniment to dishes like easy chicken pad thai or even just simple grilled chicken.
How to Store Homemade Pickled Daikon with Carrots and Onions
Once your pickled veggies have cooled completely and you’ve stored them in the refrigerator, they should stay fresh and delicious for up to a month. Make sure the jars are always kept cold. When you’re ready to serve, just give them a good drain. If you find yourself with a lot of pickling brine, you can reuse it for other vegetables or even use it in salad dressings. Just be aware that the flavor profile will change slightly as it ages.
FAQs
Q: Can I use a different type of vinegar?
A: You can, but apple cider vinegar provides a nice balance of acidity and subtle sweetness. White vinegar or rice vinegar would also work, but they might result in a more sharp or neutral flavor.
Q: How long do these pickles last?
A: When stored properly in the refrigerator, they can last for about a month.
Q: Can I make these spicy?
A: Absolutely! Add a sliced jalapeño, serrano pepper, or even a pinch of red pepper flakes to the brine for extra heat.
Q: What can I serve these with?
A: They are incredibly versatile! They’re great on sandwiches, in rice bowls, alongside grilled meats, in salads, or even as a flavorful garnish for tacos or stir-fries. They add a wonderful brightness to any dish, much like this quick pickled cucumber and red onion.
Ready to add a burst of flavor and color to your meals? Give this easy homemade pickle recipe a try! And if you love discovering delicious recipes and fun DIYs, be sure to follow us on Pinterest!
Homemade Pickled Daikon, Carrots & Onions
Equipment
- 3 x 1-pint jars
- large bowl
- saucepan
- Measuring cups and spoons
- Knife and cutting board
Ingredients
For the Pickling Brine
- 1.5 cups boiling water
- 1.5 cups apple cider vinegar
- 0.5 cup sugar
- 1 tablespoon salt
For the Vegetables
- ⅓ red onion red onion thinly sliced
- 1 medium carrot carrot julienned
- 1 daikon (8-10 inches long) daikon peeled and julienned
- 1 banana pepper banana pepper sliced, optional
Instructions
- Step 1: Sterilize three 1-pint jars.
- Step 2: In a large bowl, combine the sliced red onion, julienned carrot, julienned daikon, and optional banana pepper slices.
- Step 3: Pack the vegetable mixture evenly into the prepared jars, leaving about 1 inch of headspace at the top.
- Step 4: In a saucepan, bring 1 ½ cups of water to a rolling boil. Stir in 1 ½ cups apple cider vinegar, ½ cup sugar, and 1 tablespoon salt until dissolved.
- Step 5: Carefully pour the hot brine over the vegetables in each jar, ensuring they are fully submerged.
- Step 6: Let the jars cool on the countertop for at least 2 hours.
- Step 7: Refrigerate the jars for at least a few hours before serving. Drain excess brine before consuming.