
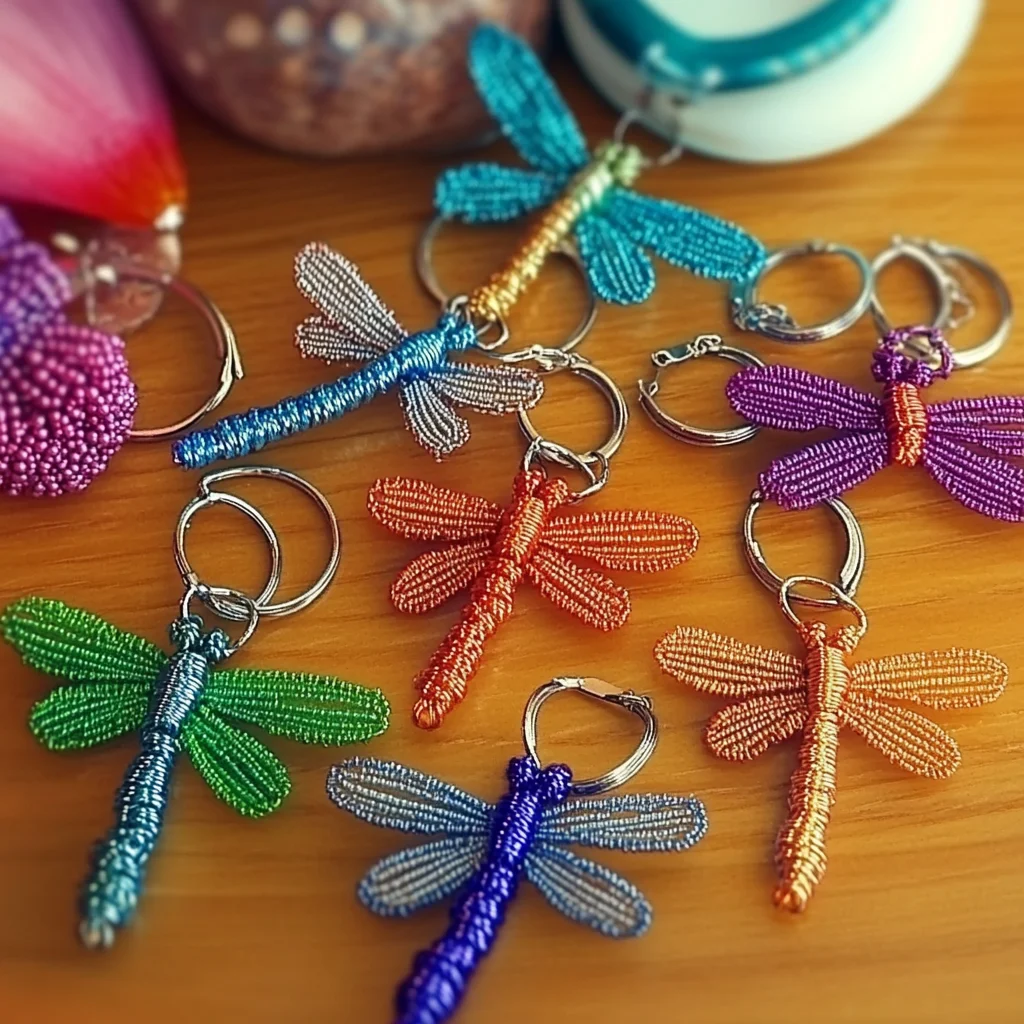
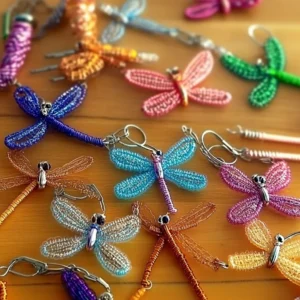
Oh, remember those summer days spent chasing dragonflies? There’s something so magical about them, isn’t there? That iridescent shimmer, the delicate wings… it always brings back such happy memories. Well, guess what? You can capture a little bit of that magic right in your hands with these super simple DIY Dragonfly Keychains! They’re so quick and easy to make, you’ll be whipping them up in no time, perfect for adding a touch of whimsy to your keys, backpack, or even as a sweet little gift for a friend.
Why You’ll Love These Adorable Dragonfly Keychains
- Fast: Seriously, you can make a batch in under an hour!
- Easy: No fancy tools or complicated steps here. Perfect for beginners!
- Giftable: They make the most charming little presents for birthdays, holidays, or just because.
- Crowd-pleasing: Kids and adults alike will adore these colorful creations.
What You’ll Need to Make Your Dragonflies Fly
Gathering your supplies is half the fun! It’s like a treasure hunt for crafty bits. Here’s what you’ll need:
- 1 Key Ring or Lobster Clasp: This is the anchor for your beautiful dragonfly.
- 1 Chenille Pipe Cleaner (any color): This will form the main body of your dragonfly. Get creative with colors – bright and bold or soft and pastel, they all look amazing!
- 1 Large Bead (for the head): This is the focal point of your dragonfly’s cute little face.
- 3–5 Medium Beads (for the body): These add character and length to your dragonfly.
- 2 Sparkly or Mesh Pipe Cleaners (for the wings): This is where the magic happens! Sparkly ones catch the light so beautifully, but any fun colored pipe cleaner will work.
- Optional Extras: Googly eyes for extra personality, craft glue to secure those eyes, a small ribbon for a sweet bow, and jewelry pliers or a twist tool if you want to ensure extra snug twists.
Let’s Get Crafty: How to Make Your DIY Dragonfly Keychains
Alright, let’s dive into the fun part! Grab your supplies and let’s get making.
Step 1: Creating the Dragonfly’s Adorable Body
Start with your chenille pipe cleaner. Fold it in half – this gives you a nice sturdy base. Now, carefully slide your large bead onto the folded end. This will be your dragonfly’s head! Next, thread 3 to 5 of your medium beads onto both ends of the pipe cleaner. These will form the sweet, segmented body. Once your beads are on, gently twist the ends of the pipe cleaner together right underneath the beads. This keeps everything snug and secure. You’ve already got the basic shape!
Step 2: Crafting the Delicate Wings
Time for the wings! Take one of your sparkly or mesh pipe cleaners and bend it into a figure-eight shape. This creates two loops, which are the first set of wings. Super easy, right? Now, do the exact same thing with the second sparkly pipe cleaner to create the other set of wings. You should have four beautiful wings in total! Twist both of these figure-eight shapes together in the very center, where they meet. Then, carefully nestle this twisted center between the head bead and the body beads you already attached. It looks like it’s ready to take flight already!
Step 3: Attaching Your Dragonfly to Its New Home
Now for the final touch: attaching your creation to the key ring. Take that little bit of pipe cleaner end you have left from making the body. Wrap it securely around your key ring or lobster clasp. Give it a good twist so it’s nice and firm. If you want an extra-secure hold, you can use your jewelry pliers to gently clamp down on the twisted ends. And voilà! Your dragonfly is ready to accompany you everywhere.
Step 4: Adding Those Extra Touches (Optional Fun!)
This is where you can really let your personality shine! If you have googly eyes, glue them onto the head bead to give your dragonfly a super cute, wide-eyed look. You can tie a tiny ribbon bow around the “neck” (where the head bead meets the body) for a touch of sweetness. Or, get really creative with markers or paint pens and add little designs, dots, or even initials onto the wings or body. It’s these little details that make each one so special!
Swaps, Twists, and Creative Upgrades
These keychains are so adaptable! Feel free to experiment:
- Bead Variety: Use different shapes and sizes of beads! Wooden beads, alphabet beads, or even small charms can add a unique touch.
- Wing Designs: Instead of a figure-eight, try different wing shapes. You could make them more rounded, pointed, or even add smaller loops.
- Color Combinations: Don’t be afraid to mix and match pipe cleaner and bead colors. Think rainbow, ombre, or even contrasting colors for a bold look.
- Glow-in-the-Dark Fun: Use glow-in-the-dark pipe cleaners and beads for a magical night-time surprise! If you enjoyed making these, you might also have fun with our DIY Bioplastic Suncatchers or learning how to Make Glow-in-the-Dark Bubbles!
Tips for Crafting Success
Here are a few little tips I’ve picked up along the way to make your crafting experience even smoother:
- Pipe Cleaner Grip: If your pipe cleaners are a bit slippery, especially the fuzzy ones, try twisting them a little tighter.
- Bead Size Matters: Make sure your beads have holes large enough to thread onto the pipe cleaner easily.
- Wing Stability: When twisting the wings together in the center, make sure the twist is firm. This prevents the wings from fanning out too much.
- Prep Ahead: You can pre-cut your pipe cleaners or pre-string your beads if you’re making a bunch for a party or event. It makes assembly even faster! If you’re planning a crafting party, you might also enjoy making something delicious like these Easy Cake Mix Toffee Bars or these fun Kool-Aid Gummy Treats.
How to Keep Your Dragonflies Flutter-Ready
These little guys are pretty durable, but here are a few tips for keeping them looking their best:
- Storage: Store them in a small bag or a craft box when not in use to prevent the pipe cleaners from getting bent out of shape.
- Cleaning: If they get a little dusty, a gentle wipe with a dry cloth or a very soft brush should do the trick. Avoid getting them wet.
- Shelf Life: Honestly, as long as they’re stored properly, they should last for ages! The pipe cleaner material is quite resilient.
Frequently Asked Questions
Got a question? We’ve got answers!
Q1: Can kids make these on their own?
Yes, with a little supervision! Younger children might need help with the twisting of the pipe cleaners, but the beading is usually a hit. It’s a great activity for developing fine motor skills.
Q2: Can I use string instead of pipe cleaners for the wings?
You could try, but pipe cleaners are ideal because they hold their shape and are easy to twist securely. If you use string, you’d likely need to stiffen it with glue or use a craft wire.
Q3: What if I don’t have sparkly pipe cleaners?
No problem at all! Any color of pipe cleaner will look fantastic. You can also try cutting out wing shapes from stiffened felt or even clear plastic for a different effect. If you’re looking for more colorful crafts, check out our Blueberry Lemon Ricotta Pancakes for a breakfast treat, or our Blueberry Cheesecake Swirl Rolls for a delightful bake!
Happy crafting, everyone! We hope you have as much fun making these DIY Dragonfly Keychains as we do. Don’t forget to share your creations – we’d love to see them! And for more crafty inspiration and delicious recipes, be sure to follow us on Pinterest!
DIY Dragonfly Keychains
Equipment
- Jewelry Pliers (optional)
- Twist Tool (optional)
Ingredients
For the Dragonfly Keychains
Optional Extras
- Googly Eyes for extra personality
- Craft Glue to secure eyes
- Small Ribbon for a bow
Instructions
- Step 1: Creating the Dragonfly's Adorable Body
Start with your chenille pipe cleaner. Fold it in half – this gives you a nice sturdy base. Now, carefully slide your large bead onto the folded end. This will be your dragonfly's head! Next, thread 3 to 5 of your medium beads onto both ends of the pipe cleaner. These will form the sweet, segmented body. Once your beads are on, gently twist the ends of the pipe cleaner together right underneath the beads. This keeps everything snug and secure. You've already got the basic shape! - Step 2: Crafting the Delicate Wings
Time for the wings! Take one of your sparkly or mesh pipe cleaners and bend it into a figure-eight shape. This creates two loops, which are the first set of wings. Super easy, right? Now, do the exact same thing with the second sparkly pipe cleaner to create the other set of wings. You should have four beautiful wings in total! Twist both of these figure-eight shapes together in the very center, where they meet. Then, carefully nestle this twisted center between the head bead and the body beads you already attached. It looks like it's ready to take flight already! - Step 3: Attaching Your Dragonfly to Its New Home
Now for the final touch: attaching your creation to the key ring. Take that little bit of pipe cleaner end you have left from making the body. Wrap it securely around your key ring or lobster clasp. Give it a good twist so it’s nice and firm. If you want an extra-secure hold, you can use your jewelry pliers to gently clamp down on the twisted ends. And voilà! Your dragonfly is ready to accompany you everywhere. - Step 4: Adding Those Extra Touches (Optional Fun!)
This is where you can really let your personality shine! If you have googly eyes, glue them onto the head bead to give your dragonfly a super cute, wide-eyed look. You can tie a tiny ribbon bow around the "neck" (where the head bead meets the body) for a touch of sweetness. Or, get really creative with markers or paint pens and add little designs, dots, or even initials onto the wings or body. It’s these little details that make each one so special!