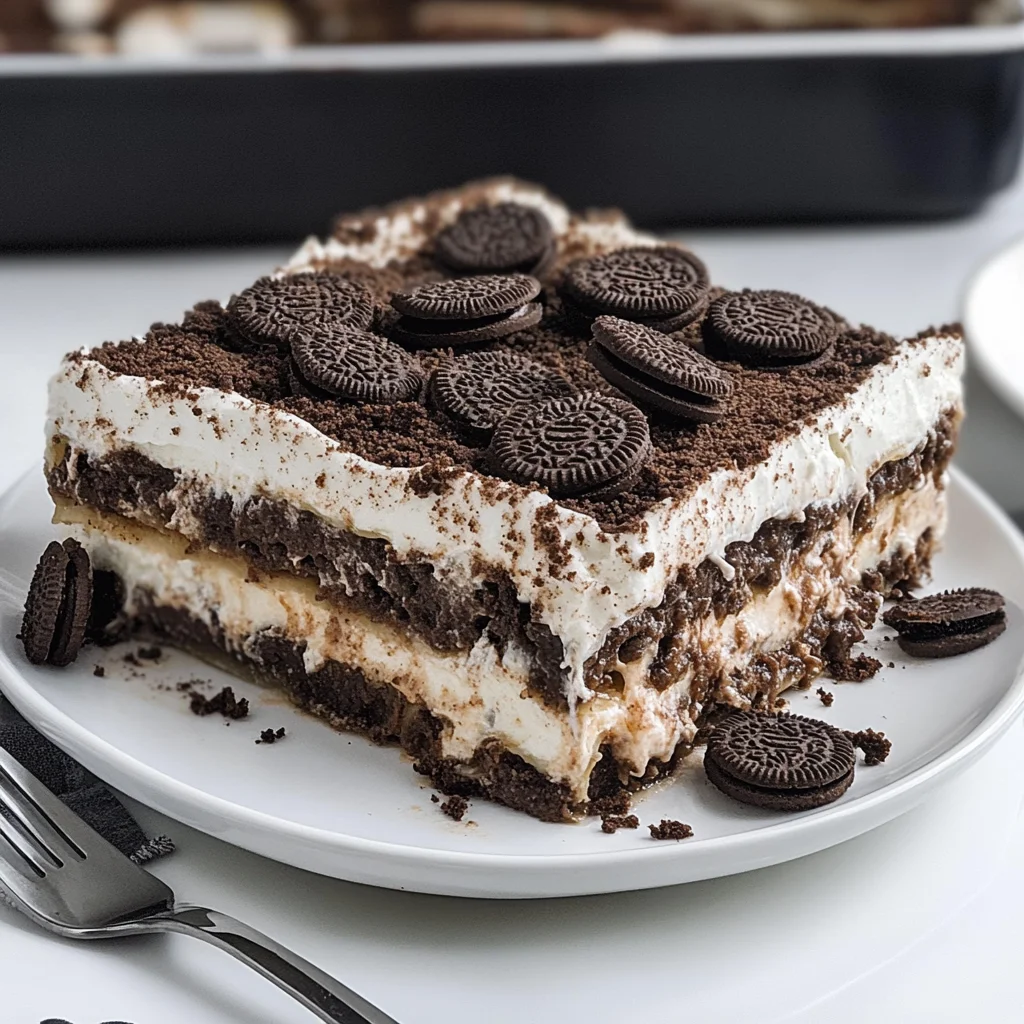
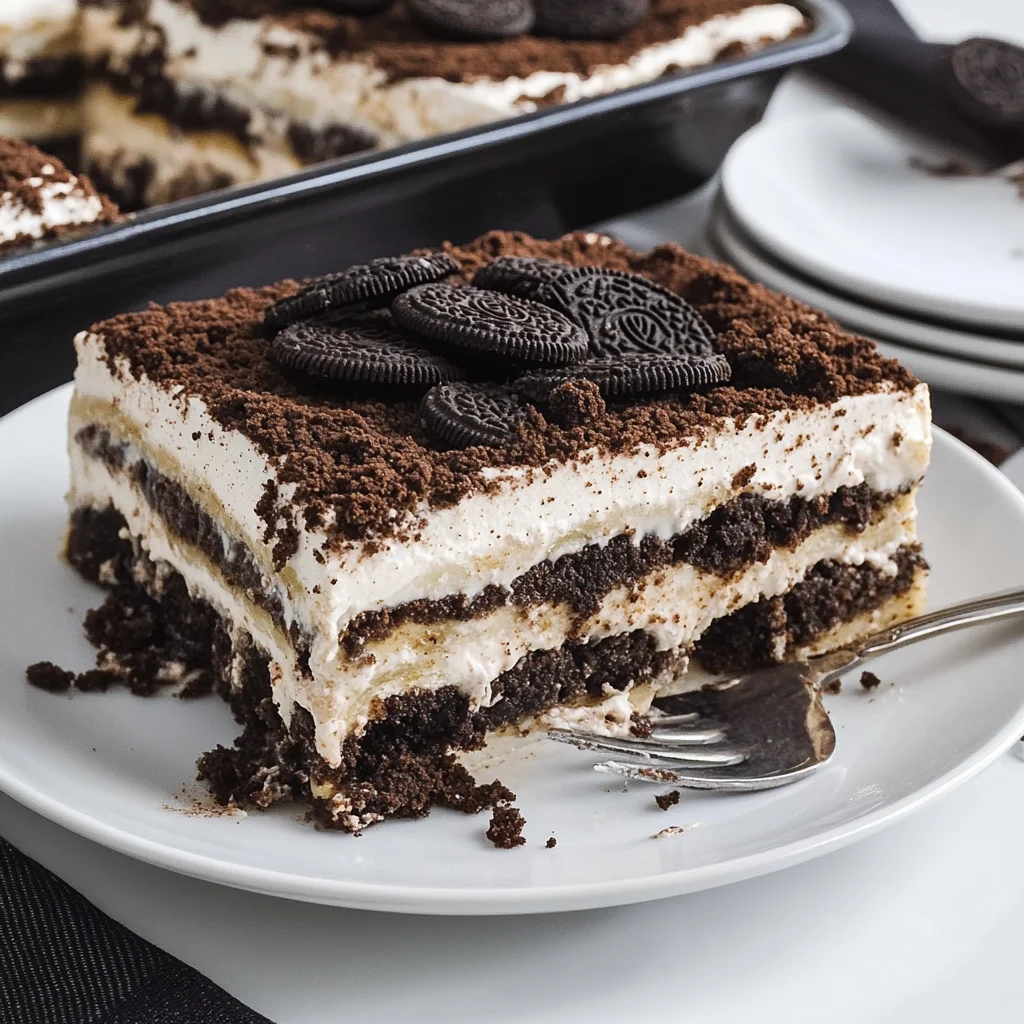
Remember those childhood sleepovers, the late-night giggles, and the shared secrets over a bowl of something sweet and utterly delicious? This Oreo Lasagna brings all those cozy feelings rushing back! It’s not really lasagna, of course, but this layered no-bake dessert is just as satisfying and oh-so-easy to whip up. Perfect for potlucks, holidays, or just a Tuesday treat, this cookie-loaded creation is guaranteed to be a hit!
Why You’ll Love Oreo Lasagna
- Fast: Seriously, once you have your ingredients, this comes together in a flash.
- Easy: No baking skills required! Just a few simple steps and you’ve got dessert magic.
- Giftable: Whip up a batch and share it with friends, neighbors, or coworkers – it’s a guaranteed crowd-pleaser!
- Crowd-pleasing: Who can resist layers of cookies, cream cheese, and chocolate pudding? It’s a universal favorite!
Ingredients
Gathering your ingredients is half the fun, and with this recipe, it’s a breeze! Here’s what you’ll need:
For the Dreamy Oreo Crust:
- 48 Oreo cookies, finely crushed (that’s about 4 sleeves!)
- 10 tablespoons salted butter, melted (makes sure it’s not too hot!)
For the Creamy Dream Cheese Layer:
- 12 ounces cream cheese, softened to room temperature (this is key for smoothness!)
- ¾ cup powdered sugar (also known as confectioners’ sugar)
- 8 ounces Cool Whip, thawed (don’t rush this, let it soften gently!)
- 1 teaspoon vanilla extract (for that extra hint of sweetness)
- 6 Oreo cookies, finely crushed (more Oreos? Yes, please!)
For the Luscious Chocolate Pudding Layer:
- 3 cups half and half or whole milk (half and half makes it richer, but milk works too!)
- 7.8 ounces (2 3.9-ounce) boxes of instant chocolate pudding mix (the regular kind, not sugar-free unless you prefer)
- 6 Oreo cookies, finely crushed (layering is everything!)
For the Irresistible Topping:
- 8 ounces Cool Whip, thawed (the final fluffy cloud!)
- 12 Oreo cookies, finely crushed (the grand finale of cookie goodness!)
How to Make Oreo Lasagna
Alright, let’s get this party started! Grab your favorite apron, and let’s make some dessert magic together.
Step 1: The Cookie Crust Foundation
First things first, let’s get that crust ready. In a good-sized bowl, dump in your 48 finely crushed Oreo cookies. Pour in that melted butter and give it a good stir until everything is nicely combined and looks like damp sand. Now, pour this glorious mixture into a 9×13 inch baking dish. Gently press it down evenly with the bottom of a glass or your hands to create a nice, firm base. Pop this into the fridge while we work on the next layer. Keeping it chilled helps it set up beautifully.
Step 2: Crafting the Cream Cheese Layer
Time for the creamy part! In another large bowl, grab your softened cream cheese and the powdered sugar. Using an electric mixer (or a whisk and some elbow grease!), beat these together until they’re super smooth and creamy. No lumps allowed here!
Step 3: Adding the Cool Whip and Oreos
Now, gently fold in your thawed Cool Whip and the vanilla extract into the cream cheese mixture. Mix it until it’s all just combined and looks light and fluffy. Then, carefully fold in those 6 crushed Oreo cookies. This layer is pure bliss!
Step 4: Layering the Cream Cheese Goodness
Carefully spread this dreamy cream cheese mixture evenly over your chilled Oreo crust. Try to get it as smooth as possible for that perfect layered look. Back into the fridge it goes while we prepare the pudding!
Step 5: Whipping Up the Chocolate Pudding
In a large bowl, whisk together your half and half (or milk) and the two boxes of instant chocolate pudding mix. Keep whisking until the pudding starts to thicken up. It’s like magic happening right before your eyes! Once it’s nicely thickened, gently fold in the 6 crushed Oreo cookies.
Step 6: Adding the Pudding Layer
Now, spread this chocolatey goodness evenly over the cream cheese layer. Make sure to cover it all the way to the edges. Give it a quick 5-minute chill in the fridge – just a little boost to help things set.
Step 7: The Grand Finale Topping
Almost there! Spread the remaining 8 ounces of thawed Cool Whip evenly over the pudding layer. This is our fluffy, white cloud. Then, sprinkle those final 12 crushed Oreo cookies all over the top. It looks so inviting, doesn’t it?
Step 8: Chilling for Perfection
The hardest part is waiting! Cover your Oreo Lasagna and refrigerate it for at least four hours. This chilling time is crucial for all the layers to meld together and set properly. The longer it chills, the better it tastes, trust me! You can even make this the night before for an effortless dessert.
Substitutions & Additions
Feeling creative? This Oreo Lasagna is a fantastic base for all sorts of delicious upgrades. Here are a few ideas:
- Oreo Variations: Try using Golden Oreos for a different flavor, or even Mint Oreos for a refreshing twist!
- Chocolate Lover’s Dream: Add a layer of chocolate ganache between the cream cheese and pudding layers for extra decadence.
- Fruity Fun: A layer of fresh berries, like strawberries or raspberries, can add a lovely tartness that contrasts beautifully with the sweet layers. If you love fruit, you might also enjoy my easy summer peach bread recipe.
- Caramel Drizzle: A drizzle of caramel sauce over the top before the final Oreo sprinkle adds another dimension of flavor.
- Peanut Butter Power: Swirl some peanut butter into the cream cheese layer for a classic flavor combination.
Tips for Success
To ensure your Oreo Lasagna is an absolute showstopper, here are a few of my favorite tips:
- Room Temperature Cream Cheese: This is super important for a smooth, lump-free cream cheese layer. Don’t skip this step!
- Don’t Overmix the Cool Whip: When folding the Cool Whip into the cream cheese and pudding, be gentle. Overmixing can deflate its fluffiness.
- Crush Those Oreos Well: For the crust, you want fine crumbs so it holds together. For the layers, slightly larger pieces add nice texture.
- Chill Time is Key: Resist the urge to dig in too soon! The chilling time allows the dessert to set and the flavors to meld. If you’re in a hurry, you can pop it in the freezer for about an hour, but be careful not to freeze it solid.
- Prep Ahead: This dessert is perfect for making a day in advance. In fact, I think it tastes even better the next day! It’s a great way to get ahead on party prep, just like my easy cake mix toffee bars can be made ahead too.
How to Store Oreo Lasagna
Got leftovers? Lucky you! Store your Oreo Lasagna tightly covered in the refrigerator. It should stay delicious for up to 3-4 days. The cookie crust might soften a bit over time, but it will still be wonderfully tasty.
FAQs
Can I make this Oreo Lasagna dairy-free?
You sure can! You’d need to use dairy-free Oreos (check the packaging!), dairy-free cream cheese, and a dairy-free whipped topping like coconut whipped cream. For the pudding, opt for a dairy-free milk alternative like almond or soy milk, and use a dairy-free instant chocolate pudding mix.
Can I bake this dessert?
This recipe is designed to be no-bake, which is part of its charm and ease! Baking it would change the texture of the cream cheese and pudding layers significantly.
What kind of dish is best for this recipe?
A standard 9×13 inch baking dish is perfect. You can use glass, ceramic, or metal. If you want to serve it in individual portions, you could also layer it in small glasses or jars.
Loved this recipe? Make sure to follow us on Pinterest for more delicious and easy recipes!
Decadent Oreo Lasagna Recipe
Equipment
- 9×13-inch baking dish
- Bowl
- Electric mixer
- Glass or hands
Ingredients
For the Dreamy Oreo Crust
- 48 Oreo cookies Oreo cookies finely crushed (that’s about 4 sleeves!)
- 10 tablespoons salted butter melted (makes sure it’s not too hot!)
For the Creamy Dream Cheese Layer
- 12 ounces cream cheese softened to room temperature (this is key for smoothness!)
- 3/4 cup powdered sugar also known as confectioners’ sugar
- 8 ounces Cool Whip thawed (don’t rush this, let it soften gently!)
- 1 teaspoon vanilla extract for that extra hint of sweetness
- 6 Oreo cookies Oreo cookies finely crushed (more Oreos? Yes, please!)
For the Luscious Chocolate Pudding Layer
- 3 cups half and half or whole milk half and half makes it richer, but milk works too!
- 2 3.9-ounce boxes instant chocolate pudding mix the regular kind, not sugar-free unless you prefer
- 6 Oreo cookies Oreo cookies finely crushed (layering is everything!)
For the Irresistible Topping
- 8 ounces Cool Whip thawed (the final fluffy cloud!)
- 12 Oreo cookies Oreo cookies finely crushed (the grand finale of cookie goodness!)
Instructions
- First things first, let’s get that crust ready. In a good-sized bowl, dump in your 48 finely crushed Oreo cookies. Pour in that melted butter and give it a good stir until everything is nicely combined and looks like damp sand. Now, pour this glorious mixture into a 9×13 inch baking dish. Gently press it down evenly with the bottom of a glass or your hands to create a nice, firm base. Pop this into the fridge while we work on the next layer. Keeping it chilled helps it set up beautifully.
- Time for the creamy part! In another large bowl, grab your softened cream cheese and the powdered sugar. Using an electric mixer (or a whisk and some elbow grease!), beat these together until they’re super smooth and creamy. No lumps allowed here!
- Now, gently fold in your thawed Cool Whip and the vanilla extract into the cream cheese mixture. Mix it until it’s all just combined and looks light and fluffy. Then, carefully fold in those 6 crushed Oreo cookies. This layer is pure bliss!
- Carefully spread this dreamy cream cheese mixture evenly over your chilled Oreo crust. Try to get it as smooth as possible for that perfect layered look. Back into the fridge it goes while we prepare the pudding!
- In a large bowl, whisk together your half and half (or milk) and the two boxes of instant chocolate pudding mix. Keep whisking until the pudding starts to thicken up. It’s like magic happening right before your eyes! Once it’s nicely thickened, gently fold in the 6 crushed Oreo cookies.
- Now, spread this chocolatey goodness evenly over the cream cheese layer. Make sure to cover it all the way to the edges. Give it a quick 5-minute chill in the fridge – just a little boost to help things set.
- Almost there! Spread the remaining 8 ounces of thawed Cool Whip evenly over the pudding layer. This is our fluffy, white cloud. Then, sprinkle those final 12 crushed Oreo cookies all over the top. It looks so inviting, doesn’t it?
- The hardest part is waiting! Cover your Oreo Lasagna and refrigerate it for at least four hours. This chilling time is crucial for all the layers to meld together and set properly. The longer it chills, the better it tastes, trust me! You can even make this the night before for an effortless dessert.
Notes
* Chocolate Lover’s Dream: Add a layer of chocolate ganache between the cream cheese and pudding layers for extra decadence.
* Fruity Fun: A layer of fresh berries, like strawberries or raspberries, can add a lovely tartness that contrasts beautifully with the sweet layers. If you love fruit, you might also enjoy my easy summer peach bread recipe.
* Caramel Drizzle: A drizzle of caramel sauce over the top before the final Oreo sprinkle adds another dimension of flavor.
* Peanut Butter Power: Swirl some peanut butter into the cream cheese layer for a classic flavor combination. To ensure your Oreo Lasagna is an absolute showstopper, here are a few of my favorite tips: * Room Temperature Cream Cheese: This is super important for a smooth, lump-free cream cheese layer. Don’t skip this step!
* Don’t Overmix the Cool Whip: When folding the Cool Whip into the cream cheese and pudding, be gentle. Overmixing can deflate its fluffiness.
* Crush Those Oreos Well: For the crust, you want fine crumbs so it holds together. For the layers, slightly larger pieces add nice texture.
* Chill Time is Key: Resist the urge to dig in too soon! The chilling time allows the dessert to set and the flavors to meld. If you’re in a hurry, you can pop it in the freezer for about an hour, but be careful not to freeze it solid.
* Prep Ahead: This dessert is perfect for making a day in advance. In fact, I think it tastes even better the next day! It’s a great way to get ahead on party prep, just like my easy cake mix toffee bars can be made ahead too. Got leftovers? Lucky you! Store your Oreo Lasagna tightly covered in the refrigerator. It should stay delicious for up to 3-4 days. The cookie crust might soften a bit over time, but it will still be wonderfully tasty.