Oh, the magic of s’mores! Just thinking about them transports me back to childhood summer nights, crackling campfires, and sticky fingers covered in melted chocolate and toasted marshmallow. There’s something truly special about that classic combination, isn’t there?
But let’s be honest, sometimes you crave that nostalgic goodness without the smoke, the struggle to find the perfect stick, or the fear of burning your marshmallow to a crisp. That’s where these S’More Bars come in! They capture all the gooey, chocolatey, graham cracker perfection of your favorite campfire treat, but they’re made right in your kitchen with minimal effort. Trust me, these bars are an absolute game-changer, bringing all those warm, cozy memories straight to your dessert plate!
Why You’ll Love S’More Bars II
These S’More Bars aren’t just a delicious treat; they’re a dream come true for anyone who loves easy, impactful desserts. If you’re anything like me, you adore a dessert that comes together with minimal fuss, just like our decadent no-bake Oreo cheesecake bars, and these S’More Bars fit right into that category. Here’s why they’ll quickly become a staple in your recipe box:
- Fast: From start to oven, you’re looking at minutes, not hours. Perfect for those spontaneous dessert cravings!
- Easy: No fancy techniques or equipment required. If you can melt butter, you can make these.
- Giftable: Wrap these beauties up in a pretty box or bag, and you’ve got a homemade gift that everyone will adore.
- Crowd-pleasing: Seriously, who can say no to s’mores? These are guaranteed to disappear quickly at any gathering.
Ingredients
Gathering your ingredients for these S’More Bars is as simple as it gets. You probably have most of these on hand already!
- 1 ½ cups butter, melted: I always use unsalted butter so I can control the saltiness in my baking. Melting it is key to a perfectly cohesive graham cracker crust!
- 4 cups graham cracker crumbs: You can buy pre-crushed crumbs for ultimate ease, or crush your own whole graham crackers in a food processor for a fresher taste. About 2-3 sleeves of crackers should do the trick!
- 6 (1.5 ounce) milk chocolate candy bars: Good old Hershey’s milk chocolate bars are the classic choice here for that authentic s’mores flavor, but feel free to experiment with your favorite milk chocolate brand.
- 2 cups miniature marshmallows: Mini marshmallows are perfect because they spread out beautifully and get all delightfully gooey without creating too thick of a layer.
How to Make S’More Bars II
Let’s get this s’mores party started! You’ll be amazed at how quickly these come together.
- Preheat Your Oven: First things first, get your oven ready. Preheat it to 350 degrees F (175 degrees C).
- Grease Your Pan: Grab a 9×13 inch baking pan. Lightly grease it with butter or cooking spray. This tiny step is crucial for making sure your bars come out easily later!
- Mix the Crumb Base: In a medium bowl, combine your melted butter and graham cracker crumbs. Stir them together until everything is well moistened and looks like wet sand.
- Press Half the Crust: Take half of that delicious graham cracker mixture and press it firmly into the bottom of your prepared pan. You want a nice, even layer. I like to use the bottom of a glass or a flat measuring cup to really get it packed down.
- Melt the Chocolate: Now for the good stuff! Break up your milk chocolate candy bars and place them in a microwave-safe bowl. Microwave in 30-second intervals, stirring frequently, until the chocolate is smooth and melted. Alternatively, you can use a metal bowl set over a pan of simmering water, stirring until smooth. For easier spreading, I sometimes pop the crust in the fridge for 10-15 minutes while the chocolate melts.
- Spread the Chocolate: Remove the melted chocolate from the heat and carefully spread it evenly over the graham cracker layer in your pan. Get it right to the edges!
- Add the Marshmallows: Sprinkle your miniature marshmallows generously and evenly over the chocolate layer. You want a fluffy cloud of marshmallow goodness!
- Top with Remaining Crumb: Crumble the remaining graham cracker mixture over the marshmallows. Don’t press this layer down; just let it sit lightly on top.
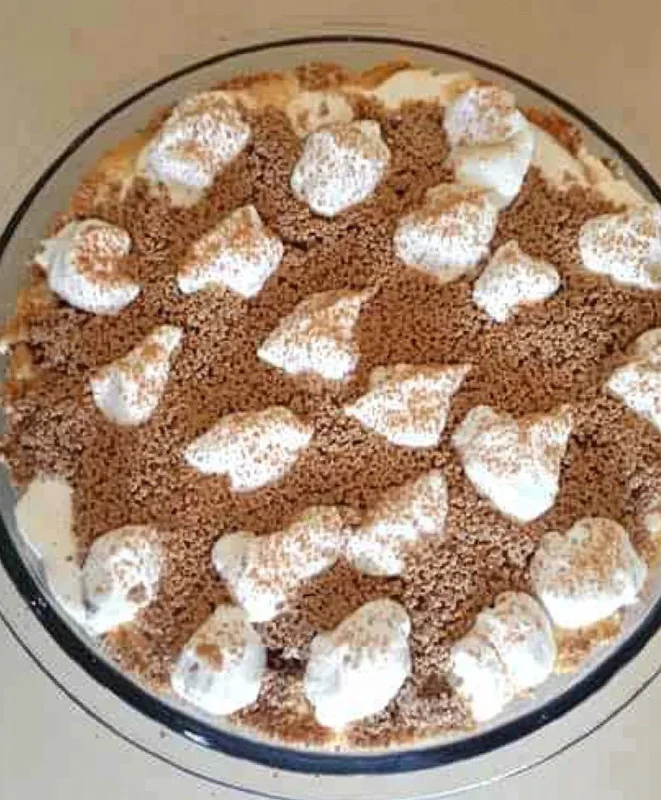
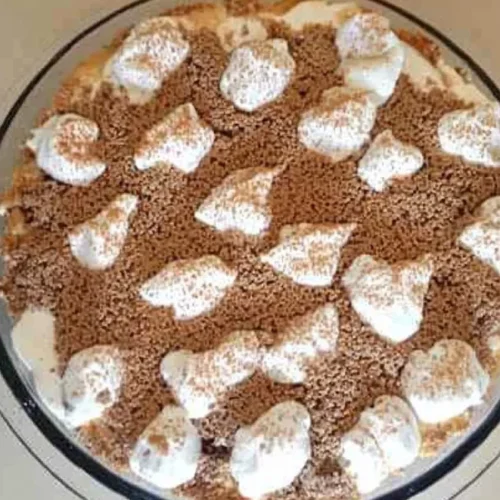
- Bake to Perfection: Pop your pan into the preheated oven and bake for 15 minutes. You’re looking for those marshmallows to be golden and puffy, and the top graham cracker layer to be lightly toasted. Keep a close eye on them to prevent burning!
- Cool Completely: This is the hardest part – waiting! Let the bars cool completely in the pan before attempting to cut them into squares. The chocolate and marshmallows need time to set, or you’ll have a delightful, gooey mess (which isn’t bad, but not great for neat squares!).
Substitutions & Additions
These S’More Bars are fantastic as is, but they’re also super versatile! Feel free to get creative:
- Different Chocolates: Swap out the milk chocolate for dark chocolate for a richer flavor, or use white chocolate for a sweeter twist. You could even use peanut butter cups, chopped, instead of chocolate bars for a Reese’s s’mores vibe!
- Crunchy Extras: Mix in some chopped nuts (like pecans or walnuts) into the graham cracker crust for extra texture.
- Flavor Boosts: A tiny pinch of cinnamon in the graham cracker crust can add a lovely warmth.
- Drizzles & Toppings: Once cooled, you can drizzle extra melted chocolate, caramel, or even a little homemade brown sugar sauce over the top for an extra layer of decadence. You could even whip up a batch of easy Cool Whip pudding frosting for an extra sweet, fluffy cloud on top of each square for a truly over-the-top treat.
- Sprinkle Fun: Add some festive sprinkles to the top while the chocolate is still slightly warm, especially if you’re making them for a holiday or party!
Tips for Success
Making these S’More Bars is straightforward, but a few little tricks can ensure they turn out absolutely perfect every time:
- Don’t Rush the Cooling: I know, I know, it’s torture, but seriously, let them cool completely! This is the most crucial step for clean cuts. If you try to cut them while warm, the chocolate and marshmallow layers will ooze, and you’ll end up with a sticky, beautiful mess (still delicious, but not as pretty).
- Even Layers are Key: Take a moment to press the bottom graham cracker crust firmly and spread the chocolate and marshmallows evenly. This ensures every bite has the perfect balance of flavors and textures.
- Watch the Marshmallows: Ovens vary, so keep an eye on your marshmallows during baking. They can go from perfectly golden to burnt in a flash! You want them lightly toasted and puffy, not charred.
- Grease Well: Don’t skimp on greasing your pan. It makes removal and cutting so much easier. You can also line the pan with parchment paper, leaving an overhang on the sides, to lift the whole slab out for easier cutting.
- Prep Ahead: You can make the graham cracker crust ahead of time and store it covered in the fridge for a day. This speeds up assembly even more when you’re ready to bake!
How to Store S’More Bars II
These S’More Bars are best enjoyed fresh, but they store beautifully too!
- Room Temperature: Store leftover bars in an airtight container at room temperature for up to 2-3 days.
- Refrigeration: For longer storage, or if your kitchen is particularly warm, you can keep them in an airtight container in the refrigerator for up to 5 days. Just bring them to room temperature for about 15-20 minutes before serving for optimal gooeyness.
- Freezing: While you can freeze them, the texture of the marshmallows might change slightly upon thawing. If you do freeze, wrap individual bars tightly in plastic wrap, then place them in an airtight freezer-safe container for up to 1 month. Thaw at room temperature.
FAQs
Got questions? I’ve got answers!
Can I use different types of chocolate?
Absolutely! While milk chocolate gives that classic s’mores taste, feel free to use semi-sweet, dark chocolate, or even white chocolate chips if you prefer. Just be sure to melt them smoothly.
Do I have to melt the chocolate?
Yes, melting the chocolate is essential. It creates a smooth, even layer that binds the marshmallows to the crust. If you just lay whole chocolate bars, they won’t spread as nicely and might make the bars hard to cut.
How long do S’More Bars last?
When stored properly in an airtight container, these bars will stay fresh and delicious at room temperature for about 2-3 days, or in the refrigerator for up to 5 days.
Can I make these S’More Bars ahead of time for a party?
Yes, you definitely can! They’re perfect for making a day or two in advance. Just ensure they’re stored in an airtight container to keep them fresh and gooey.
For more delicious and easy recipe inspiration, be sure to follow us on Pinterest!
Irresistibly Easy S'More Bars
Equipment
- 9x13-inch baking pan
- Medium bowl
- Microwave-safe bowl
- Spatula
- Bottom of a glass or flat measuring cup
- Food Processor (optional)
Ingredients
- 1.5 cups butter melted, unsalted is preferred
- 4 cups graham cracker crumbs pre-crushed or crush your own (about 2-3 sleeves of crackers)
- 6 bars milk chocolate candy bars 1.5 ounce each, Hershey's is classic, or your favorite brand
- 2 cups miniature marshmallows
Instructions
- Step 1: Preheat your oven to 350 degrees F (175 degrees C).
- Step 2: Lightly grease a 9x13 inch baking pan with butter or cooking spray. This is crucial for easy removal.
- Step 3: In a medium bowl, combine your melted butter and graham cracker crumbs. Stir them together until everything is well moistened and looks like wet sand.
- Step 4: Take half of the graham cracker mixture and press it firmly into the bottom of your prepared pan. Use the bottom of a glass or a flat measuring cup to pack it down into an even layer.
- Step 5: Break up your milk chocolate candy bars and place them in a microwave-safe bowl. Microwave in 30-second intervals, stirring frequently, until the chocolate is smooth and melted. Alternatively, use a metal bowl set over a pan of simmering water, stirring until smooth.
- Step 6: Remove the melted chocolate from the heat and carefully spread it evenly over the graham cracker layer in your pan, right to the edges.
- Step 7: Sprinkle your miniature marshmallows generously and evenly over the chocolate layer, aiming for a fluffy cloud of marshmallow goodness.
- Step 8: Crumble the remaining graham cracker mixture over the marshmallows. Do not press this layer down; just let it sit lightly on top.
- Step 9: Pop your pan into the preheated oven and bake for 15 minutes. Watch closely for the marshmallows to be golden and puffy, and the top graham cracker layer to be lightly toasted to prevent burning.
- Step 10: Let the bars cool completely in the pan before attempting to cut them into squares. This is the most crucial step, as the chocolate and marshmallows need time to set for clean cuts.