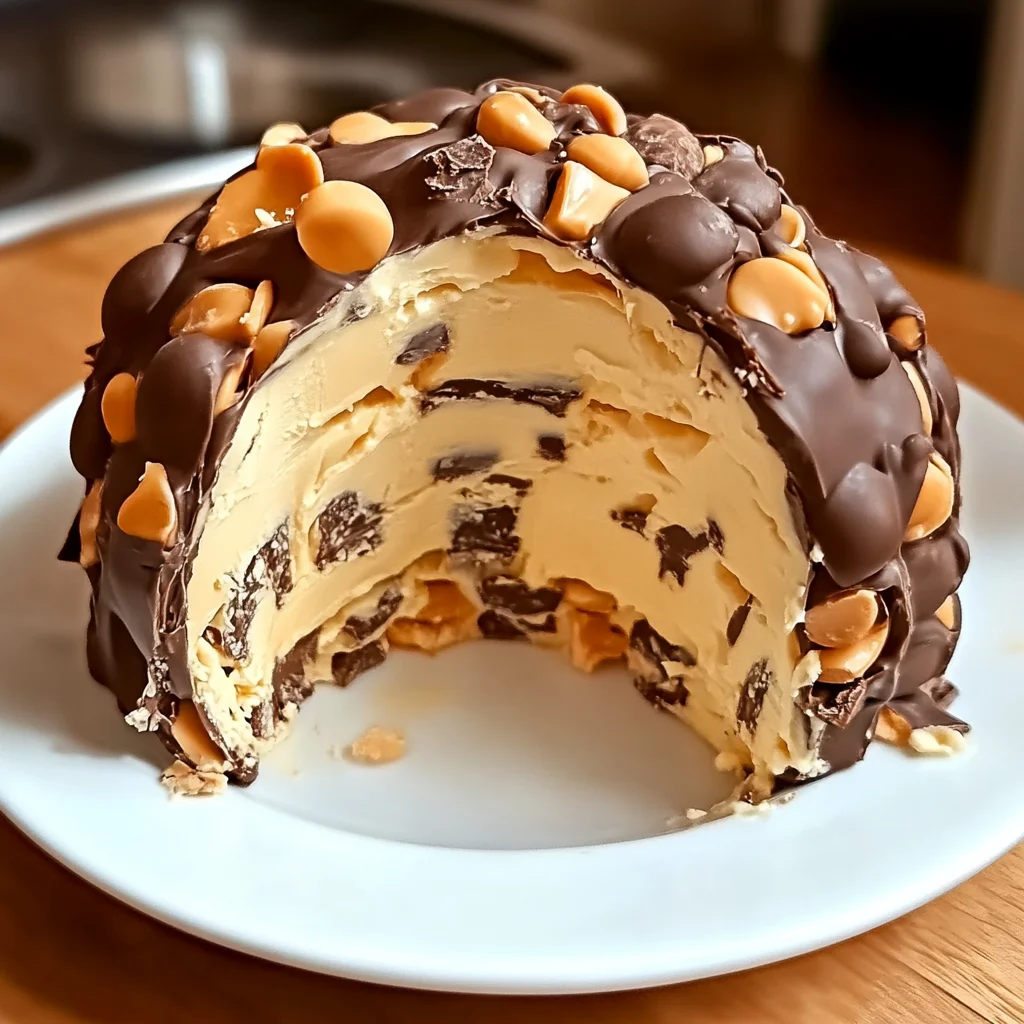
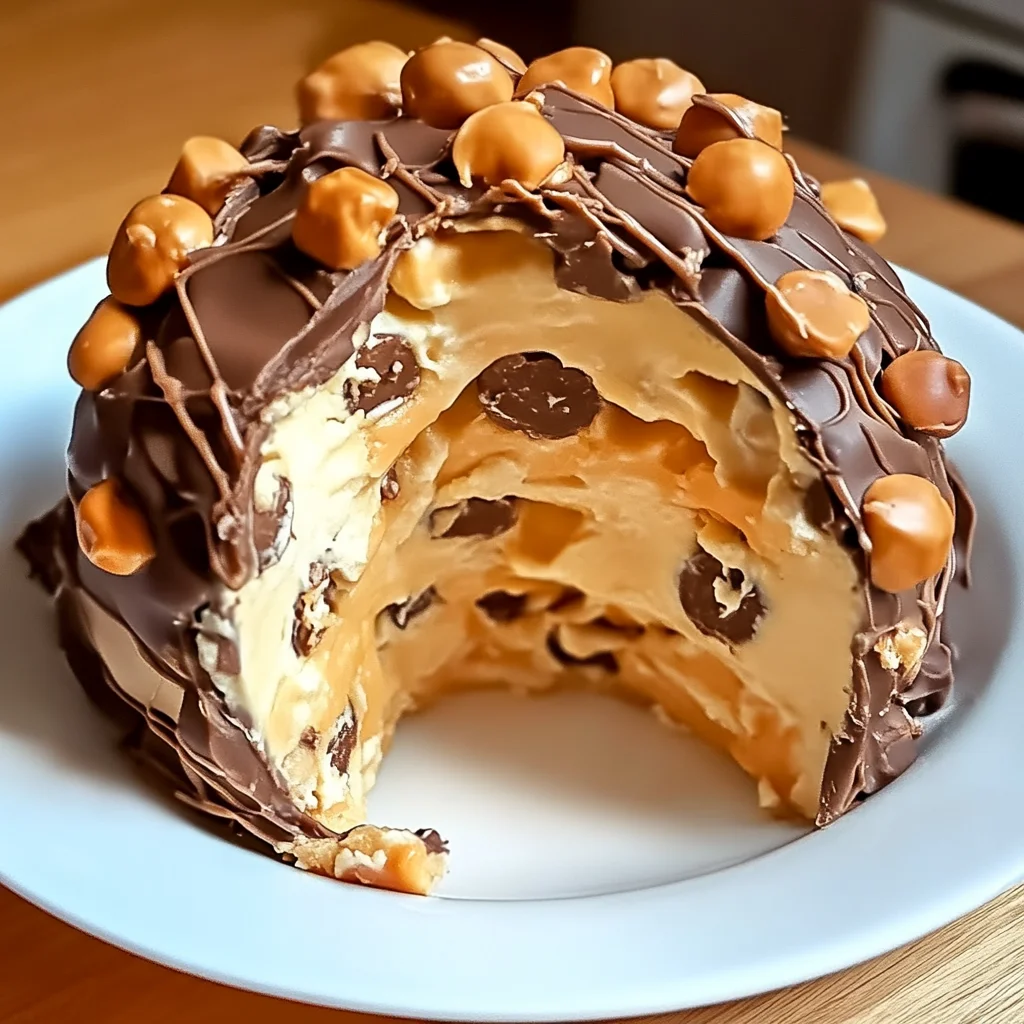
Remember those childhood afternoons spent digging into a jar of peanut butter with a spoon? Or the sheer joy of unwrapping a Reese’s candy? This Reese’s Peanut Butter Bliss Cheese Ball is a blast from the past, bringing all those nostalgic flavors together in one incredibly easy, no-bake, and utterly delicious appetizer. It’s the perfect treat for holidays, parties, or just a cozy night in. You won’t believe how simple it is to whip up this delightful confection that will have everyone begging for the recipe!
Why You’ll Love Reese’s Peanut Butter Bliss Cheese Ball
- Fast: Ready in under 30 minutes of active prep time.
- Easy: No baking required, just mixing and chilling!
- Giftable: Package it up nicely for a sweet homemade gift.
- Crowd-pleasing: It’s a guaranteed hit with peanut butter and chocolate lovers of all ages.
Ingredients
Gathering your ingredients is the first step to peanut butter paradise. Here’s what you’ll need:
- 8 ounces cream cheese, softened: Make sure it’s nice and soft for easy mixing!
- 1/2 cup peanut butter: Your favorite creamy or crunchy variety works here.
- 1/2 cup powdered sugar: For that touch of sweetness.
- 1/4 cup brown sugar: Adds a lovely depth of flavor.
- 1 teaspoon vanilla extract: A little goes a long way for that warm vanilla note.
- 1 cup mini Reese’s Pieces: These are essential for that iconic Reese’s crunch and flavor.
- 1/2 cup mini chocolate chips: Because more chocolate is always a good idea.
- 1/2 cup crushed peanut butter cups (optional): If you’re feeling extra decadent, toss these in!
For the Coating
This is what gives our cheese ball that irresistible outer layer of deliciousness:
- 1/4 cup mini Reese’s Pieces
- 1/4 cup mini chocolate chips
- 1/4 cup crushed peanut butter cups
How to Make Reese’s Peanut Butter Bliss Cheese Ball
Alright, let’s get our hands (or rather, our spatulas) busy! This is so straightforward, you’ll be amazed.
Step 1: Mix the Base
In a medium mixing bowl, add your softened cream cheese, peanut butter, powdered sugar, brown sugar, and vanilla extract. Grab your electric mixer (or a sturdy whisk and some elbow grease!) and blend everything together until it’s perfectly smooth and creamy. You want a consistent texture, no lumps allowed!
Step 2: Fold in the Goodies
Now for the fun part! Gently fold in the mini Reese’s Pieces, mini chocolate chips, and the crushed peanut butter cups if you’re using them. Mix until everything is evenly distributed throughout the creamy base. This is where the magic happens, creating those delightful little pockets of flavor and texture.
Step 3: Shape and Chill
Once everything is nicely combined, it’s time to give your mixture a shape. Use your hands (or a spatula) to form it into a nice, round ball. Then, carefully wrap it up tightly in plastic wrap. Pop it into the refrigerator for at least 1 hour. This chilling step is super important – it helps the cheese ball firm up so it holds its shape and is easier to coat.
Step 4: Prepare the Coating
While your cheese ball is chilling, let’s get the coating ready. In a shallow dish or a pie plate, combine the mini Reese’s Pieces, mini chocolate chips, and crushed peanut butter cups for the outside. Give it a little stir to mix them all up.
Step 5: Coat Your Creation
Once your cheese ball is firm, take it out of the fridge and carefully unwrap it. Now, gently roll the chilled cheese ball in the prepared coating mixture. Make sure to press lightly so the coating adheres all over. You want a beautiful, even coat of all those yummy bits.
Step 6: Serve and Enjoy!
Place your beautifully coated Reese’s Peanut Butter Bliss Cheese Ball on your favorite serving plate. You can serve it immediately or keep it chilled until you’re ready to impress your guests. It’s perfect with graham crackers, pretzels, fruit slices, or just a spoon!
Substitutions & Additions
Feeling creative? This recipe is wonderfully adaptable! If you’re not a fan of Reese’s Pieces, you could try mini M&Ms or even some chopped pretzels for a salty crunch. For an extra layer of flavor, I sometimes like to add a tablespoon of peanut butter powder to the cream cheese mixture. You could also swap out the chocolate chips for white chocolate chips or even butterscotch chips. If you’re looking for other delicious no-bake treats, you might enjoy my easy frozen cool whip candy or these strawberry banana pudding cookies cheesecake dip.
Tips for Success
- Soften the Cream Cheese: This is key! If your cream cheese is too cold, it will be hard to mix and you might end up with a lumpy cheese ball.
- Chill Time is Crucial: Don’t skimp on the chilling time. A well-chilled cheese ball is much easier to handle and coat evenly.
- Gentle Rolling: When coating, be gentle. You don’t want to squish the cheese ball and lose its shape.
- Prep Ahead: You can easily make this cheese ball a day in advance. Just keep it covered in the fridge and roll it in the coating just before serving for the freshest look.
How to Store Reese’s Peanut Butter Bliss Cheese Ball
Leftovers? Lucky you! Store any remaining cheese ball in an airtight container in the refrigerator. It will stay fresh for up to 3-4 days. Just be aware that the coating might soften a bit over time.
FAQs
Can I make this cheese ball ahead of time?
Yes! You can prepare the cheese ball mixture and chill it for up to 24 hours before coating and serving. For the best results, coat it just before you plan to serve it.
What can I serve with this cheese ball?
It’s delicious with a variety of dippers! Graham crackers, pretzels, shortbread cookies, apple slices, and even celery sticks are great options.
Can I freeze this cheese ball?
I don’t recommend freezing this particular cheese ball, as the texture of the cream cheese might change upon thawing. It’s best enjoyed fresh or stored in the refrigerator.
Love discovering new and delicious recipes? Make sure to follow our adventures on Pinterest!

Reese's Peanut Butter Bliss Cheese Ball
Equipment
- medium mixing bowl
- Electric mixer or whisk
- Plastic wrap
- Shallow Dish or Pie Plate
- Serving Plate
Ingredients
For the Cheese Ball Base
- 8 ounces cream cheese softened
- 1/2 cup peanut butter creamy or crunchy
- 1/2 cup powdered sugar
- 1/4 cup brown sugar
- 1 teaspoon vanilla extract
- 1 cup mini Reese's Pieces
- 1/2 cup mini chocolate chips
- 1/2 cup crushed peanut butter cups optional
For the Coating
- 1/4 cup mini Reese's Pieces
- 1/4 cup mini chocolate chips
- 1/4 cup crushed peanut butter cups
Instructions
- In a medium mixing bowl, add your softened cream cheese, peanut butter, powdered sugar, brown sugar, and vanilla extract. Grab your electric mixer (or a sturdy whisk and some elbow grease!) and blend everything together until it's perfectly smooth and creamy. You want a consistent texture, no lumps allowed!
- Now for the fun part! Gently fold in the mini Reese's Pieces, mini chocolate chips, and the crushed peanut butter cups if you’re using them. Mix until everything is evenly distributed throughout the creamy base. This is where the magic happens, creating those delightful little pockets of flavor and texture.
- Once everything is nicely combined, it’s time to give your mixture a shape. Use your hands (or a spatula) to form it into a nice, round ball. Then, carefully wrap it up tightly in plastic wrap. Pop it into the refrigerator for at least 1 hour. This chilling step is super important – it helps the cheese ball firm up so it holds its shape and is easier to coat.
- While your cheese ball is chilling, let’s get the coating ready. In a shallow dish or a pie plate, combine the mini Reese's Pieces, mini chocolate chips, and crushed peanut butter cups for the outside. Give it a little stir to mix them all up.
- Once your cheese ball is firm, take it out of the fridge and carefully unwrap it. Now, gently roll the chilled cheese ball in the prepared coating mixture. Make sure to press lightly so the coating adheres all over. You want a beautiful, even coat of all those yummy bits.
- Place your beautifully coated Reese's Peanut Butter Bliss Cheese Ball on your favorite serving plate. You can serve it immediately or keep it chilled until you’re ready to impress your guests. It’s perfect with graham crackers, pretzels, fruit slices, or just a spoon!