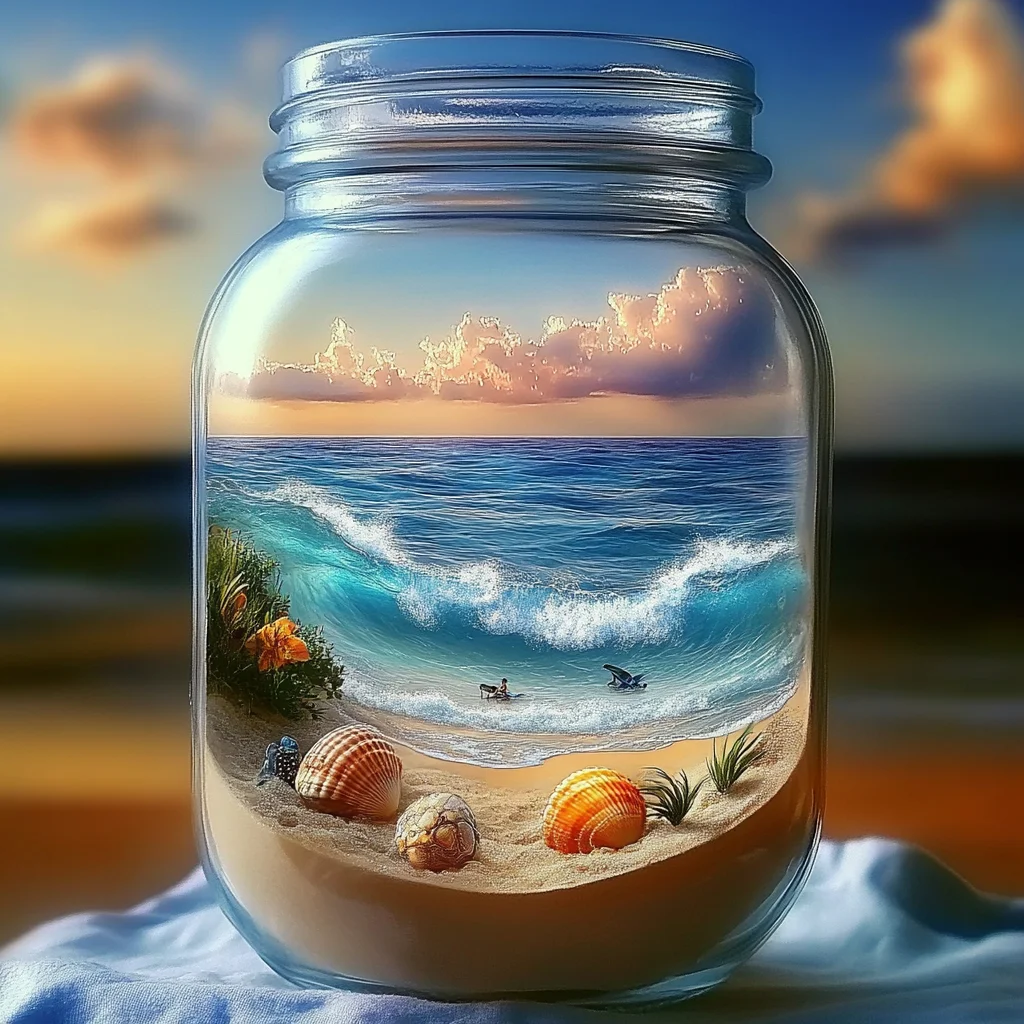
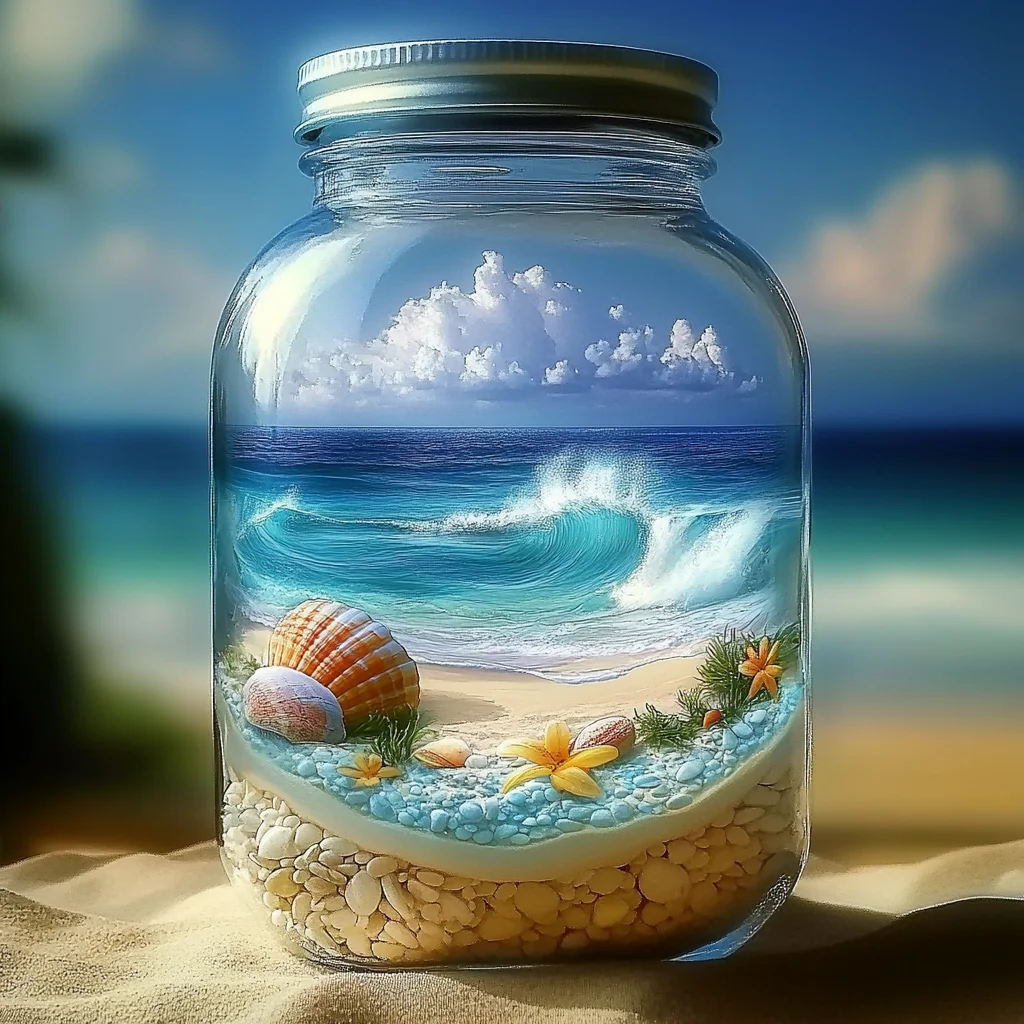
Remember those days when a trip to the beach felt like pure magic? The gentle sound of the waves, the soft feel of sand between your toes, the way the sunlight danced on the water. It’s a feeling of peace and relaxation that can be hard to capture, especially when life gets hectic. Well, I’ve got a little secret for you: you can bring a bit of that beachy bliss right into your home with this super simple, incredibly calming “Beach in a Bottle” craft! It’s the perfect way to create a little slice of tranquility you can hold in your hands, and trust me, it’s as easy as it sounds.
Why You’ll Love Beach-in-a-Bottle Calming Jar
- Fast: Seriously, you can whip this up in under 15 minutes!
- Easy: No complicated steps here, just simple layering and a little bit of magic.
- Giftable: This makes a thoughtful and unique handmade gift for anyone needing a moment of calm.
- Crowd-pleasing: Kids and adults alike will be mesmerized by the gentle sway of the “waves.”
Ingredients
Here’s what you’ll need to create your own little piece of paradise:
- Clear plastic jar or bottle with lid: An empty water bottle or a jam jar works perfectly. Make sure it’s clean and dry!
- Water: The base for our ocean simulation.
- Baby oil or vegetable oil: This creates the mesmerizing separation and slow movement of the “waves.”
- Blue food coloring: To get that perfect ocean hue.
- Sand: Real beach sand if you have some, or craft sand from your local store.
- Small seashells or sea-themed decorations (optional): To add that extra touch of authenticity.
- Glitter (optional): For a bit of sparkle, like sunlight on the water!
- Funnel (optional): Makes filling your bottle a little cleaner, but not essential.
How to Make Beach-in-a-Bottle Calming Jar
Let’s get crafting! Grab your supplies and follow these easy steps:
- Prepare the Jar: First things first, make sure your jar or bottle is squeaky clean. Rinse it out thoroughly and let it dry completely.
- Add Water: Pour water into your jar, filling it about two-thirds of the way full.
- Add Sand: Now for the beach! Spoon in 1 to 2 tablespoons of sand. You can give it a gentle stir with a spoon or stick to mix it with the water a bit.
- Add Oil: Time for the “ocean” effect! Carefully pour in your baby oil or vegetable oil. Fill it almost to the top, but leave a little bit of space – this helps prevent spills when you seal it.
- Add Food Coloring: Drop in a few drops of blue food coloring. You can always add more if you want a deeper ocean blue. Gently stir or swirl to distribute the color.
- Add Glitter (Optional): If you’re feeling fancy, sprinkle in some glitter. It adds such a lovely shimmer!
- Add Seashells (Optional): If you have tiny seashells or other little beachy trinkets, now’s the time to add them. They’ll float and drift like treasures.
- Seal the Jar: Screw the lid on tightly. Double-check it’s secure to avoid any leaks – we want our ocean contained!
- Observe: Give your jar a gentle shake or tilt it back and forth. Watch as the sand settles and the “waves” move. It’s so soothing!
Substitutions & Additions
Feeling creative? You can totally customize your beach in a jar!
- Different Colors: Instead of blue, try green for a tropical lagoon or even purple for a fantasy ocean!
- Other Decorations: Tiny plastic fish, tiny starfish, or even small pearls can add extra fun.
- Glow-in-the-Dark Fun: Add some glow-in-the-dark glitter or paint for a magical nighttime effect. You might also enjoy our DIY Glow-in-the-Dark Swirl Bounce Balls for more luminous crafts.
- Texture: If you don’t have sand, you could try fine salt or even tiny craft beads for a different look.
Tips for Success
A few little tricks to make your beach in a jar even better:
- Don’t Overfill: Leave a small air gap at the top to allow for movement and prevent overflow.
- Secure the Lid: For extra security, especially if this is for little hands, you can add a bit of strong glue or tape around the lid once it’s sealed.
- Oil Choice: Baby oil is great because it’s usually clear and has a nice slow flow. Vegetable oil works too, but make sure it’s clear and not cloudy.
- Prep Ahead: You can gather all your materials and have them ready to go. It’s a fantastic activity to do with kids on a rainy day. If you enjoy easy crafts, you might also like our Easy DIY Bioplastic Suncatchers.
How to Store Beach-in-a-Bottle Calming Jar
These jars are pretty low maintenance! Just store them upright on a shelf or table. They don’t require refrigeration and are quite durable. The contents should last for a very long time, as the oil and water won’t spoil, though the glitter might settle over time.
FAQs
Q: Can I use glass jars?
A: Yes, you can use glass jars! Just be extra careful, especially if children are involved, as glass can break.
Q: How long will the “waves” last?
A: The effect is pretty long-lasting! As long as the lid is sealed tightly, the oil and water will remain separated and the glitter will shimmer for a long time.
Q: My glitter is clumping. What can I do?
A: Sometimes glitter can clump. If this happens, you can try adding a tiny bit more oil or shaking it more vigorously to break up the clumps.
Q: Can I put heavier decorations in it?
A: It’s best to stick to lightweight decorations like small seashells or beads. Heavier items might sink to the bottom and not move as nicely with the “waves.”
I hope you have as much fun making your Beach in a Bottle as I do! It’s a little piece of calm that’s always there when you need it. For more crafty inspiration and delicious recipes, be sure to follow us on Pinterest!

DIY Beach in a Jar
Equipment
- Clear plastic jar or bottle with lid
- Funnel (optional)
Ingredients
- Clear plastic jar or bottle with lid An empty water bottle or a jam jar works perfectly. Make sure it’s clean and dry!
- Water The base for our ocean simulation.
- Baby oil or vegetable oil This creates the mesmerizing separation and slow movement of the “waves.”
- few drops Blue food coloring To get that perfect ocean hue.
- 1-2 tbsp Sand Real beach sand if you have some, or craft sand from your local store.
- Small seashells or sea-themed decorations optional, to add that extra touch of authenticity.
- Glitter optional, for a bit of sparkle, like sunlight on the water!
Instructions
- Step 1: Prepare the Jar: First things first, make sure your jar or bottle is squeaky clean. Rinse it out thoroughly and let it dry completely.
- Step 2: Add Water: Pour water into your jar, filling it about two-thirds of the way full.
- Step 3: Add Sand: Now for the beach! Spoon in 1 to 2 tablespoons of sand. You can give it a gentle stir with a spoon or stick to mix it with the water a bit.
- Step 4: Add Oil: Time for the “ocean” effect! Carefully pour in your baby oil or vegetable oil. Fill it almost to the top, but leave a little bit of space – this helps prevent spills when you seal it.
- Step 5: Add Food Coloring: Drop in a few drops of blue food coloring. You can always add more if you want a deeper ocean blue. Gently stir or swirl to distribute the color.
- Step 6: Add Glitter (Optional): If you’re feeling fancy, sprinkle in some glitter. It adds such a lovely shimmer!
- Step 7: Add Seashells (Optional): If you have tiny seashells or other little beachy trinkets, now’s the time to add them. They’ll float and drift like treasures.
- Step 8: Seal the Jar: Screw the lid on tightly. Double-check it’s secure to avoid any leaks – we want our ocean contained!
- Step 9: Observe: Give your jar a gentle shake or tilt it back and forth. Watch as the sand settles and the “waves” move. It’s so soothing!