
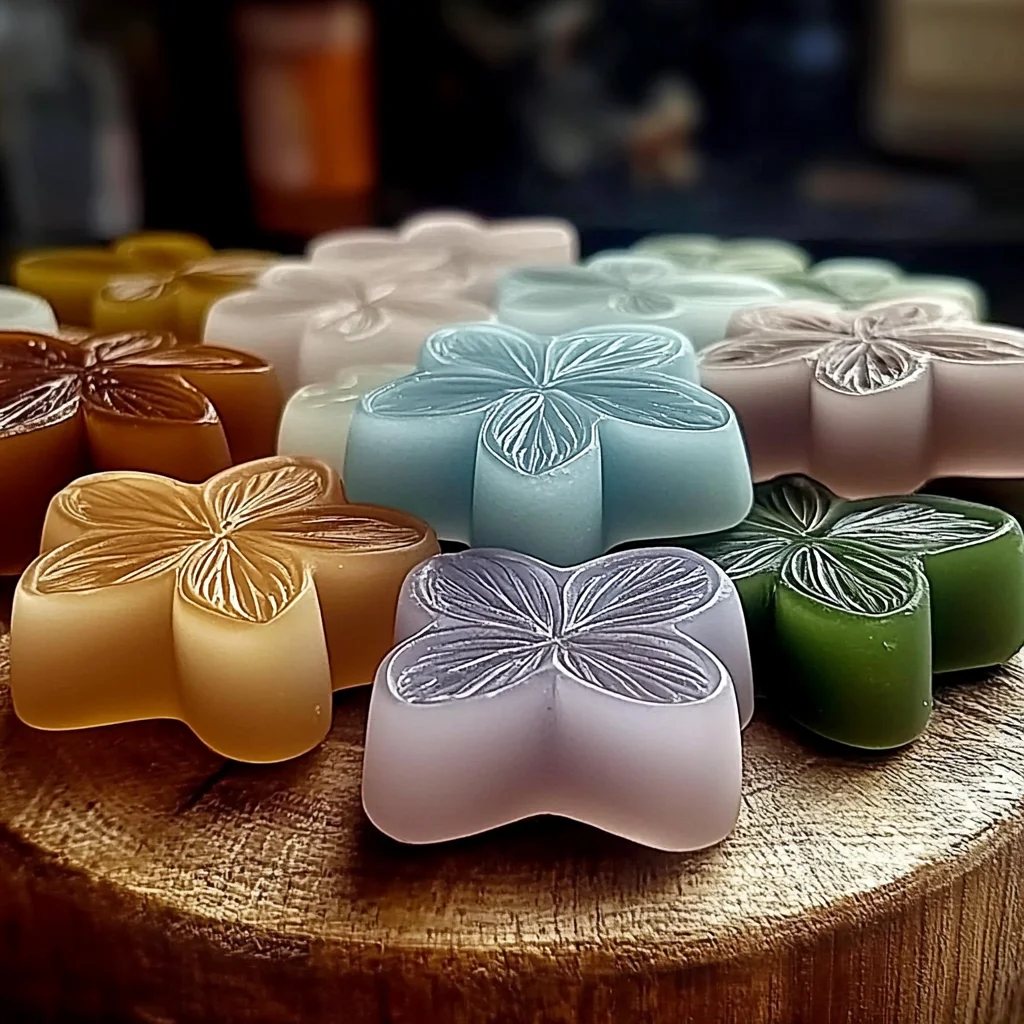
Remember those cozy afternoons spent making crafts that filled your home with wonderful scents? There’s something incredibly satisfying about creating something beautiful and functional with your own hands. Today, we’re diving into a super simple DIY project that will bring a lovely, natural fragrance into your space: DIY Aroma Stones! These little gems are not only easy to make but also incredibly versatile and make for thoughtful, homemade gifts.
Why You’ll Love DIY Aroma Stones
- Fast: You can whip up a batch in no time!
- Easy: Perfect for crafters of all skill levels, even beginners.
- Giftable: Package them up beautifully for birthdays, holidays, or just because!
- Crowd-pleasing: Everyone loves a beautifully scented home.
Ingredients
Here’s what you’ll need to create your own little scent-sational wonders:
- 1/2 cup baking soda: This is our base, and it absorbs scents wonderfully.
- 1/2 cup cornstarch: This helps bind everything together and gives the stones a smooth texture.
- 1/4 cup warm water: Just enough to create a moldable dough.
- 15–30 drops essential oil: This is where the magic happens! Choose your favorite scents like calming lavender, uplifting lemon, refreshing peppermint, or invigorating eucalyptus.
- Optional: Natural coloring (mica powder or food coloring): If you want to add a pop of color!
- Silicone molds, cookie cutters, or ice cube trays: Get creative with shapes!
- Mixing bowl and spoon: For getting your hands messy (in a good way!).
- Parchment paper or drying tray: To let your creations dry undisturbed.
How to Make DIY Aroma Stones
Ready to get crafting? It’s as easy as 1-2-3-4!
Mix the Base:
Grab your mixing bowl and add the baking soda and cornstarch. Give them a little stir to combine. Now, slowly pour in the warm water, mixing as you go. You’re aiming for a consistency like thick clay – something that holds its shape but isn’t too sticky. If it feels a bit too wet, just add a tiny bit more cornstarch. If you’re adding color, now’s the time to mix it in until you get a beautiful hue. I love adding a touch of mica powder for a subtle shimmer!
Shape the Stones:
This is the fun part where you can really let your creativity shine! Gently press the dough into your silicone molds. If you’re using cookie cutters, roll out the dough on a clean surface to about 1/4 inch thick and then press your cutters in. Make sure to smooth out any rough edges. Once shaped, carefully place your stones onto a sheet of parchment paper or a drying tray.
Dry the Stones:
Now, patience is key! Let your beautiful aroma stones air-dry for about 24 to 48 hours. To make sure they dry evenly, it’s a good idea to flip them over halfway through the drying process. You want them to be completely hard and dry to the touch.
Add Scent:
Once your stones are completely dry and hardened, it’s time to infuse them with your chosen fragrance. Add about 3 to 5 drops of your essential oil onto each stone. Let them sit for an hour or two to really soak in that lovely scent before you place them around your home. You can even pop these into a drawer or closet for a burst of freshness. They’re a lovely alternative to store-bought fresheners and remind me a bit of the satisfaction I get from making something like these easy lemon fudge bites.
Substitutions & Additions
Want to mix things up? Here are some ideas:
- Different Molds: Beyond silicone, you can use small jars, decorative tins, or even repurpose small ceramic dishes.
- Dried Flowers or Herbs: Gently press dried lavender buds, rose petals, or rosemary into the dough before it dries for a beautiful, natural look and added scent.
- Essential Oil Blends: Get creative with combinations! Try a blend of lavender and chamomile for relaxation, or lemon and peppermint for an energizing boost.
- Fragrance Oils: If you prefer fragrance oils over essential oils, be sure to use ones that are safe for contact with skin if you plan to handle them a lot.
Tips for Success
Here are a few pointers to make your aroma stones absolutely perfect:
- Don’t Add Too Much Water: It’s better to add the water gradually to avoid a sticky mess.
- Air Dry is Best: While tempting, avoid using an oven or microwave to speed up drying, as this can cause them to crack.
- Refresh the Scent: When the scent starts to fade, simply add a few more drops of essential oil to the stones.
- Prep Ahead: You can make the dough and shape the stones one day and let them dry the next. It’s a great activity for a lazy weekend afternoon, much like making fluffy blueberry lemon ricotta pancakes on a Sunday morning.
How to Store DIY Aroma Stones
Once your aroma stones are fully dry and scented, store them in an airtight container or a pretty glass jar to preserve their fragrance. Keep them out of direct sunlight and away from humidity. They should maintain their lovely scent for several weeks to a few months, depending on the strength of the essential oils you use.
FAQs
Q: Can I reuse these aroma stones?
A: Yes! You can refresh the scent by adding more essential oils whenever the fragrance fades.
Q: How long does the scent last?
A: The scent typically lasts for a few weeks to a couple of months, but you can easily revive it by adding more essential oil.
Q: Can I use these in my car?
A: Absolutely! Just place a few in a small dish or sachet in your car for a natural air freshener.
Q: Can kids make these?
A: Yes, with adult supervision, this is a fantastic craft for kids! It’s a fun way to introduce them to DIY projects, similar to making crayon star sun catchers or glow-in-the-dark bubbles.
We hope you have a wonderful time crafting your own DIY Aroma Stones! They’re a little touch of handmade happiness for your home.
For more creative DIY ideas and delicious recipes, be sure to follow us on Pinterest!
DIY Aroma Stones
Equipment
- Mixing Bowl
- spoon
- Silicone molds, cookie cutters, or ice cube trays
- Parchment paper or drying tray
- Airtight container or glass jar
Ingredients
For the Aroma Stones
- 1/2 cup baking soda base
- 1/2 cup cornstarch binder
- 1/4 cup warm water for moldable dough
- 15-30 drops essential oil e.g., lavender, lemon, peppermint, eucalyptus
- natural coloring (optional) mica powder or food coloring
- 3-5 drops essential oil for refreshing scent per stone
Optional Additions
- dried flowers or herbs e.g., lavender buds, rose petals, rosemary
Instructions
- Step 1: Mix the Base: In a mixing bowl, combine baking soda and cornstarch. Slowly add warm water, mixing until a thick clay consistency is formed. If too wet, add more cornstarch; if too dry, add a tiny bit more water. Mix in optional coloring until desired hue is achieved.
- Step 2: Shape the Stones: Press the dough into silicone molds, or roll out to 1/4 inch thick and use cookie cutters. Smooth any rough edges. Place the shaped stones onto parchment paper or a drying tray.
- Step 3: Dry the Stones: Allow the aroma stones to air-dry for 24 to 48 hours. Flip them halfway through for even drying. They should be completely hard and dry to the touch.
- Step 4: Add Scent: Once dry, add 3–5 drops of essential oil onto each stone. Let them sit for 1–2 hours to absorb the scent before placing them around your home, in drawers, or closets.