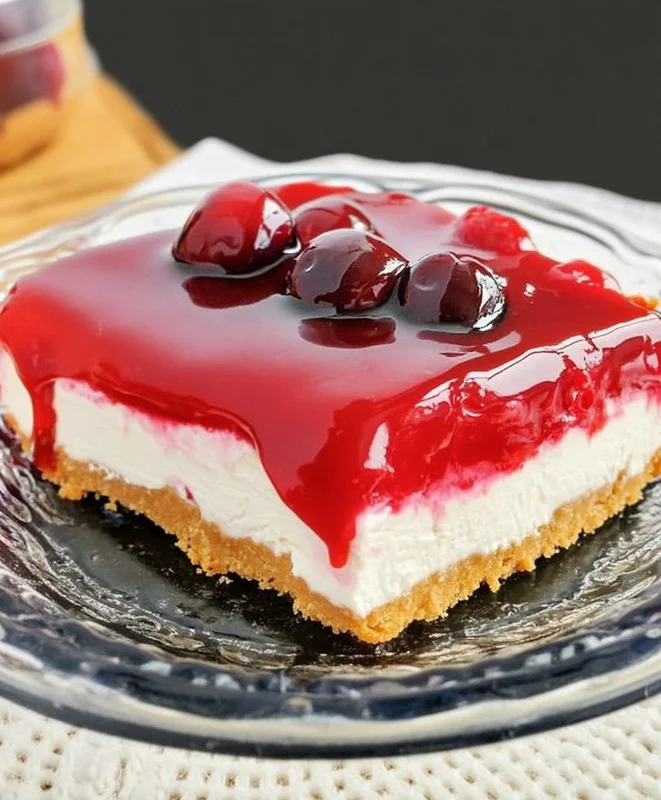
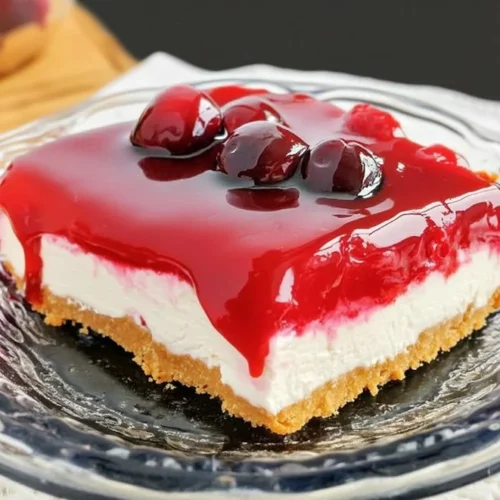
Hey there, sweet friend! Do you ever get that craving for a rich, creamy dessert that just transports you back to grandma’s kitchen or those sun-drenched summer picnics? You know, the kind of dessert that feels like a big, cozy hug? Well, get ready, because I’m about to share one of my absolute favorite, most fool-proof recipes that delivers exactly that: a dreamy No-Bake Cherry Cheesecake.
This isn’t just any cheesecake, my dear. This is the kind of recipe you pull out when you need something spectacular without spending hours slaving away in the kitchen. It’s quick, it’s ridiculously easy, and it’s so memorable that everyone will be asking for the recipe. Trust me, if you can stir and spread, you can make this luscious dessert. Let’s get baking… or rather, no-baking!
Why You’ll Love No Bake Cherry Cheesecake
- Fast: From start to fridge in about 15 minutes of active time!
- Easy: No oven required, simple steps, perfect for beginners.
- Giftable: A beautiful dessert that makes a thoughtful gift for neighbors, hosts, or anyone who needs a sweet pick-me-up.
- Crowd-pleasing: Who doesn’t love the classic combo of creamy cheesecake and bright cherry? It’s a guaranteed hit!
Ingredients
Gathering your ingredients for this no-bake wonder is half the fun! Here’s what you’ll need:
- 2 cups crushed graham crackers: You can buy them pre-crushed or grab a box of graham cracker sheets and crush them yourself. A food processor makes quick work of this, or you can get a little stress relief by putting them in a zip-top bag and crushing them with a rolling pin!
- 1/2 cup melted butter: Unsalted is usually my go-to for baking, but for a crust like this, regular salted butter works just fine and adds a nice little flavor contrast.
- 1/3 cup granulated sugar: Just a touch of sweetness to make that crust extra special.
- 1 (8 ounce) package cream cheese, softened: This is crucial! Make sure your cream cheese is truly at room temperature. This makes it super smooth and prevents lumps in your filling. I usually set mine out on the counter a couple of hours before I plan to make the cheesecake.
- 2 cups thawed whipped topping: The secret to that light, airy, and oh-so-creamy texture. A standard 8oz tub works perfectly.
- 1 cup confectioners’ sugar: Also known as powdered sugar, this dissolves beautifully into the cream cheese mixture, ensuring a silky-smooth filling without any graininess.
- 1 (18 ounce) can cherry pie filling: The vibrant, fruity crown jewel of our cheesecake! You can find this in the baking aisle of any grocery store.
How to Make No Bake Cherry Cheesecake
Alright, let’s get down to business! You’ll be amazed at how quickly this comes together. It’s truly one of those recipes that makes you feel like a kitchen wizard without all the fuss.
- Prep your dish: First things first, grab an 8×8 inch dish. A glass baking dish works great here. Give it a light spritz with non-stick spray. This isn’t strictly necessary since the crust has butter, but I find it makes serving those first few slices a breeze, and who doesn’t love an easy cleanup? Set that aside for a moment.
- Crust time!: In a medium-sized bowl, you’re going to combine those delicious crushed graham cracker crumbs, your lovely melted butter, and the granulated sugar. Stir it all together until the crumbs are thoroughly moistened and resemble wet sand. Now, pour this mixture into your prepared 8×8 inch dish. Take your time to press it firmly and evenly into the bottom. I like to use the back of a spoon or the bottom of a flat-bottomed glass to really pack it down. The firmer you press, the better your crust will hold together. Once it’s all neat and tidy, pop it into the refrigerator for at least 1 hour. This chilling time is essential for the crust to set up nicely.
- Whip up the creamy filling: While your crust is chilling out, let’s make the star of the show – that creamy, dreamy filling! In another medium bowl, combine your softened cream cheese, the thawed whipped topping, and the confectioners’ sugar. Now, using an electric mixer (or a strong arm and a whisk!), beat these ingredients together until the mixture is completely smooth and fluffy. Scrape down the sides of the bowl to make sure everything is incorporated. You want it light, airy, and free of any lumps. Just like when you’re making something equally delightful, like the filling for a blueberry cheesecake swirl rolls recipe, that smooth texture is key to a perfect bite!
- Layer it up: Once your crust has had its hour in the fridge and is firm, retrieve it. Spoon your glorious cream cheese mixture evenly over the graham cracker crust. Use a spatula to gently spread it out, making sure you get into all the corners and create a nice, smooth top.
- Add the cherry on top (literally!): Now for the grand finale! Carefully spoon the cherry pie filling over the cream cheese layer. Spread it out gently so it covers the entire surface. The vibrant red against the creamy white is just so pretty, isn’t it? If you’re looking for another fantastic no-bake dessert that lets a fruit topping shine, you might love this easy no-bake strawberry cool whip pie, which uses similar principles for effortless deliciousness.
- Chill out and enjoy!: This is perhaps the hardest part – waiting! Return your beautiful cheesecake to the refrigerator for at least 2 hours, or even longer. I often make mine in the morning to serve after dinner, or even the day before. The longer it chills, the firmer and more sliceable it will be. When it’s time to serve, just cut yourself a generous slice and dive into that sweet, cherry bliss!
Substitutions & Additions
One of the joys of cooking (or no-baking!) is making a recipe your own. This No-Bake Cherry Cheesecake is super versatile, so feel free to get creative!
- Crust Variations: Not a fan of graham crackers? You could easily swap them out for crushed vanilla wafers, shortbread cookies, or even Oreo cookies (for a chocolatey twist!). For an extra special touch, you could even try a pretzel crust for a sweet and salty combo.
- Fruit Filling Frenzy: While cherry is classic, don’t limit yourself! Peach, blueberry, strawberry, or even a mixed berry pie filling would be absolutely divine. Fresh berries on top instead of canned filling? Go for it!
- Flavor Boosters: A teaspoon of vanilla extract in the cream cheese filling can deepen its flavor. A little lemon zest could add a lovely brightness, especially if you’re using a tart fruit filling.
- Chocolate Lovers Rejoice: Drizzle some melted chocolate over the cherry topping, or sprinkle with mini chocolate chips before serving. You could even fold a few mini chocolate chips into the cream cheese layer!
- Nutty Crunch: A sprinkle of toasted slivered almonds or chopped pecans on top would add a wonderful texture and nutty flavor.
Tips for Success
Even though this recipe is incredibly easy, a few little pointers can make sure your No-Bake Cherry Cheesecake turns out absolutely perfect every single time.
- Softened Cream Cheese is Key: I can’t stress this enough! If your cream cheese isn’t soft, you’ll end up with lumps, and nobody wants lumpy cheesecake. Take it out of the fridge at least an hour or two before you start.
- Don’t Rush the Chill: Both the crust and the finished cheesecake need their time in the fridge to properly set. Resist the urge to cut into it too early, or you might have a softer, messier dessert. Patience, my friend, is a virtue here!
- Even Spreading: Take a moment to spread both the crust and the cream cheese filling evenly. This ensures every slice is beautiful and consistent.
- Full-Fat for Flavor: While light cream cheese and whipped topping can work, using full-fat ingredients will give you the richest, most luxurious flavor and texture.
- Prep Ahead for Parties: This cheesecake is an amazing make-ahead dessert. You can prepare it a day in advance, which frees you up to enjoy your guests without any last-minute dessert stress. It’s perfect for summer gatherings, just like an oreo lasagna recipe or other chilled treats!
How to Store No Bake Cherry Cheesecake
Got leftovers? (That’s a big “if”!) Here’s how to keep your cheesecake fresh and delicious:
- Refrigeration: Always store your No-Bake Cherry Cheesecake in an airtight container in the refrigerator. This keeps it fresh and prevents it from absorbing any odors from other foods.
- Shelf Life: It will keep beautifully in the fridge for 3-4 days. The crust might soften slightly over time, but the flavor will still be fantastic.
- Freezing (Optional): You can freeze this cheesecake! Wrap it tightly in plastic wrap, then a layer of aluminum foil, and place it in a freezer-safe container. It will last for up to 1-2 months. Thaw it in the refrigerator overnight before serving. The texture might be a tiny bit different after freezing and thawing, but it will still be a delightful treat.
FAQs
Here are a few common questions I get about this delightful dessert:
Q: Can I use fresh cherries instead of canned pie filling?
A: Absolutely! If you want to use fresh cherries, you’ll need to cook them down with a little sugar and cornstarch to create your own homemade cherry sauce or compote. Let it cool completely before spooning it over the cheesecake layer.
Q: What if I don’t have an 8×8 inch dish?
A: A 9-inch pie plate or an 8×10 inch rectangular dish would also work. Just be aware that the layers might be slightly thinner or thicker depending on the dish size.
Q: Can I use homemade whipped cream instead of whipped topping?
A: Yes, you can! Just make sure your homemade whipped cream is stabilized (you can do this by adding a bit of confectioners’ sugar and a touch of cream cheese or gelatin) so it holds its shape well and doesn’t weep in the cheesecake filling. It’ll add an extra fresh flavor!
Q: How can I make this even faster if I’m short on time?
A: If you’re really pressed for time, you can skip the full hour of chilling for the crust. A 30-minute chill will usually suffice to firm it up enough. However, I highly recommend the full hour if you can spare it for the best results!
I hope you absolutely adore this No-Bake Cherry Cheesecake as much as I do. It’s a testament to how simple ingredients and minimal effort can create something truly magical. Happy no-baking!
For more delicious recipes and kitchen inspiration, be sure to follow us on Pinterest!
No-Bake Cherry Cheesecake
Equipment
- 8×8 inch dish
- Medium-sized bowls
- Electric mixer
- Spatula
Ingredients
- 2 cups crushed graham crackers
- 0.5 cup melted butter unsalted or salted
- 0.33 cup granulated sugar for the crust
- 1 package cream cheese 8 ounce, softened to room temperature
- 2 cups thawed whipped topping standard 8oz tub
- 1 cup confectioners’ sugar
- 1 can cherry pie filling 18 ounce
Instructions
- Step 1: Prep your dish: Grab an 8×8 inch dish and lightly spritz with non-stick spray. Set aside.
- Step 2: Crust time!: In a medium-sized bowl, combine crushed graham cracker crumbs, melted butter, and granulated sugar. Stir until moistened. Press firmly and evenly into the bottom of the prepared 8×8 inch dish. Refrigerate for at least 1 hour to set.
- Step 3: Whip up the creamy filling: In another medium bowl, combine softened cream cheese, thawed whipped topping, and confectioners’ sugar. Beat with an electric mixer until completely smooth, light, and fluffy, scraping down the sides of the bowl as needed.
- Step 4: Layer it up: Once the crust is firm, spoon the cream cheese mixture evenly over the graham cracker crust. Use a spatula to gently spread it out, ensuring a smooth top and filling all corners.
- Step 5: Add the cherry on top (literally!): Carefully spoon the cherry pie filling over the cream cheese layer. Spread it out gently to cover the entire surface.
- Step 6: Chill out and enjoy!: Return the cheesecake to the refrigerator for at least 2 hours, or even longer (up to overnight) for best results. The longer it chills, the firmer and more sliceable it will be. Cut into generous slices and serve immediately.