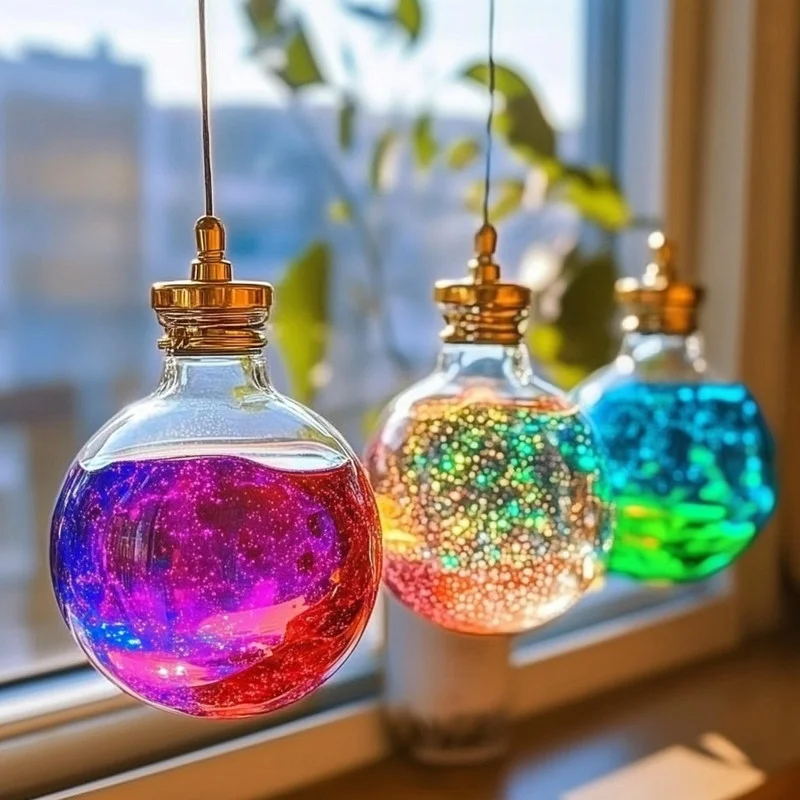
Oh my goodness, remember those days? The swirling, bubbly magic of a lava lamp perched on a bookshelf, casting a groovy glow? There was just something so mesmerizing about watching those colorful blobs float and collide. Well, get ready to capture some of that retro charm and bring a little bit of that bubbly fun into your home with these super simple Lava Lamp Style Suncatchers! They’re incredibly easy to make, use just a few household items, and they catch the light in the most beautiful, almost magical way.
This is one of those projects that’s perfect for a rainy afternoon, a weekend craft session with the kids, or just when you feel like adding a little pop of color and nostalgia to your windows. Trust me, once you see the sunlight streaming through these vibrant, swirling creations, you’ll be hooked!
Why You’ll Love Lava Lamp Style Suncatchers
- Fast
- Easy
- Giftable
- Crowd-pleasing
Ingredients
Gathering your supplies for this is a breeze! You probably have most of this stuff hanging around the house already, which is just one more reason to love this project.
- 4–6 clean plastic lids: Think yogurt lids, sour cream lids, or even the lids from disposable food containers. Make sure they’re clean and totally dry!
- Clear school glue: The classic kind you used in elementary school works perfectly. You’ll need a decent amount, so maybe grab an extra bottle if you’re making a lot!
- Liquid food coloring: Your favorite vibrant colors – red, orange, blue, yellow, green are great starters, but feel free to experiment!
- Vegetable oil or baby oil: This is the secret ingredient for that lava lamp effect! Either one works great.
- Toothpicks or cotton swabs: Handy little tools for swirling.
- Hole punch or skewer: To make a spot for hanging.
- String or suction cup hooks: For hanging your finished masterpieces!
- Wax paper or tray: Protect your workspace from any potential spills (because crafting can get a little messy, right?).
How to Make Lava Lamp Style Suncatchers
Alright, let’s get this groovy party started! This process is pretty straightforward, and the best part is that no two suncatchers will ever look exactly alike. Each one will be its own unique piece of art!
Step 1: Prep Your Space. First things first, lay down some wax paper or grab a tray to line your work surface. This makes clean-up so much easier, and we all love that, don’t we?
Step 2: Get Your Lids Ready. Place your clean, dry plastic lids upside down on your protected surface. They’re going to be your little molds.
Step 3: Add the Glue Base. Squeeze a nice, even layer of clear school glue into the bottom of each lid. You want it to cover the whole bottom, but don’t fill it up too much – just a thin-ish base layer is perfect. It should be deep enough for the oil to sit on top but not so full it overflows easily.
Step 4: Drop the Color. Now for the fun part! Carefully add 2-4 small drops of your liquid food coloring around the inside edge of the glue in each lid. Try to space them out a bit. The idea is to have distinct drops that you’ll swirl later, not to blend them into one color just yet.
Step 5: Introduce the “Lava”. Gently pour 1-2 teaspoons of vegetable oil (or baby oil) right on top of the glue and food coloring. See how the oil beads up? That’s exactly what you want! Since oil and water-based glue don’t mix, this creates that cool separation that gives you the lava lamp look. If you’re looking for other fun science-meets-craft projects, you might also enjoy making a DIY Lava Lamp itself!
Step 6: Swirl the Magic. Grab a toothpick or a cotton swab and lightly swirl the oil through the glue and food coloring. Use gentle motions to create blobs, trails, and cool patterns. Don’t stir vigorously – you just want to move the oil around on the surface and let it push the color with it. Be careful not to poke through the bottom layer of glue!
Step 7: Let Them Dry, Dry, Dry! This is the hardest part: waiting! Place your suncatchers in a flat, safe spot where they won’t be disturbed. They need a good 3 to 5 days to dry completely. This is crucial for them to peel out nicely and hold their shape. Trying to rush it will just lead to sticky disappointment!
Step 8: Peel ‘Em Out. Once they are totally, completely dry (they’ll feel firm and look clear-ish, not cloudy or wet), it’s time to peel them out of the lids. Gently lift an edge. If it’s a bit stubborn, you can use a skewer or toothpick to carefully loosen the edge and then slowly peel it away. It should come out as a flexible, rubbery disc.
Step 9: Time to Hang! Use a hole punch or a sharp skewer to make a small hole near the top edge of each suncatcher. Thread some string or ribbon through the hole and tie a loop, or attach a small suction cup hook directly to the top. Now find the perfect sunny window and hang them up!

Substitutions & Additions
Want to get even more creative? Here are a few ideas to make your suncatchers unique:
- Glitter Power: Add a sprinkle of fine glitter to the glue before adding the oil for some extra sparkle.
- Different “Molds”: Try other small plastic containers with smooth bottoms – just make sure they are flexible enough to peel the dried glue out of.
- Mix and Match Colors: Don’t just stick to one color scheme per suncatcher. Use contrasting colors for bold effects or colors that blend nicely for softer swirls.
- Experiment with Oil: While vegetable or baby oil works great, you can try other lightweight oils too (though results might vary!).
Tips for Success
Here are a few pointers I’ve learned along the way to make sure your suncatcher project is a smashing success!
- Clean & Dry Lids are Key: Any residue or moisture can make peeling difficult.
- Don’t Rush the Drying: I know it’s tempting, but patience is a virtue here! Waiting the full 3-5 days (or even longer in humid conditions) ensures the best results.
- Gentle Swirling: Remember, you’re just nudging the oil and color, not mixing them into a muddy mess. Light touches create those distinct blobs and swirls.
- Flat Drying Surface: Make sure wherever you put them to dry is perfectly level. If they dry on an angle, they’ll be uneven.
- Peeling Technique: If one seems stuck, try gently flexing the plastic lid itself. Sometimes that helps loosen the edges.
- Make it a Party: This is a fantastic group activity! Get the kids involved or have a craft night with friends. It’s just as fun as making easy clear glue suncatchers or tackling a delicious baking project like easy cake mix toffee bars together.
How to Display Lava Lamp Style Suncatchers
Once your suncatchers are dry and ready, the best place for them is a sunny window! Hang them individually or string several together to make a mobile or a garland across the top of a windowpane. They look absolutely stunning with the light shining through, highlighting the vibrant colors and swirling patterns you created. You can also hang them outdoors in a sheltered spot like on a porch, but be aware that direct sun and weather might degrade them over time.
FAQs
Here are a couple of common questions you might have:
Q: My suncatcher isn’t peeling out of the lid. What should I do?
A: It’s likely not fully dry yet. Give it more time! Humidity can affect drying time. If it still won’t budge after ample time, sometimes running a thin knife or skewer carefully around the very edge can help loosen it.
Q: Can I use paint instead of food coloring?
A: Liquid food coloring works best because it’s very concentrated and mixes minimally with the oil. Acrylic paint might work, but it might be thicker and not give you the same delicate swirling effect with the oil.
Q: How long do these suncatchers last?
A: When hung indoors away from extreme temperatures, they can last for a long time, retaining their color and shape. Outdoor exposure might shorten their lifespan.
Q: Is this safe for young children?
A: With supervision, absolutely! Kids love the swirling part. Just make sure they don’t ingest the glue, oil, or food coloring, and an adult handles the skewer for making the hole if needed.
I hope you have as much fun making these Lava Lamp Style Suncatchers as I do! They’re a wonderful way to add some handmade cheer to your home and a sweet nod to a classic retro vibe. Happy crafting!
Follow us on Pinterest for more fun recipes and craft ideas!
DIY Lava Lamp Style Suncatchers
Equipment
- Toothpicks or Cotton Swabs
- Hole Punch or Skewer
- String or Suction Cup Hooks
- Wax Paper or Tray
Ingredients
- 4-6 lids clean plastic lids yogurt lids, sour cream lids, or disposable food container lids
- Clear school glue need a decent amount
- Liquid food coloring your favorite vibrant colors
- Vegetable oil or baby oil 1-2 teaspoons per lid
Instructions
- Step 1: Prep Your Space. Lay down wax paper or a tray to line your work surface.
- Step 2: Get Your Lids Ready. Place clean, dry plastic lids upside down on your protected surface.
- Step 3: Add the Glue Base. Squeeze an even layer of clear school glue into the bottom of each lid, covering the whole bottom with a thin base layer.
- Step 4: Drop the Color. Carefully add 2-4 small drops of liquid food coloring around the inside edge of the glue in each lid, spacing them out.
- Step 5: Introduce the "Lava". Gently pour 1-2 teaspoons of vegetable oil or baby oil on top of the glue and food coloring.
- Step 6: Swirl the Magic. Use a toothpick or cotton swab to lightly swirl the oil through the glue and food coloring, creating patterns. Do not stir vigorously or poke through the glue layer.
- Step 7: Let Them Dry. Place suncatchers in a flat, safe spot undisturbed. Let them dry completely for 3 to 5 days (or longer in humid conditions). Do not rush the drying process.
- Step 8: Peel 'Em Out. Once completely dry, gently peel the suncatchers out of the lids. If stubborn, carefully loosen the edge with a skewer or toothpick.
- Step 9: Time to Hang. Use a hole punch or skewer to make a small hole near the top. Thread string or ribbon through the hole or attach a suction cup hook. Hang in a sunny window.