
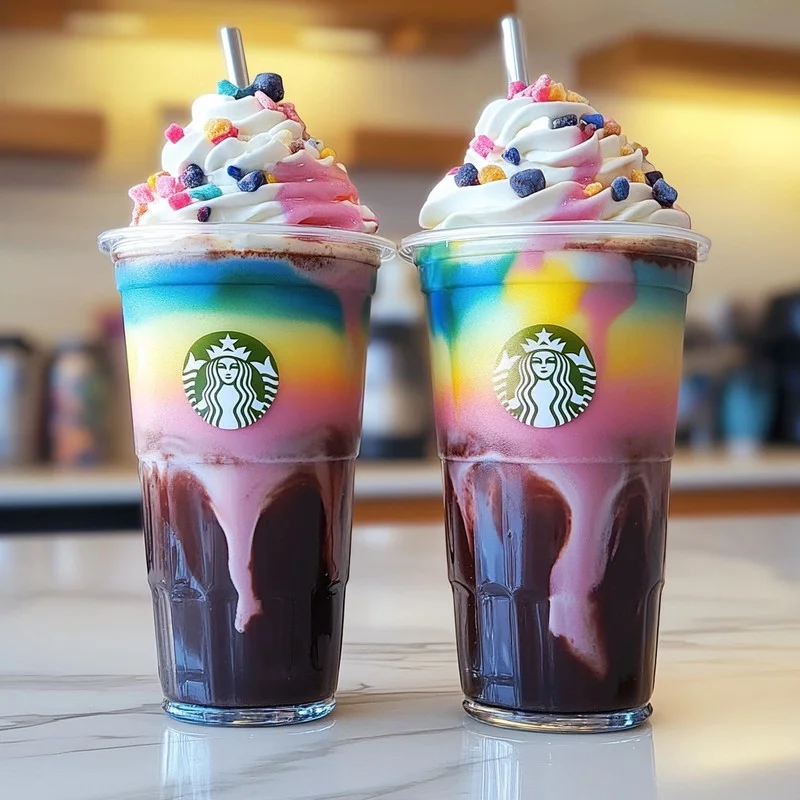
Remember those drinks that just felt… magical? The ones that were almost too pretty to sip, bursting with color and flavor? Well, get ready to recreate that magic right in your own kitchen! This Homemade Rainbow Mudslide Frappuccino isn’t just a drink; it’s an experience. It takes a little effort, sure, but the look on your face (or your friends’ faces!) when you see those vibrant layers is absolutely priceless. And honestly, once you get the hang of it, it’s surprisingly simple to whip up whenever you need a serious dose of happy.
Forget those expensive coffee shop runs! This recipe lets you customize everything and enjoy a show-stopping treat that tastes even better because you made it yourself. It’s decadent, fun, and guaranteed to bring a smile. Ready to blend up some liquid sunshine?
Why You’ll Love This Recipe
- Fast: Once you have your ingredients prepped, blending each layer and assembling goes pretty quickly!
- Easy: No fancy equipment needed beyond a blender. The steps are straightforward, even for kitchen newbies.
- Giftable: Okay, maybe not the liquid drink itself (unless delivering immediately!), but you could package up the ingredients (minus the ice cream/ice) with the recipe for a fun kit! Or just make it for someone as a sweet surprise.
- Crowd-pleasing: Who doesn’t love a colorful, creamy, chocolatey-vanilla treat? This is a guaranteed hit at parties, sleepovers, or just a special afternoon pick-me-up.
Ingredients
Gather ’round, friends! Here’s what you’ll need to create this colorful masterpiece. Most of these are likely staples in your pantry and freezer already!
For the Mudslide Base:
- 1 cup milk (whole, almond, or oat): Use whatever you have on hand! Whole milk makes it super creamy, but plant-based works beautifully too.
- 1/2 cup chocolate ice cream: This adds richness and that classic chocolatey depth. Grab your favorite brand!
- 2 tablespoons chocolate syrup: Extra chocolatey goodness and helps with blending.
- 1 tablespoon coffee liqueur (optional): Adds that classic mudslide kick. If you’re making this kid-friendly or prefer it non-alcoholic, just leave this out!
- 1 cup ice: The essential ingredient for that perfect frappuccino texture.
For the Rainbow Layers:
- 1 cup vanilla ice cream: The base for our vibrant colors. Vanilla works best so the colors pop!
- 1 cup milk: Again, your milk of choice works here.
- 1 tablespoon vanilla syrup: Enhances that sweet vanilla flavor.
- Food coloring (red, orange, yellow, green, blue, purple): The magic makers! Gel food coloring gives the most vibrant results with just a drop or two.
- 1 cup ice: More ice for that slushy consistency.
For the Whipped Cream Topping:
- 1 cup heavy whipping cream: Whipped cream isn’t optional, it’s necessary for true indulgence!
- 2 tablespoons powdered sugar: Sweetens the cream just right.
- 1 teaspoon vanilla extract: Adds a little extra flavor oomph to the topping.
- Edible glitter or rainbow sprinkles: For that final touch of sparkle and fun!
How to Make It
Alright, let’s get blending! Take it step-by-step, and don’t be afraid to get a little messy – that’s part of the fun!
- First, make the Whipped Cream: In a medium bowl, combine the heavy whipping cream, powdered sugar, and vanilla extract. Use an electric mixer (or whisk really vigorously!) to beat until stiff peaks form. You want it nice and firm so it holds its shape on top of your drink. Pop this in the fridge while you make the frappuccinos.
- Blend the Mudslide Base: Add all the ingredients for the Mudslide Base (milk, chocolate ice cream, chocolate syrup, optional coffee liqueur, and 1 cup ice) into your blender. Blend until smooth and creamy. If it’s too thick, add a tiny splash more milk. If it’s too thin, add a few more ice cubes. Pour this chocolatey goodness into the bottom of your serving glass(es). Don’t fill it more than about 1/4 of the way up. Set aside.
- Blend the Vanilla Base: Rinse out your blender. Add all the ingredients for the Rainbow Layers except the food coloring (vanilla ice cream, milk, vanilla syrup, and 1 cup ice) into the clean blender. Blend until smooth and creamy. This is your plain vanilla frappuccino base.
- Divide and Conquer (with Color!): Divide the vanilla base evenly into 6 separate small bowls or containers. Now, add a few drops of a different food color to each bowl – one for red, one for orange, yellow, green, blue, and purple. Stir each bowl gently until the color is fully mixed and vibrant.
- Layer Up the Rainbow: This is the fun part! Carefully spoon or pour each color layer on top of the chocolate base in your glass. I find starting with red and going through the rainbow (red, orange, yellow, green, blue, purple) works well, but you can do any order you like! Pour slowly and gently. You can pour it over the back of a spoon held against the side of the glass to help keep the layers separate.
- Almost Done! Top It Off: Once all your beautiful rainbow layers are stacked up, grab that whipped cream from the fridge. Spoon or pipe a generous swirl (or mountain!) of whipped cream on top.
- Add the Sparkle: Finish with a sprinkle of edible glitter or rainbow sprinkles.
- Serve Immediately! Pop in a straw and enjoy your stunning, delicious creation!
Substitutions & Additions
This recipe is super flexible! Feel free to play around and make it your own:
- Milk: Any dairy or non-dairy milk works great (soy, coconut, almond, oat).
- Ice Cream: Swap the vanilla ice cream for frozen yogurt or even frozen bananas blended with a splash of milk for a healthier twist (though the color might not be as vibrant). You could also use chocolate ice cream for the whole thing and just add different colored chocolate layers (less visual contrast, but still yummy!).
- Syrups: Use caramel syrup in the chocolate layer, or different flavored syrups (like raspberry or mint) in some of the vanilla layers for extra flavor dimensions.
- Make it Coffee-Free: Just omit the coffee liqueur. The chocolate base will still be delicious!
- Add-ins: Stir in mini chocolate chips, a pinch of espresso powder to the chocolate base (if you like coffee!), or a drop of peppermint extract.
- Toppings: Drizzle with extra chocolate syrup, caramel sauce, or add a cherry on top!
Tips for Success
Making layered drinks can seem tricky, but these tips will help you nail it:
- Get the Consistency Right: Both the chocolate and vanilla bases should be thick enough to hold their shape somewhat, but thin enough to pour. If your blender is struggling or it’s too thick, add milk a tablespoon at a time. If it’s too thin, add a few more ice cubes.
- Blend the Vanilla Base Well: Make sure the vanilla base is completely smooth before dividing and adding color. You don’t want ice chunks in your layers.
- Layering Technique: Pouring slowly is key! Using the back of a spoon against the side of the glass helps the liquid flow gently down the side, preventing it from plunging into the layer below and mixing. Don’t rush this step.
- Color Concentration: Start with just a drop or two of gel food coloring per small bowl. You can always add more if you want a deeper color, but you can’t take it away!
- Chill Your Glass: If you have time, pop your serving glass in the freezer for 10-15 minutes before starting. This helps keep the layers cold and firm as you build them.
- Prep Ahead (Sort Of): You can make the whipped cream ahead of time and keep it in the fridge. However, the frappuccino bases are best blended right before layering and serving, as they can separate or melt if left sitting.
How to Store It
Honestly? These rainbow beauties are made to be enjoyed right away! Frappuccinos with ice and ice cream don’t store well at all; they’ll melt into a sad, watery puddle.
If you happen to have any leftover plain chocolate or vanilla base (before adding ice), you could store it in the fridge for a day and potentially re-blend with fresh ice later, but the texture won’t be quite the same. The colored layers absolutely need to be made fresh for that stunning visual effect. So, my best advice? Plan to drink it all!
FAQs
Got questions? I’ve got answers!
Can I make this non-alcoholic?
Absolutely! Simply omit the coffee liqueur from the Mudslide Base. It will still be deliciously rich and chocolatey.
Can I use dairy-free ingredients?
Yes! Choose your favorite plant-based milk (almond, oat, soy) and dairy-free chocolate and vanilla ice cream alternatives. Make sure your whipped cream is also a dairy-free version (like coconut or cashew based) if needed.
Why aren’t my layers separating?
The most common reasons are that your frappuccino bases are too thin (add more ice or ice cream when blending!) or you’re pouring the layers too quickly. Remember to pour gently, ideally over the back of a spoon!
Can I make a big batch?
You can double or triple the base recipes, but you’ll still need to divide the vanilla base into small portions to color them individually. Layering big batches into large pitchers can be tricky to get defined lines. It’s usually easier and results in prettier drinks to make them one or two at a time in individual glasses.
Easy Homemade Rainbow Mudslide Frappuccino Recipe
Equipment
- Blender
- Medium bowl
- Electric mixer or whisk
- Small bowls or containers (6 total)
- Serving glass
- spoon
- Straw
Ingredients
For the Mudslide Base
- 1 cup milk (whole, almond, or oat)
- 0.5 cup chocolate ice cream
- 2 tablespoons chocolate syrup
- 1 tablespoon coffee liqueur (optional)
- 1 cup ice
For the Rainbow Layers
- 1 cup vanilla ice cream
- 1 cup milk
- 1 tablespoon vanilla syrup
- Food coloring (red, orange, yellow, green, blue, purple)
- 1 cup ice
For the Whipped Cream Topping
- 1 cup heavy whipping cream
- 2 tablespoons powdered sugar
- 1 teaspoon vanilla extract
- Edible glitter or rainbow sprinkles
Instructions
- First, make the Whipped Cream: In a medium bowl, combine the heavy whipping cream, powdered sugar, and vanilla extract. Use an electric mixer (or whisk really vigorously!) to beat until stiff peaks form. You want it nice and firm so it holds its shape on top of your drink. Pop this in the fridge while you make the frappuccinos.
- Blend the Mudslide Base: Add all the ingredients for the Mudslide Base (milk, chocolate ice cream, chocolate syrup, optional coffee liqueur, and 1 cup ice) into your blender. Blend until smooth and creamy. If it's too thick, add a tiny splash more milk. If it's too thin, add a few more ice cubes. Pour this chocolatey goodness into the bottom of your serving glass(es). Don't fill it more than about 1/4 of the way up. Set aside.
- Blend the Vanilla Base: Rinse out your blender. Add all the ingredients for the Rainbow Layers except the food coloring (vanilla ice cream, milk, vanilla syrup, and 1 cup ice) into the clean blender. Blend until smooth and creamy. This is your plain vanilla frappuccino base.
- Divide and Conquer (with Color!): Divide the vanilla base evenly into 6 separate small bowls or containers. Now, add a few drops of a different food color to each bowl – one for red, one for orange, yellow, green, blue, and purple. Stir each bowl gently until the color is fully mixed and vibrant.
- Layer Up the Rainbow: This is the fun part! Carefully spoon or pour each color layer on top of the chocolate base in your glass. I find starting with red and going through the rainbow (red, orange, yellow, green, blue, purple) works well, but you can do any order you like! Pour slowly and gently. You can pour it over the back of a spoon held against the side of the glass to help keep the layers separate.
- Almost Done! Top It Off: Once all your beautiful rainbow layers are stacked up, grab that whipped cream from the fridge. Spoon or pipe a generous swirl (or mountain!) of whipped cream on top.
- Add the Sparkle: Finish with a sprinkle of edible glitter or rainbow sprinkles.
- Serve Immediately! Pop in a straw and enjoy your stunning, delicious creation!