
Remember those cozy afternoons spent crafting with family, the scent of creativity filling the air? There’s something so incredibly special about making something beautiful and functional with your own two hands. Today, we’re going to recapture that magic with a super simple project that will fill your home with delightful aromas and add a touch of handmade charm: DIY Aroma Stones! These little gems are incredibly easy to make, perfect for gifting, and will have you feeling like a domestic goddess in no time.
Why You’ll Love DIY Aroma Stones
- Fast: Whip up a batch in just minutes!
- Easy: Perfect for beginners and kids (with a little supervision, of course!).
- Giftable: These make thoughtful, handmade presents for any occasion.
- Crowd-pleasing: Who doesn’t love a beautifully scented home?
Ingredients
Gathering your supplies is half the fun! Here’s what you’ll need:
- 1/2 cup baking soda: This is our base, creating a smooth texture.
- 1/2 cup cornstarch: Helps bind everything together and gives the stones their unique feel.
- 1/4 cup warm water: Just enough to create our magical dough.
- 15–30 drops essential oil: This is where the magic happens! Lavender for calm, lemon for a bright boost, peppermint for focus, eucalyptus for a refreshing feel – the possibilities are endless. I love mixing a few for a unique scent profile!
- Optional: Natural coloring (mica powder or food coloring): Want to add a pop of color? Mica powder gives a lovely shimmer, while a few drops of food coloring will do the trick too.
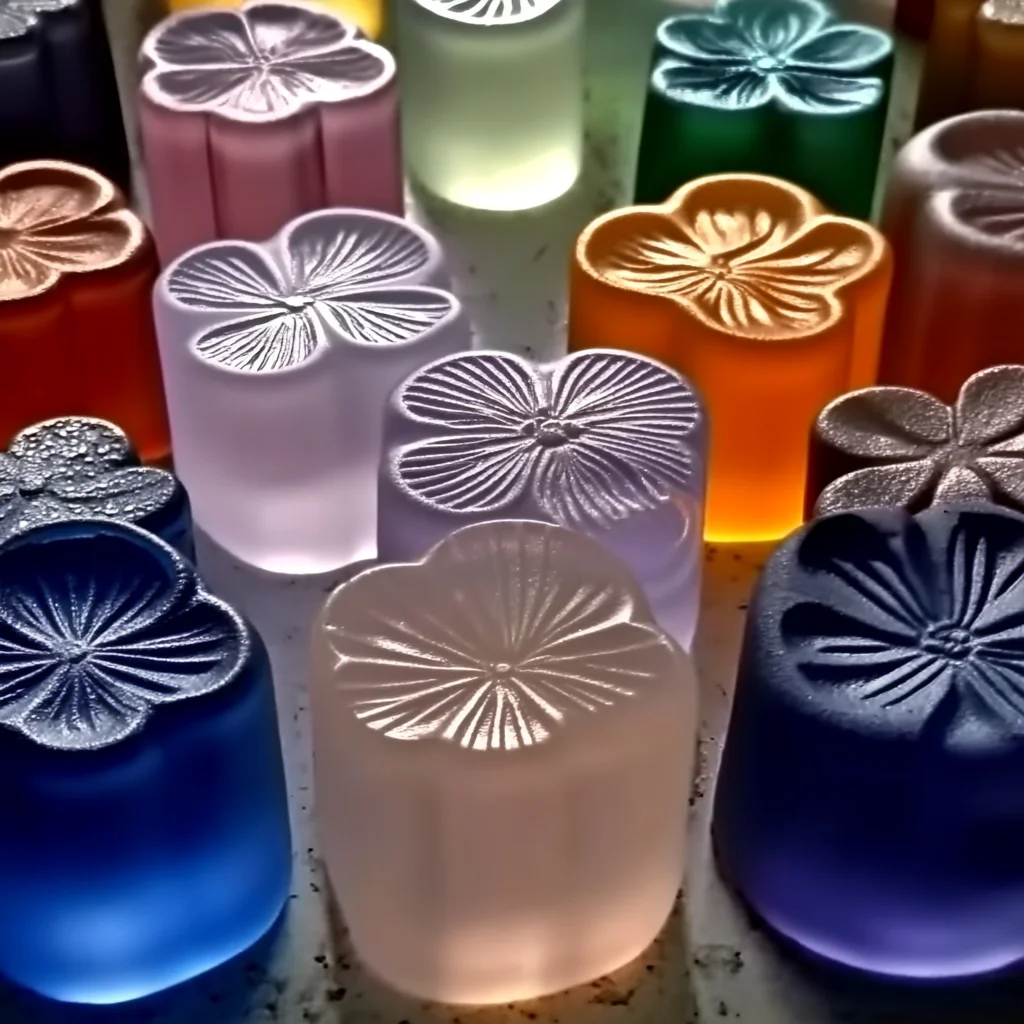
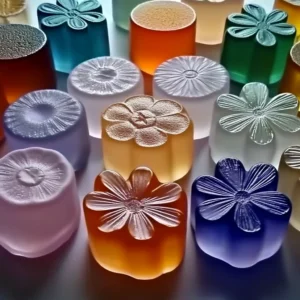
- Silicone molds, cookie cutters, or ice cube trays: Get creative with shapes!
- Mixing bowl
- Spoon
- Parchment paper or drying tray
How to Make DIY Aroma Stones
Ready to get started? It’s as easy as 1, 2, 3!
-
Step 1: Mix the Dough
In your mixing bowl, combine the baking soda and cornstarch. Give them a little whisk to combine. Now, gradually add the warm water, stirring as you go. You’re looking for a consistency that’s like a thick, pliable dough – almost like playdough. If it feels a bit too sticky, just add a tiny bit more cornstarch. If it feels too dry, a splash more water will do the trick. If you’re adding color, this is the time to gently mix it in until you have your desired hue.
-
Step 2: Shape Your Stones
Now for the fun part – shaping! You can press the dough directly into your silicone molds, cookie cutters, or even an ice cube tray. If you’re using cookie cutters, roll out the dough on a clean surface (you might want to dust it with a little extra cornstarch if it’s sticking) and then press your cutters in. Smooth out any rough edges with your fingers. Once they’re shaped, gently transfer your creations onto a parchment-lined baking sheet or drying tray. I like to use a variety of molds to make them extra special!
-
Step 3: Let Them Dry
This is where patience comes in! Let your aroma stones air dry in a cool, dry place for about 24 to 48 hours. To ensure they dry evenly, I recommend flipping them halfway through the drying process. They’re ready when they feel completely hard to the touch.
-
Step 4: Add the Scent
Once your stones are perfectly dry and hard, it’s time to add the essential oils! Simply place 3–5 drops of your chosen essential oil onto each stone. Let them sit and absorb the oils for about 1–2 hours. The scent will gradually fill the air, creating a wonderfully aromatic atmosphere.
Substitutions & Additions
Feeling adventurous? Here are some ways to jazz up your aroma stones:
- Dried Flowers or Herbs: Gently press small dried flower petals or herb leaves (like lavender buds or rose petals) into the dough before it dries for a beautiful visual touch.
- Citrus Zest: Add finely grated citrus zest (like lemon or orange) to the dough for an extra burst of natural fragrance.
- Spices: A pinch of cinnamon or nutmeg can add a warm, cozy scent, especially for fall-themed stones.
- Glitter: For a touch of sparkle, mix in some cosmetic-grade glitter with your coloring.
Tips for Success
Want to make sure your aroma stones turn out perfectly every time? Here are a few tips:
- Don’t Use Too Much Water: The key is a firm, clay-like dough. Too much water will make them sticky and hard to handle.
- Even Drying: Make sure to flip your stones halfway through the drying process for consistent hardness.
- Essential Oil Application: Apply the essential oils only after the stones are completely dry to prevent them from dissolving or becoming too soft.
- Prep Ahead: You can make the dough and shape the stones a day or two in advance, then let them dry when you have time.
How to Store DIY Aroma Stones
Once your aroma stones are dry and scented, store them in an airtight container or a pretty jar. This helps to keep the fragrance fresh for longer. They can last for several months, and when the scent starts to fade, you can simply add a few more drops of essential oil!
FAQs
-
Q: How long do the scents last?
A: The scent can last for several weeks to a few months, depending on the essential oil used and the environment. You can refresh them by adding more drops of oil.
-
Q: Can I use these in my car?
A: Absolutely! Just place one on a heat-safe surface or in a small dish in your car for a natural air freshener.
-
Q: Are these safe for pets?
A: While the stones themselves are non-toxic, some essential oils can be harmful to pets. It’s best to research pet-safe essential oils or use them in areas where your pets cannot access them directly.
Creating these DIY Aroma Stones is such a rewarding experience, much like whipping up a batch of fluffy blueberry lemon ricotta pancakes or the simple joy of making easy homemade key lime fudge. They add a touch of handmade warmth to your home and make for incredibly thoughtful gifts. You might even find yourself making a batch to pair with a lovely summer pineapple lemonade punch!
If you enjoyed this craft, be sure to follow us on Pinterest for more fun DIYs and delicious recipes!
DIY Aroma Stones
Equipment
- Mixing Bowl
- spoon
- Silicone molds, cookie cutters, or ice cube trays
- Parchment paper or drying tray
Ingredients
- 1/2 cup baking soda
- 1/2 cup cornstarch
- 1/4 cup warm water
- 15 –30 drops essential oil e.g., Lavender, Lemon, Peppermint, Eucalyptus
- Optional: Natural coloring (mica powder or food coloring)
- Optional: Dried Flowers or Herbs, Citrus Zest, Spices, Glitter
Instructions
- Step 1: Mix the Dough
In your mixing bowl, combine the baking soda and cornstarch. Whisk to combine. Gradually add the warm water, stirring until a thick, pliable dough forms. Adjust with more cornstarch if sticky, or a splash more water if dry. If using color, mix it in now. - Step 2: Shape Your Stones
Press the dough into silicone molds, cookie cutters, or ice cube trays. If using cookie cutters, roll out the dough on a lightly cornstarched surface and press cutters in. Smooth edges. Transfer to a parchment-lined tray. - Step 3: Let Them Dry
Air dry the aroma stones in a cool, dry place for 24 to 48 hours. Flip them halfway through for even drying. They are ready when completely hard to the touch. - Step 4: Add the Scent
Once dry, place 3–5 drops of your chosen essential oil onto each stone. Allow them to absorb for 1–2 hours before displaying or gifting.