
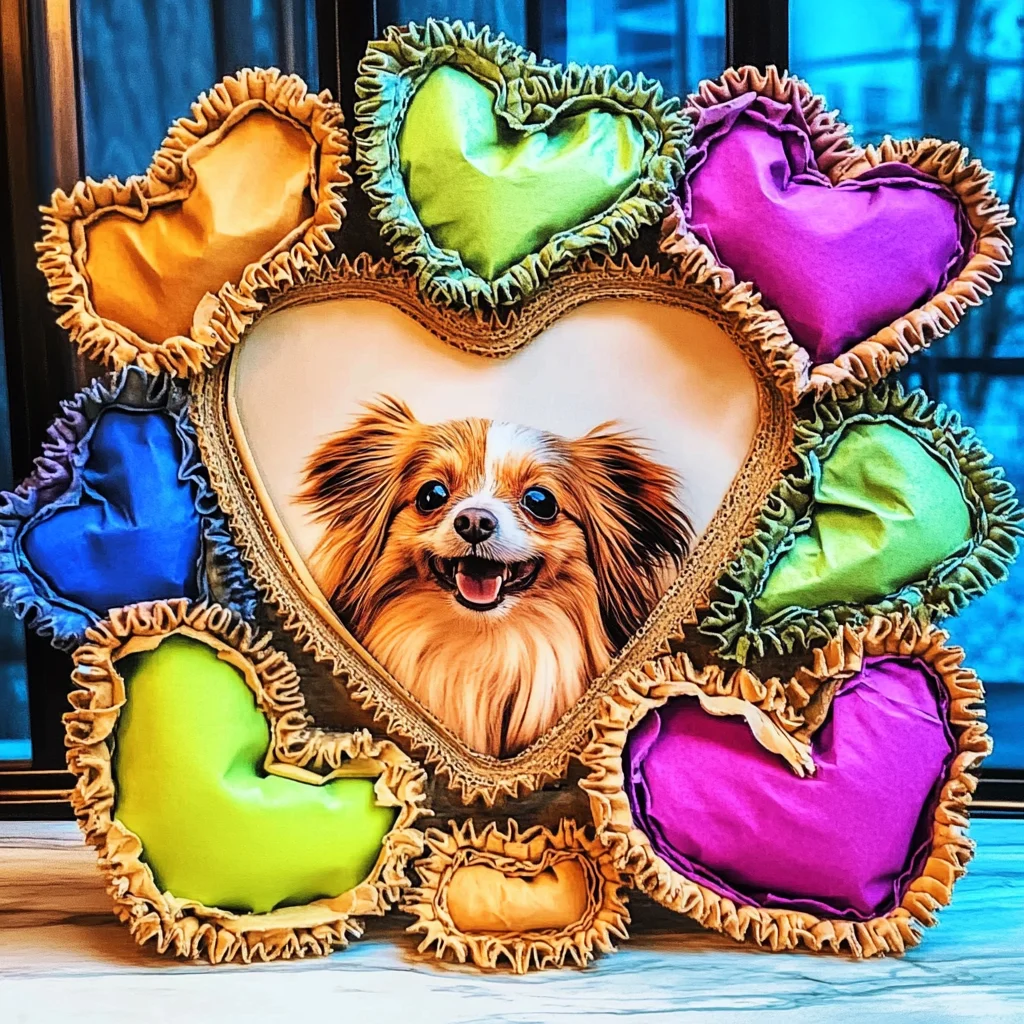
Gather ’round, my friend, because today we are diving into a delightful DIY project that will spark your creativity and bring joyful memories to life. Imagine crafting a beautiful frame adorned with colorful pasta, perfect for showcasing your favorite photos or artworks. This project is not just about making something pretty; it’s about the laughter shared, the stories exchanged, and the cozy moments spent together. Picture the vibrant colors of dried pasta, the feel of the cardboard beneath your fingers, and the satisfaction of creating something uniquely yours. Let’s embark on this crafty adventure together!
Why You’ll Love DIY Cardboard Frame with Pasta
- Beginner-friendly
- Budget-friendly
- Creative and fun
- Great for kids and families
- Perfect for gifts or decorations
- Customizable
The Heart Behind This DIY
Crafting has a magical way of connecting us, whether with our loved ones or with our inner selves. This DIY cardboard frame with pasta is a wonderful way to engage your creativity while enjoying some quality time with family or friends. Every piece of pasta you glue down tells a story, and as you create, you’ll find moments of mindfulness that can soothe the soul. The textures of the cardboard and pasta, the rich colors, and the simple act of creating can foster a sense of accomplishment and joy. Plus, it’s an excellent opportunity for little ones to learn about shapes, colors, and even the art of patience as they wait for glue to dry.
A Gentle Look at the Process
As you gather your materials, take a deep breath and embrace the experience. You’ll start by cutting your cardboard to the perfect size, creating a frame that speaks to you. Then comes the fun part—laying out your dried pasta in whimsical designs. Feel free to experiment! Once you’re satisfied, gluing those pasta shapes onto the cardboard will bring your creation to life. And if you’re feeling adventurous, a splash of paint can add that extra flair. Each step is not just about the end result; it’s a journey of creativity that allows you to express who you are.
Materials You’ll Need
- Cardboard: The sturdy base for your frame.
- Dried pasta (various shapes): Use fun shapes like macaroni, fusilli, or penne for texture.
- Craft glue or hot glue gun: To secure your pasta pieces onto the cardboard.
- Scissors: For cutting the cardboard to your desired size.
- Ruler: To ensure your cuts are straight and even.
- Pencil: For marking measurements on the cardboard.
- Paint (optional): To add color to your frame or pasta.
- Paintbrush (optional): For applying paint if you choose to add this finishing touch.
Step-by-Step Directions
Step 1
Start by cutting your cardboard to the size you want your frame to be. Use your ruler to measure and draw a rectangle with your pencil, then carefully cut it out with scissors. Don’t forget to create an opening in the center for your picture; this is where the magic happens!
Step 2
Now comes the fun part—arranging your dried pasta shapes! Lay them out on the cardboard frame to design your pattern. Feel free to try different arrangements until you find one that brings a smile to your face. The sound of pasta clinking together can be quite soothing, don’t you think?
Step 3
Once you’re happy with your pasta arrangement, it’s time to glue! Carefully apply craft glue or use a hot glue gun to secure each piece onto the cardboard frame. Press firmly and allow the glue to dry completely. Take a moment to admire your handiwork—it’s already looking fabulous!
Step 4
If you’d like, now is the perfect time to add a splash of color! Use your paint and paintbrush to decorate the frame or the pasta pieces. Imagine the bright colors enhancing your creation! Allow the paint to dry thoroughly, filling the room with a lovely scent of fresh paint as you wait.
Step 5
Finally, once everything is dry, insert your cherished picture into the frame. Find the perfect spot to display it—perhaps on a shelf, your desk, or even as a thoughtful gift for someone special. How rewarding it is to see your creation come to life!
Creative Ways to Use DIY Cardboard Frame with Pasta
Your beautiful cardboard frame is not just a holder for pictures; it’s a canvas for creativity! Use it to display family photos, your child’s artwork, or even inspirational quotes. Consider gifting it to grandparents, or use it as a decorative piece during holidays by changing out the pictures. You can even create a gallery wall with multiple frames to showcase various memories. The possibilities are endless!
How to Store, Preserve, or Reuse DIY Cardboard Frame with Pasta
If you want to preserve your creation, keep it in a cool, dry place away from direct sunlight. If you ever want to refresh the look, consider changing the picture inside or repainting the pasta. And remember, if you want to reuse the frame, you can easily remove the pasta and start anew!
Creative Variations and Customizations
- Color variations: Experiment with different paint colors for a unique flair.
- Theme ideas: Create frames for specific occasions like birthdays or holidays.
- Seasonal adaptations: Change the pasta and paint to match the seasons.
- Kid-friendly modifications: Use edible pasta for a fun twist—just remember, it won’t last long!
- Advanced creative upgrades: Consider adding beads, buttons, or other embellishments for a mixed-media masterpiece.
Tips for Success
- Common mistakes to avoid: Ensure the glue is completely dry before moving on to the next step.
- Safety tips: If using a hot glue gun, be cautious of burns and supervise children closely.
- Preparation suggestions: Gather all your materials beforehand to make the crafting process smoother.
- Cleanup recommendations: Have a damp cloth handy for any glue spills or paint splatters.
- Expert crafting tips: Don’t be afraid to let your creativity flow—there are no wrong ways to create!
FAQs About DIY Cardboard Frame with Pasta
Can beginners make this?
Absolutely! This project is perfect for beginners and can be enjoyed by crafters of all ages.
Can children participate?
Yes! This DIY is a wonderful family project that kids will love, especially the decorating part.
How long does it last?
With proper care, your frame can last for years. Just keep it away from moisture and direct sunlight.
Can I customize it?
Definitely! Feel free to use different materials or themes that resonate with your personal style.
A Final Creative Note
As we wrap up this delightful crafting session, I hope you feel inspired to unleash your creativity and make something beautiful. Remember, every handmade project is a celebration of self-expression, a chance to learn, and an opportunity for connection with those around you. So grab your materials, put on some music, and let the crafting begin! For more delicious recipes, check out the blueberry cheesecake swirl rolls recipe or the easy lemon garlic butter salmon recipe for treats you will love!
And don’t forget to follow Pinterest for more DIY inspiration!

DIY Cardboard Frame with Pasta
Equipment
- Scissors
- Ruler
- Pencil
- Craft Glue or Hot Glue Gun
- Paintbrush (optional)
Ingredients
Materials You'll Need
- Cardboard The sturdy base for your frame.
- Dried pasta (various shapes) Use fun shapes like macaroni, fusilli, or penne for texture.
- Craft glue or hot glue gun To secure your pasta pieces onto the cardboard.
- Scissors For cutting the cardboard to your desired size.
- Ruler To ensure your cuts are straight and even.
- Pencil For marking measurements on the cardboard.
- Paint (optional) To add color to your frame or pasta.
- Paintbrush (optional) For applying paint if you choose to add this finishing touch.
Instructions
- Step 1: Start by cutting your cardboard to the size you want your frame to be. Use your ruler to measure and draw a rectangle with your pencil, then carefully cut it out with scissors.
- Step 2: Now comes the fun part—arranging your dried pasta shapes! Lay them out on the cardboard frame to design your pattern.
- Step 3: Once you’re happy with your pasta arrangement, it's time to glue! Carefully apply craft glue or use a hot glue gun to secure each piece onto the cardboard frame.
- Step 4: If you’d like, now is the perfect time to add a splash of color! Use your paint and paintbrush to decorate the frame or the pasta pieces.
- Step 5: Finally, once everything is dry, insert your cherished picture into the frame and find the perfect spot to display it.
