
Remember those endless summer nights as a kid, chasing fireflies and making memories under the starry sky? There’s something so magical about those simple joys, isn’t there? Well, get ready to recapture that enchantment because today, we’re diving into a recipe that’s sure to bring a little extra sparkle to your life – DIY Glow-in-the-Dark Bubbles! Seriously, who knew you could make bubbles that glow? It’s the kind of fun that makes everyone, from little ones to grown-ups, feel like a kid again.
This recipe is an absolute blast, and the best part is how incredibly easy it is. You probably have most of the ingredients hiding in your kitchen or craft drawer already. It’s the perfect activity for a backyard party, a fun science experiment, or just a spontaneous burst of joy on a warm evening. Imagine the delight on your kids’ faces (or your own!) as these luminous bubbles float through the air!
Why You’ll Love Glow-in-the-Dark Bubbles
- Fast: Whip up a batch in minutes, perfect for last-minute fun.
- Easy: Super simple steps that even the littlest helpers can join in on.
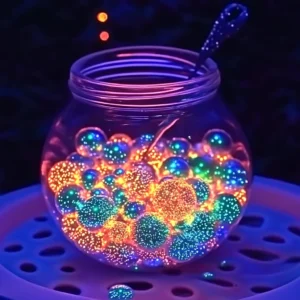
- Giftable: Package them up in a cute jar with a ribbon for a unique homemade gift.
- Crowd-pleasing: Guaranteed to be a hit at any gathering, especially after sunset!
Ingredients
Gather these simple items and let’s get bubbling!
- 1 cup bubble solution: You can use your favorite store-bought kind or make your own! (We’ll chat about homemade options later!)
- 1 highlighter: Yellow or green tend to give the best glow, but feel free to experiment with other colors. Just make sure it’s a non-toxic, washable one!
- 1/4 cup warm water: This helps to dissolve the highlighter ink.
How to Make Glow-in-the-Dark Bubbles
Alright, let’s get our hands a little colorful and make some magic happen!
- Prepare the Highlighter: This is where the “glow” comes from! Carefully open up your highlighter. I usually find it easiest to gently pull the parts apart.
- Extract the Ink: Now, you want to get that vibrant ink out. Most highlighters have a felt tip that soaks up the ink. You can try gently squeezing the felt tip, or sometimes just letting it sit upside down in a small bowl for a few minutes is enough to get a good amount of ink to drip out. If you’re feeling adventurous, you can even snip the end of the felt to release more ink.
- Mix Your Bubble Solution: In a separate, larger bowl, combine your 1 cup of bubble solution with the 1/4 cup of warm water. The warm water helps the ink blend more smoothly.
- Add the Glow: Pour the extracted highlighter ink into the bubble solution mixture. Give it a good stir until the color is evenly distributed. You want to make sure there are no clumps of ink.
- Check the Glow: Now for the fun part! Take your mixture into a dark room or wait until it’s nighttime. If it’s not as bright as you’d like, you can carefully add a little more ink from the highlighter. If it seems too intense, you can add a tiny bit more plain bubble solution.
- Blow Away! Grab your bubble wand and start blowing! Watch as your glowing bubbles float through the air, creating a truly mesmerizing effect.

Substitutions & Additions
Feeling creative? Let’s jazz this up a bit!
- Homemade Bubble Solution: If you don’t have store-bought solution, you can easily make your own! Mix 4 cups of water with 1/2 cup of dish soap and 1/2 cup of corn syrup (or glycerin). This makes a fantastic, super-bubbly solution that works perfectly for this recipe.
- Glitter Power: For an extra touch of sparkle, try adding a pinch of fine glitter to your mixture. It catches the light and makes your bubbles even more enchanting!
- Different Colors: While yellow and green highlighters give the most vibrant glow, you can experiment with other colors. Just be aware that some colors might not glow as intensely.
- Glow Sticks: For a different kind of glow, you could also try carefully crushing a glow stick and adding the liquid to your bubble solution. Make sure to rinse out the glow stick parts thoroughly afterward!
Tips for Success
A few little tricks to ensure your bubble-making is a glowing success!
- Use Fresh Highlighters: Older highlighters might have less ink, making it harder to get a good glow.
- Non-Toxic is Key: Always opt for washable, non-toxic highlighters, especially if kids are involved.
- Darkness is Your Friend: The glow effect is most noticeable in complete darkness. A dimly lit room won’t show off the magic as much.
- Be Patient with Ink Extraction: Sometimes getting the ink out takes a little time and fiddling. Don’t get discouraged!
- Test First: Always test a small batch to see how bright the glow is before making a large amount.
- Prep Ahead: You can mix the solution a bit ahead of time, but you might want to give it a gentle stir right before you start blowing bubbles, just in case the ink settles. For more fun family activities, you might want to check out other DIY craft ideas.
How to Store Glow-in-the-Dark Bubbles
Once you’ve made your glowing concoction, you’ll want to keep it fresh!
Store any leftover bubble solution in an airtight container, like a jar or a sealed bottle, at room temperature. It should stay good for a few days to a week. Give it a good shake or stir before using it again, as the ink might separate slightly.
FAQs
Got questions? We’ve got answers!
- Can I use any highlighter? It’s best to use non-toxic, washable highlighters. Fluorescent yellow and green usually give the best results.
- How do they glow? Highlighters contain fluorescent dyes that react to UV light. While they won’t glow on their own in the dark like a glow stick, the ink itself can appear to glow under the right conditions, especially when dispersed in the bubble solution. For true ‘glow in the dark’ effects, you might need to “charge” them under a blacklight or ensure the ink source is indeed fluorescent.
- Are these safe for kids? Yes, as long as you use non-toxic, washable highlighters and supervise young children to ensure they don’t ingest the solution.
These glow-in-the-dark bubbles are a fantastic way to add some sparkle to your evenings. For more creative and fun projects, be sure to explore what’s happening on Pinterest!
DIY Glow-in-the-Dark Bubbles
Equipment
- Small bowl
- Larger bowl
- Airtight container or bottle
Ingredients
For the Glow-in-the-Dark Bubbles
- 1 cup bubble solution store-bought or homemade
- 1 highlighter yellow or green recommended, non-toxic, washable
- 1/4 cup warm water
For Homemade Bubble Solution (Optional)
- 4 cups water
- 1/2 cup dish soap
- 1/2 cup corn syrup or glycerin
Optional Additions
- pinch fine glitter
- 1 glow stick liquid, carefully crushed (for a different glow effect)
Instructions
- Step 1: Prepare the Highlighter: Carefully open up your highlighter. Gently pull the parts apart to access the ink reservoir.
- Step 2: Extract the Ink: Get the highlighter ink out. Squeeze the felt tip gently, or let the highlighter sit upside down in a small bowl for a few minutes to let the ink drip out. You can also snip the end of the felt to release more ink.
- Step 3: Mix Your Bubble Solution: In a larger bowl, combine 1 cup of bubble solution with 1/4 cup of warm water. The warm water helps the ink blend smoothly.
- Step 4: Add the Glow: Pour the extracted highlighter ink into the bubble solution mixture. Stir well until the color is evenly distributed and there are no clumps.
- Step 5: Check the Glow: Take your mixture into a dark room or wait until nighttime. If the glow isn't bright enough, carefully add more ink. If it's too intense, add a little more plain bubble solution.
- Step 6: Blow Away!: Grab your bubble wand and start blowing! Watch the glowing bubbles float through the air.