
Okay, gather ’round! Let me tell you about Carli’s Bee Cheese. The name itself is a little mysterious, isn’t it? It always makes me smile. This isn’t just any cheese spread; it’s the one that disappears first at every party, the one people subtly hint you should bring again, the one you’ll find yourself sneaking bites of straight from the jar. It’s ridiculously easy – seriously, like, embarrassingly easy – but tastes like something you fussed over for hours. It’s become a total must-have in my kitchen, especially around the holidays, and I just know it will be in yours too!
It’s got that perfect balance of sharp cheddar tang, a hint of savory depth from the sherry, a little zip from the horseradish and garlic, all wrapped up in a creamy, spreadable package thanks to the butter. Plus, it’s a total make-ahead champion, which makes entertaining so much less stressful. Let’s dive in!
Why You’ll Love This Recipe
- Fast: Seriously, you can mix this up in under 10 minutes.
- Easy: No cooking required, just mixing!
- Giftable: Pack it in a cute jar with some crackers, and you’ve got a perfect hostess gift or holiday treat.
- Crowd-pleasing: I have yet to meet someone who doesn’t absolutely adore this spread.
- Make-Ahead Magic: It requires chilling, so you’re meant to make it ahead!
Ingredients
Alright, ready to see just how simple this is? You probably have most of these hanging out in your fridge right now! Here’s what you’ll need:
- 10 oz sharp cheddar cheese, grated: The star of the show! Sharp cheddar gives it that classic tangy flavor. I always grate my own for the best texture, but good quality pre-shredded works in a pinch if you’re short on time.
- 6 oz butter, softened: This is key to getting that wonderfully smooth, spreadable texture. Make sure it’s truly softened, not melted! Leave it out on the counter for an hour or so until it’s easily mashable.
- 2 tablespoons sherry: Adds a lovely depth and slightly nutty, complex flavor. Don’t skip this – it’s part of the magic! You want a dry or medium-dry sherry here.
- 1 tablespoon horseradish: Gives it just the right amount of zesty kick without being overpowering. Use prepared horseradish from a jar, not creamed horseradish sauce.
- 1 garlic clove, minced: Fresh garlic is best here! It brightens everything up and gives it a little punch.
- 2 tablespoons chopped Italian flat leaf parsley (optional): This is totally up to you. It adds a little color and fresh, herbaceous note, but the spread is fantastic without it too. Use fresh parsley, not dried!
How to Make It
Okay, deep breath. Are you ready for the easiest instructions ever? Seriously, it’s just three steps (plus waiting!). Let’s do this:
Step 1: Get that cheese ready!
First, you’ll want to grate your sharp cheddar cheese. As I mentioned before, I love the texture of fresh grated cheese, but if you’re really pressed for time, go ahead and use good quality pre-shredded.
Step 2: Mix, mix, mix!
Now, grab a medium-sized bowl. Add your grated cheddar, the softened butter (make sure it’s really soft!), sherry, horseradish, minced garlic, and the optional chopped parsley if you’re using it. Now comes the fun part – or maybe just the muscle part! You’re going to mix all of this together until everything is fully combined and it looks like a homogeneous, deliciously lumpy (in a good way!) spread. I usually start with a sturdy spoon or spatula, but sometimes my clean hands just work best for getting it really incorporated. Get in there and make sure you don’t see any streaks of plain butter or cheese!
Step 3: Pack it up and wait!
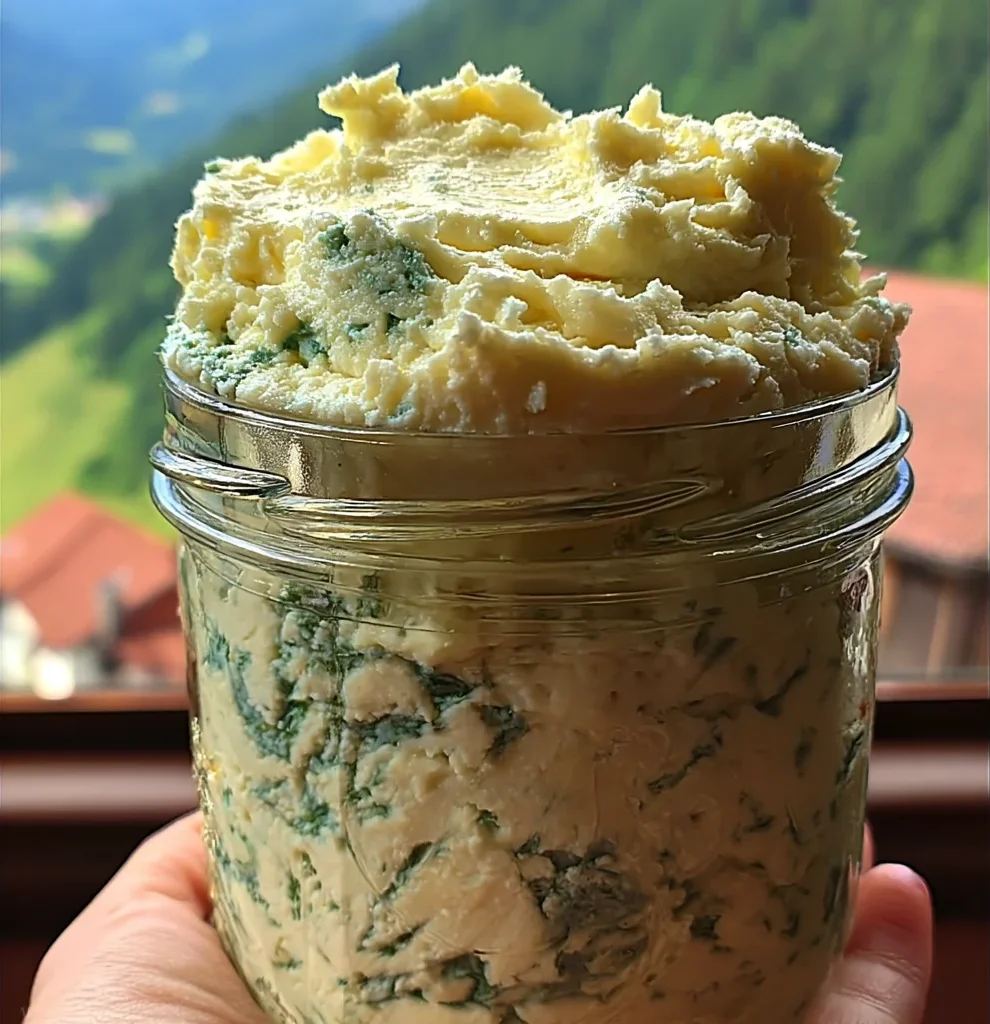
Once everything is beautifully mixed, it’s time to pack it. Grab a cheese crock, a small jar, or even just a small bowl. You want something that holds about 1.5 to 2 cups. Spoon the mixture into the container and press it down tightly. Use the back of your spoon or spatula (or your fingers!) to really pack it in and eliminate any air pockets. Smooth the top nicely.
Now for the hardest part: waiting! Pop the container in the refrigerator. This spread needs time for the flavors to meld and deepen, and for the butter to firm up. You really need to let it chill for at least 2 full days before you dig in. I know, I know, it’s tempting to try it right away, but trust me on this – the wait is absolutely worth it! The flavor improves dramatically with a couple of days in the fridge.
Substitutions & Additions
Okay, the classic Carli’s Bee Cheese is perfect as is, but sometimes it’s fun to play around! Here are a few ideas if you want to change things up or use what you have on hand:
- Different Cheese: While sharp cheddar is traditional, you could try a mix! How about adding a little smoked cheddar, Monterey Jack, or even a touch of finely grated Parmesan or Asiago for extra savoriness? Just keep the total amount around 10 oz.
- Spice It Up: Add a pinch of cayenne pepper, a dash of your favorite hot sauce, or a little smoked paprika for a smoky heat.
- Herb Garden: Beyond parsley, consider adding finely chopped chives, a tiny bit of fresh thyme, or even some chopped fresh rosemary (use sparingly as it’s strong!).
- Crunch Factor: Stir in some finely chopped pecans or walnuts for a nice textural contrast.
- Different Booze: No sherry? A dry white wine or even a splash of brandy or port could work in a pinch, though the flavor profile will change slightly. Use something you’d drink!
- Roasted Garlic: For a deeper, sweeter garlic flavor, use roasted garlic instead of fresh minced garlic. Use about half a clove’s worth.
Tips for Success
Even though this recipe is super simple, here are a few little pointers to make sure your Bee Cheese turns out absolutely perfect every single time:
- Butter Matters: Make sure your butter is genuinely soft. Cold butter won’t incorporate properly, leading to a lumpy texture, and melted butter will make the spread greasy. Leave it out on the counter for a good while.
- Don’t Rush the Chill: I know waiting two days is tough, but it is absolutely essential for the flavors to marry and the spread to firm up correctly. This isn’t a “make and serve” recipe! Plan ahead if you’re making it for a specific event like a holiday party or gathering.
- Serving Temperature: For the best spreadability, take your Bee Cheese out of the refrigerator about 15-20 minutes before you plan to serve it. This allows the butter to soften just enough to be easily spreadable on crackers or bread.
- Packing is Key: Tightly packing the mixture into its container helps remove air pockets and gives the final product a nice, dense, and attractive texture when scooped out.
- Serving Suggestions: This is absolutely amazing on buttery crackers (like Ritz or club crackers), sliced baguette (toasted or not), celery sticks, apple slices, or even as a delicious spread for a turkey or roast beef sandwich. It’s also fantastic dolloped onto warm baked potatoes or stirred into mashed potatoes.
How to Store It
Making this ahead is one of its best features! Here’s how to keep it fresh and delicious:
Keep your Carli’s Bee Cheese stored tightly covered in the refrigerator. A cheese crock with a lid, a glass jar with a tight-fitting lid, or even just a bowl covered tightly with plastic wrap works perfectly. It will keep beautifully for about 10 days in the fridge. Because it contains dairy and butter, make sure it doesn’t sit out at room temperature for more than a couple of hours at a time. If it’s out for a party, pop it back in the fridge if things linger.
FAQs
Got questions? I’ve got answers!
Where does the name ‘Bee Cheese’ come from?
Honestly, I’m not entirely sure of the original story! It was shared with me as “Carli’s Bee Cheese,” and the name just stuck. My best guess? Maybe because everyone “buzzes” about how good it is, or perhaps it’s an inside family joke. Whatever the origin, the name is as unique as the spread!
Can I freeze Carli’s Bee Cheese?
While you can technically freeze cheese spreads, I don’t recommend it for this recipe. The texture of the butter and cheese can change when frozen and thawed, sometimes becoming a little grainy or separating. It’s best enjoyed fresh from the fridge within its 10-day window for the best taste and texture.
Can I double the recipe?
Absolutely! This recipe doubles (or even triples!) beautifully. Just make sure you have a large enough bowl for mixing everything together easily and a container or multiple containers big enough to pack it into. Perfect for larger parties or if you just want extra on hand (and trust me, you will!).

Carli’s Bee Cheese
Equipment
- Grater
- medium-sized bowl
- Sturdy spoon or spatula
- Container (cheese crock, jar, or bowl)
Ingredients
- 10 oz sharp cheddar cheese grated
- 6 oz butter softened
- 2 tbsp sherry dry or medium-dry
- 1 tbsp horseradish prepared horseradish from a jar
- 1 clove garlic minced, fresh is best
- 2 tbsp Italian flat leaf parsley chopped, optional, fresh not dried
Instructions
- Step 1: Get that cheese ready! Grate your sharp cheddar cheese. While pre-shredded works in a pinch, grating your own provides the best texture.
- Step 2: Mix, mix, mix! In a medium-sized bowl, add the grated cheddar, softened butter, sherry, horseradish, minced garlic, and the optional chopped parsley. Mix thoroughly with a sturdy spoon, spatula, or your hands until everything is fully combined and looks like a homogeneous spread. Ensure no streaks of plain butter or cheese remain.
- Step 3: Pack it up and wait! Spoon the mixture into a container that holds about 1.5 to 2 cups (like a cheese crock, jar, or small bowl). Press it down tightly to eliminate air pockets and smooth the top. Refrigerate for at least 2 full days before serving. The flavor improves dramatically with chilling time.