
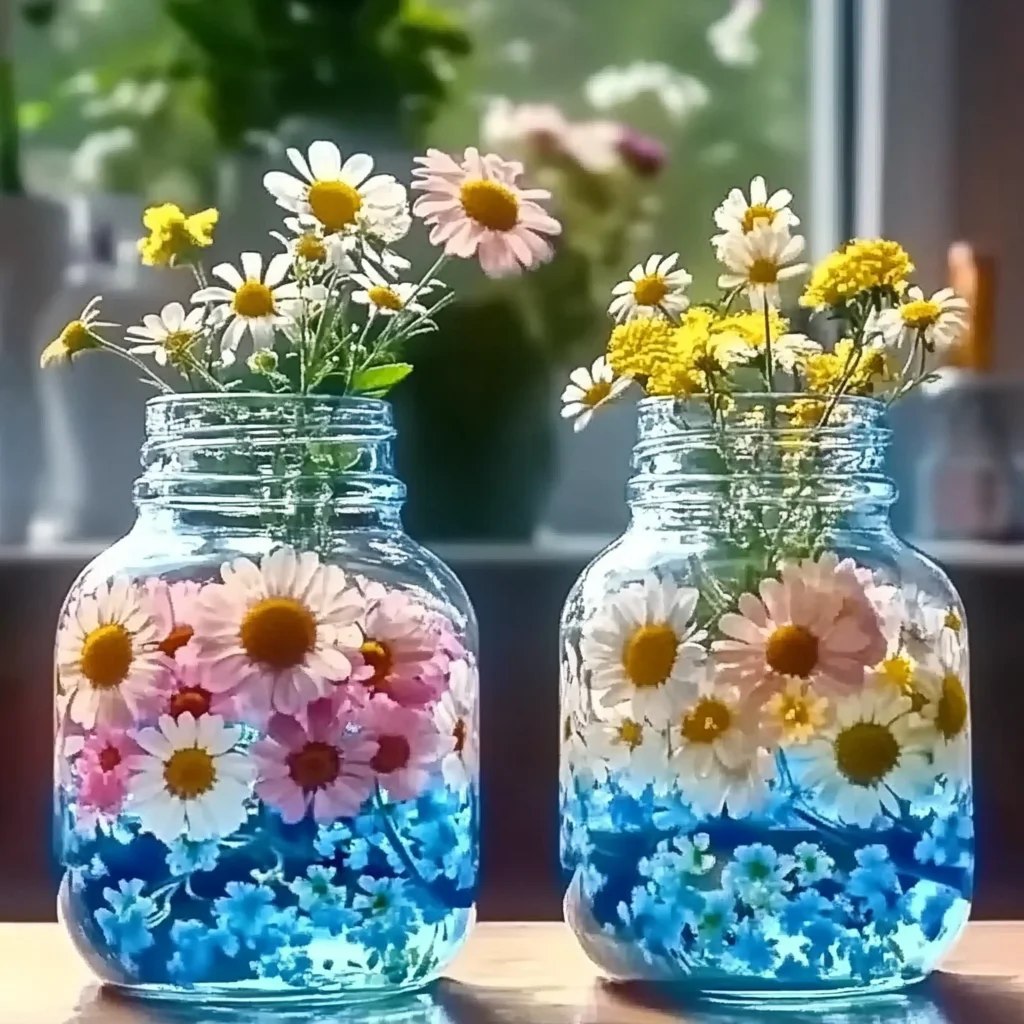
Welcome to the wonderful world of DIY! There’s something truly magical about creating your own gel air fresheners. Imagine walking into a room filled with a delightful scent that brings back warm memories or brightens your day. As we gather around our crafting table, I can already envision the lovely little jars filled with colorful gel, just waiting to spread joy and freshness throughout your home. This project is not only fun and easy, but it also allows you to infuse your space with scents that resonate with you and your family. So, grab your materials, and let’s embark on this aromatic adventure together!
Why You’ll Love DIY Gel Air Fresheners
- Beginner-friendly
- Budget-friendly
- Creative and fun
- Great for kids and families
- Perfect for gifts or decorations
- Customizable
The Heart Behind This DIY
Crafting your own gel air fresheners is a wonderful way to connect with your creative side while also enhancing your living space. The simple act of mixing colors and scents can be incredibly therapeutic, allowing you to express your personality and style. As you stir and pour, you may find that the stress of the day melts away, replaced by the soothing scents of lavender, citrus, or whatever fragrance you choose. This project encourages mindfulness and creativity, helping you to appreciate the little things in life. Plus, it’s a great opportunity to involve kids, fostering their creativity and confidence as they create something beautiful and functional.
A Gentle Look at the Process
In this delightful DIY project, you’ll experience the joy of transforming simple ingredients into a fragrant masterpiece. We’ll begin by heating a mixture of water and salt, which will serve as the base for our gel. As the salt dissolves, you’ll add gelatin, creating that lovely, squishy texture we all adore. Once we infuse our mixture with essential oils and a splash of color, we’ll pour it into charming little jars and let it set. Picture the satisfaction of watching your creation transform, and imagine the wonderful aromas wafting through your home as they dry.
Materials You’ll Need
- 1 cup water – the base for your gel
- 2 tablespoons salt – helps dissolve and sets the gel
- 2 tablespoons gelatin – gives the gel its lovely texture
- 1 teaspoon essential oil – choose your favorite scent!
- Food coloring (optional) – for a splash of fun color
- Small jars or containers – where your gel will live
Step-by-Step Directions
Step 1
In a medium saucepan, combine 1 cup of water and 2 tablespoons of salt. Place it over medium heat, stirring gently until the salt is completely dissolved. You’ll hear the gentle bubbling of the water, and soon you’ll see the salt vanish into the liquid, creating a clear solution.
Step 2
Once the salt has dissolved, sprinkle in 2 tablespoons of gelatin while stirring continuously. Keep the mixture on the heat, allowing the gelatin to dissolve completely. You’ll notice the mixture thickening as you stir, creating a pleasing, silky texture.
Step 3
Remove the saucepan from heat and let it cool slightly. Now comes the fun part! Add 1 teaspoon of your chosen essential oil and a few drops of food coloring if you’d like to brighten things up. Stir well to blend all the ingredients together until the colors and scents are perfectly combined.
Step 4
Carefully pour the mixture into small jars, leaving a little space at the top. You can use a funnel to make this easier and avoid spills. Set the jars aside at room temperature and allow the gel to set until firm, which usually takes a few hours.
Step 5
Once the gel has set, it’s time to enjoy your creations! Place the gel air fresheners in your desired locations, like on a desk, in a bathroom, or on a windowsill, and savor the lovely scents filling your space.
Creative Ways to Use DIY Gel Air Fresheners
Your DIY gel air fresheners are not just practical; they are also a delightful decor element! Place them in your living room to create a welcoming atmosphere for guests, or keep one by your bedside for a calming scent as you drift off to sleep. These jars also make thoughtful gifts for friends and family; simply wrap them in a pretty ribbon for a personal touch. You can even create themed scents for holidays or seasons, bringing a festive vibe to your home. The possibilities are endless!
How to Store, Preserve, or Reuse DIY Gel Air Fresheners
To keep your gel air fresheners in tip-top shape, store them in a cool, dry place away from direct sunlight. If you notice the scent fading over time, simply add a few more drops of essential oil to refresh them. And when the gel gets low, you can easily whip up another batch to refill the jars, keeping the delightful aromas flowing throughout your home.
Creative Variations and Customizations
- Color variations – mix and match colors for a fun display
- Theme ideas – create scents for holidays like peppermint for Christmas or fresh flowers for spring
- Seasonal adaptations – use seasonal scents like pumpkin spice in the fall
- Kid-friendly modifications – let kids pick their favorite scents and colors
- Advanced creative upgrades – add dried flowers or herbs for a rustic touch
Tips for Success
- Common mistakes to avoid – ensure the salt is fully dissolved before adding gelatin for the best texture
- Safety tips – be cautious of hot liquids and supervise children during the process
- Preparation suggestions – gather all materials before starting to streamline the process
- Cleanup recommendations – use warm soapy water to clean up any spills easily
- Expert crafting tips – experiment with different essential oils to find your perfect blend
FAQs About DIY Gel Air Fresheners
Can beginners make this?
Absolutely! This project is super beginner-friendly and perfect for anyone looking to explore their creative side.
Can children participate?
Yes, children can definitely help! Just make sure to supervise them during the heating process.
How long does it last?
Typically, your gel air fresheners will last a few weeks, depending on the strength of the essential oils used.
Can I customize it?
Definitely! You can choose any essential oil and food coloring combination to make it uniquely yours.
A Final Creative Note
As we wrap up our DIY gel air fresheners project, I hope you feel inspired to unleash your creativity and fill your home with beautiful scents. Remember, crafting is not just about the final product; it’s about the joy of creating and the memories you make along the way. So, gather your loved ones, create together, and let the scents of your handmade creations brighten your days. For more delicious recipes, check out the delightful Blueberry Lemon Ricotta Pancakes or Kool-Aid Gummy Treats for treats you will love! Don’t forget to follow our Pinterest for more DIY inspiration.
DIY Gel Air Fresheners
Ingredients
For the Gel Base
- 1 cup water the base for your gel
- 2 tbsp salt helps dissolve and sets the gel
- 2 tbsp gelatin gives the gel its lovely texture
- 1 tsp essential oil choose your favorite scent!
Optional
- Food coloring for a splash of fun color
- Small jars or containers where your gel will live
Instructions
- Step 1: In a medium saucepan, combine 1 cup of water and 2 tablespoons of salt. Place it over medium heat, stirring gently until the salt is completely dissolved.
- Step 2: Once the salt has dissolved, sprinkle in 2 tablespoons of gelatin while stirring continuously. Keep the mixture on the heat until the gelatin dissolves completely.
- Step 3: Remove the saucepan from heat and let it cool slightly. Add 1 teaspoon of your chosen essential oil and a few drops of food coloring if desired. Stir well.
- Step 4: Carefully pour the mixture into small jars, leaving a little space at the top. Set aside at room temperature to let the gel set until firm, usually a few hours.
- Step 5: Once the gel has set, place the gel air fresheners in your desired locations and enjoy the lovely scents.
