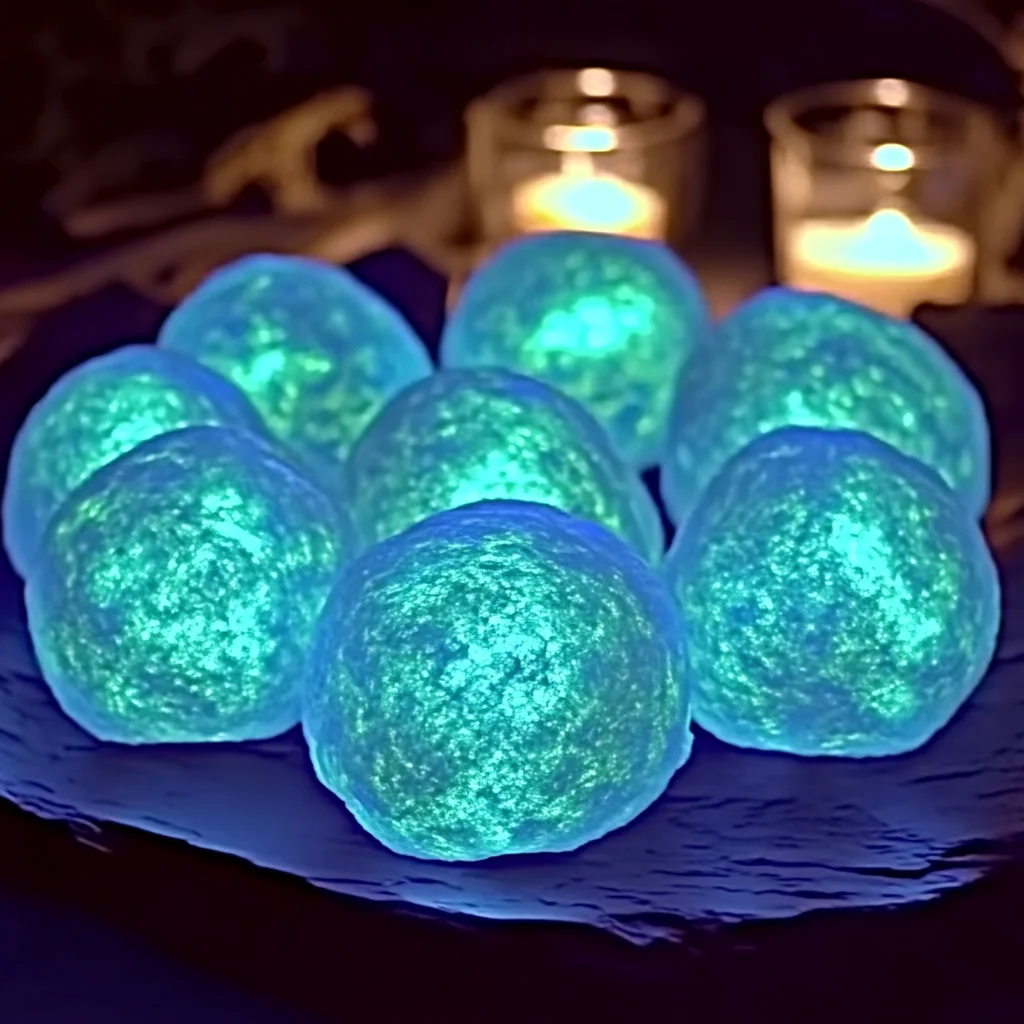
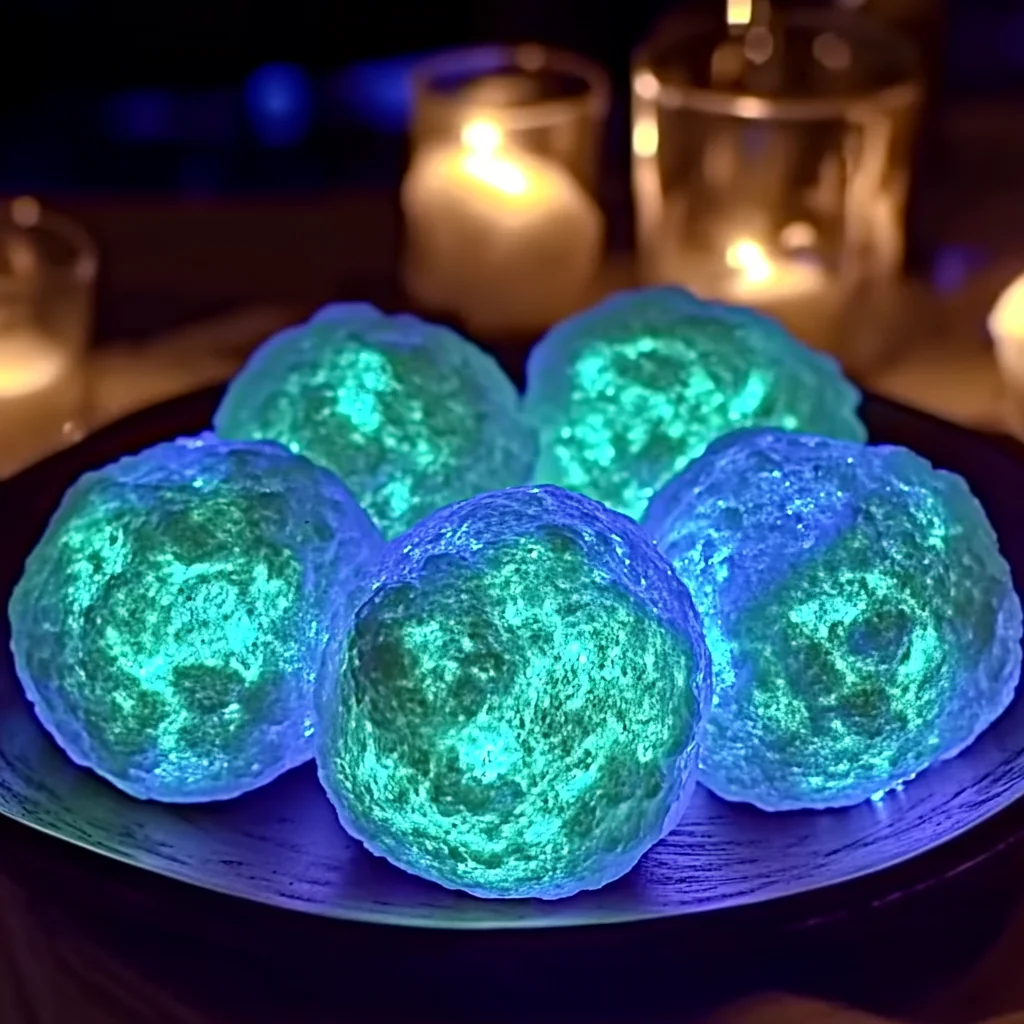
Remember those magical afternoons spent creating things that surprised and delighted you? There’s something so special about making your own toys, especially when they have a touch of wonder to them. Today, we’re diving into a recipe that’s not for eating, but for pure, unadulterated fun: Glowing, Bouncy Moon Rocks! These little wonders are surprisingly simple to make and offer a unique sensory experience that kids and adults alike will adore. Get ready to spark some creativity and have a blast exploring the magic of these homemade treasures.
Why You’ll Love Glowing, Bouncy Moon Rocks
- Fast to Make: You can whip up a batch in no time, perfect for a spontaneous craft session.
- Easy Peasy: With just a few common ingredients, even the littlest hands can help.
- Giftable: Package them up in a cute jar or bag for a unique handmade gift.
- Crowd-Pleasing: These are always a hit at parties, playdates, or just a fun afternoon activity.
- Sensory Play: The squishy, bouncy, and glowing aspects make for fantastic sensory exploration.
Ingredients
Here’s what you’ll need to create your own glowing celestial wonders:
- 1 cup baking soda: This is our main base, giving the rocks their unique texture.
- 1/4 cup water: Just enough to bring everything together.
- Glow-in-the-dark paint (non-toxic) or glow pigment powder: The magic ingredient for that otherworldly glow! Make sure it’s safe for crafting.
- Black food coloring or washable black paint (optional): For that authentic “moon rock” look.
- Cornstarch (for texture, optional): If you want a slightly smoother, more pliable dough.
- Vinegar (for fizzing effect, optional): For an extra bit of scientific fun!
How to Make Glowing, Bouncy Moon Rocks
Let’s get our hands a little messy and create something truly out of this world!
- Start with the Base: Grab a mixing bowl and pour in your 1 cup of baking soda.
- Add Some Lunar Color (Optional): If you want your moon rocks to look more authentic, add a few drops of black food coloring or a tiny bit of washable black paint to the baking soda. Mix it in well until the color is evenly distributed.
- Bring it Together: Now, it’s time to add the water. Gradually pour in your 1/4 cup of water while stirring. Keep mixing until you achieve a moldable dough consistency. You want it to hold its shape without being too crumbly or too sticky.
- Achieve Perfect Texture (Optional): For a smoother, more tactile dough, sprinkle in a tablespoon or two of cornstarch and mix it thoroughly. This gives the rocks a nice, soft feel.
- Shape Your Rocks: Get creative! Pinch off pieces of the dough and roll them into irregular, rock-like shapes. Think bumpy, lumpy, and varied sizes – just like real moon rocks!
- Let Them Dry: Place your beautifully shaped moon rocks on a tray or baking sheet.
- Patience, Young Astronaut: Allow the rocks to dry completely. This usually takes a few hours, but for the best bouncy texture, I like to leave them overnight.
- Activate the Glow: Once your rocks are dry, it’s time for the magic! Expose them to a bright light source (like a lamp or even daylight) for a few minutes. This “charges” the glow-in-the-dark paint or pigment.
- Bounce and Fizz! Now for the fun part! Take your glowing moon rocks and give them a gentle bounce. Squish them, play with their texture, and marvel at their soft glow. For an extra burst of excitement, try pouring a little bit of vinegar over them – watch them fizz and bubble! It’s like a mini lunar eruption right in your hands. If you’re looking for more fun science crafts, you might enjoy our Easiest Volcano Eruption Science Experiment.
Substitutions & Additions
Feeling inspired to mix things up? Here are a few ideas:
- Glittery Moons: Add fine glitter to the dough mixture for some extra sparkle.
- Different Colors: If you don’t want black rocks, use other non-toxic food coloring or paints to create colorful cosmic creations.
- More Glow: If you have extra glow pigment, feel free to add a little more for an even brighter glow.
- Different Textures: Experiment with adding a bit more water or cornstarch to see how it changes the feel and bounce of your rocks.
Tips for Success
A few pointers to make your moon rock-making journey smooth sailing:
- Don’t Add Too Much Water: Too much water will make the dough too sticky and difficult to handle. Add it slowly!
- Ensure Non-Toxic Ingredients: Since this is a craft, always use non-toxic paints and glues if you choose to add embellishments.
- Drying Time is Key: Letting the rocks dry completely ensures they hold their shape and have the best bouncy quality.
- Charging the Glow: The brighter the light and the longer you expose them, the brighter and longer they will glow.
- Prep Ahead: You can make the dough and shape the rocks a day or two in advance and let them dry. Store them in an airtight container until you’re ready to activate the glow. This is great for party prep! If you’re prepping for a party, you might also like these 4th of July Oreo Balls.
How to Store Glowing, Bouncy Moon Rocks
Keep your moon rocks ready for their next glow session by storing them properly. Once they are completely dry, place them in an airtight container or a resealable plastic bag. Keep them away from moisture, as this can make them mushy. They should retain their glow-activating properties for several weeks, though the glow might fade over time.
FAQs
Here are some common questions you might have:
- Can I make these edible? No, these are strictly for crafting and sensory play. Please do not eat them!
- How long will they glow? The glow duration depends on how long and how brightly you charge them. Typically, they’ll glow for a good 10-20 minutes after a good charge, with a fainter glow lasting longer.
- Can I use different kinds of paint? It’s best to stick with glow-in-the-dark craft paint or pigment powder specifically designed for crafts. Regular paint won’t glow, and some paints might not react well with the baking soda mixture.
- My rocks are crumbling, what did I do wrong? You might not have used enough water, or the dough might have dried out too quickly. Try adding a tiny bit more water and kneading it in, or ensure you’re working in a relatively humid environment if your home is very dry.
I hope you have as much fun making and playing with these Glowing, Bouncy Moon Rocks as I do! They’re a wonderful way to spark imagination and enjoy some hands-on creativity. For more fun craft ideas and delicious recipes, be sure to follow us on Pinterest!

Glowing, Bouncy Moon Rocks
Equipment
- Mixing Bowl
- Tray or baking sheet
Ingredients
For the Moon Rocks
- 1 cup baking soda This is our main base, giving the rocks their unique texture.
- 1/4 cup water Just enough to bring everything together.
- 2 tbsp glow-in-the-dark paint or glow pigment powder non-toxic, The magic ingredient for that otherworldly glow!
- 3 drops black food coloring or washable black paint (optional) For that authentic "moon rock" look.
- 2 tbsp cornstarch (for texture, optional) If you want a slightly smoother, more pliable dough.
- 50 ml vinegar (for fizzing effect, optional) For an extra bit of scientific fun!
Instructions
- Step 1: Grab a mixing bowl and pour in your 1 cup of baking soda.
- Step 2: If you want your moon rocks to look more authentic, add a few drops of black food coloring or a tiny bit of washable black paint to the baking soda. Mix it in well until the color is evenly distributed.
- Step 3: Now, it’s time to add the water. Gradually pour in your 1/4 cup of water while stirring. Keep mixing until you achieve a moldable dough consistency. You want it to hold its shape without being too crumbly or too sticky.
- Step 4: For a smoother, more tactile dough, sprinkle in a tablespoon or two of cornstarch and mix it thoroughly. This gives the rocks a nice, soft feel.
- Step 5: Get creative! Pinch off pieces of the dough and roll them into irregular, rock-like shapes. Think bumpy, lumpy, and varied sizes – just like real moon rocks!
- Step 6: Place your beautifully shaped moon rocks on a tray or baking sheet.
- Step 7: Allow the rocks to dry completely. This usually takes a few hours, but for the best bouncy texture, I like to leave them overnight.
- Step 8: Once your rocks are dry, it’s time for the magic! Expose them to a bright light source (like a lamp or even daylight) for a few minutes. This "charges" the glow-in-the-dark paint or pigment.
- Step 9: Now for the fun part! Take your glowing moon rocks and give them a gentle bounce. Squish them, play with their texture, and marvel at their soft glow. For an extra burst of excitement, try pouring a little bit of vinegar over them – watch them fizz and bubble! It's like a mini lunar eruption right in your hands.