
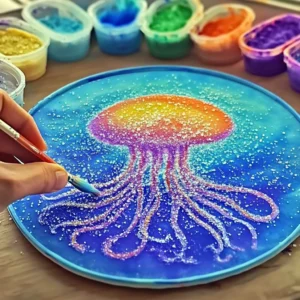
Remember those magical afternoons spent creating art, where a little bit of glue and some salt could transform plain paper into something truly spectacular? I have such fond memories of bringing simple designs to life with vibrant colors, and this Jellyfish Salt Painting is one of those crafts that instantly brings back those happy, creative vibes. It’s not just beautiful, it’s also surprisingly easy to make, making it perfect for a quiet afternoon, a rainy day activity, or even a fun craft project to do with the kids!
Why You’ll Love Jellyfish Salt Painting
- Fast: You can create a stunning piece in under an hour!
- Easy: The steps are super simple, even for beginners.
- Giftable: These look so professional, they make wonderful handmade gifts.
- Crowd-pleasing: Everyone, from little ones to grown-ups, is mesmerized by the way the colors spread!
Ingredients
Gathering your supplies is a breeze. You likely have most of these already in your craft or kitchen drawers!
- White cardstock or watercolor paper: This provides a sturdy base for your colorful creation. Watercolor paper is great because it can handle a bit of moisture.
- White school glue: The magic ingredient that makes the salt stick and the colors bloom!
- Table salt: Plain old table salt is perfect for creating those gorgeous, textured lines.
- Watercolor paints or liquid food coloring: This is where you get to play with color! Watercolors give a softer effect, while liquid food coloring offers bolder hues.
- Paintbrushes or droppers: To gently apply the color. Droppers are especially fun for kids as they give a really controlled way to see the color spread.
- Small cups or a paint palette: For mixing your colors with a little water.
- Tray or baking sheet: Essential for catching any excess salt or stray paint drips, keeping your workspace tidy.
How to Make Jellyfish Salt Painting
Let’s get crafting! It’s a simple process that yields beautiful results.
- Prep your station: Lay your cardstock or watercolor paper flat on a tray or baking sheet. This is your first step to a mess-free craft!
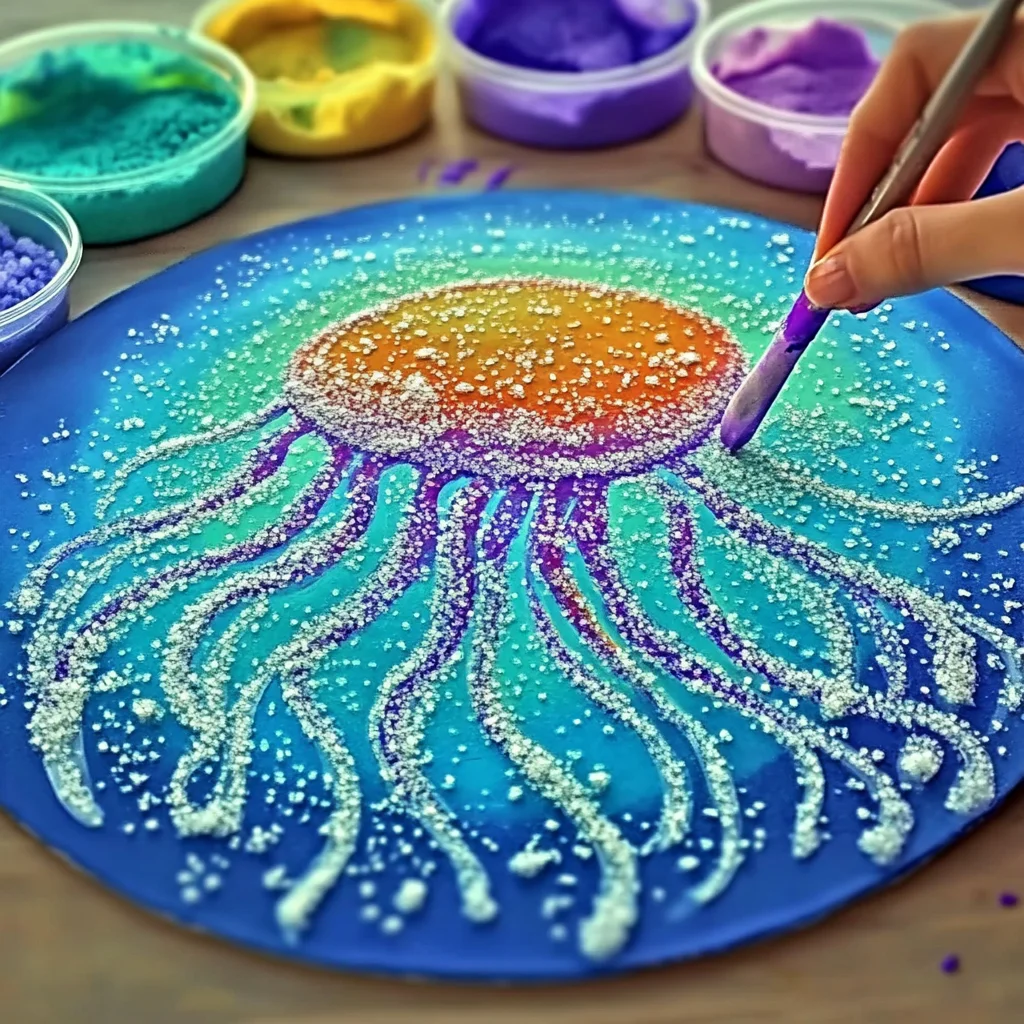
- Draw your jellyfish: Using the white school glue, carefully draw the outline of your jellyfish. Think about a bell shape for the body and flowing tentacles. Don’t worry about perfection; slightly wobbly lines add character!
- Salt it up: While the glue is still wet, generously sprinkle table salt all over it. Make sure every bit of glue is covered. Once you’re happy with the salt coverage, gently tilt the paper over your tray to shake off any excess salt. The salt crystals will cling to the glue, creating amazing texture.
- Mix your colors: In your small cups or on your paint palette, mix your watercolor paints or liquid food coloring with a small amount of water. You want a good, vibrant color that’s not too watery.
- Bring it to life: Dip your paintbrush or dropper into one of your mixed colors. Gently touch the tip to the salted glue lines. Watch in awe as the color magically travels up the salt crystals, creating a beautiful, stained-glass effect.
- Color your jellyfish: Continue adding colors to fill in the body and tentacles of your jellyfish. You can use different colors for different sections or let them blend together. Experiment with touching colors next to each other to see how they interact. This part is so satisfying, much like creating sugar water paintings where the colors bloom!
- Let it dry: Once you’re happy with your masterpiece, let it dry completely. This usually takes a few hours, depending on how much liquid you’ve used. Resist the urge to touch it while it’s drying!
Substitutions & Additions
Feeling inspired to tweak this recipe? Here are a few ideas:
- Different shapes: Instead of jellyfish, try drawing fish, seahorses, or even abstract patterns. If you love ocean themes, you might also enjoy making this DIY ocean in a jar.
- Glitter: After salting, before the glue dries, sprinkle some fine glitter over the salt for an extra sparkly effect.
- Paint pens: For a cleaner look, you could try using white paint pens for the outline and then applying colored liquid watercolors to the salt.
- Different paper: While cardstock is great, you could also try this on heavy drawing paper. Just be mindful that it might wrinkle a bit more if you use too much liquid.
Tips for Success
A few little tricks can make your Jellyfish Salt Painting even more spectacular:
- Don’t be shy with the salt! The more salt you use to cover the glue, the more vibrant the color diffusion will be.
- Gentle application is key. You want to touch the color to the salt, not scrub it. Let gravity and capillary action do the work.
- Work in sections if needed. If you’re making a larger piece or working with very young children, you might want to do one section of the jellyfish at a time to prevent the glue from drying before you salt and paint it.
- Prep ahead for gifting: If you plan to give these as gifts, you can draw and salt multiple jellyfish in one session and then let them dry overnight.
How to Store Jellyfish Salt Painting
Once your beautiful jellyfish is completely dry, you can carefully remove it from the tray. Store it flat in a folder or place it in a shadow box frame to protect it. Since it’s paper-based, it’s best to keep it out of direct sunlight and away from moisture to preserve its colors.
FAQs
- Can I use regular glue? Yes, white school glue works best because it’s thick enough to hold the salt well and allows for good color diffusion.
- Will the salt fall off after drying? Usually, most of the salt will adhere to the dried glue. You can spray a light coat of clear acrylic sealer on it if you’re concerned, but it’s often not necessary if handled gently.
- Can I use markers instead of paint? While you can try touching markers to the salt, watercolors or liquid food coloring are recommended because they are water-based and will spread much more effectively through the salt crystals.
I hope you have as much fun making your Jellyfish Salt Painting as I do! It’s a wonderfully relaxing and rewarding craft. If you enjoyed this, be sure to check out other fun crafts and recipes on our site! You might also like our Pinterest for more creative inspiration.
Jellyfish Salt Painting
Equipment
- White cardstock or watercolor paper
- White school glue
- Table salt
- Watercolor paints or liquid food coloring
- Paintbrushes or droppers
- Small cups or a paint palette
- Tray or baking sheet
Ingredients
- White cardstock or watercolor paper
- White school glue
- Table salt
- Watercolor paints or liquid food coloring
- Paintbrushes or droppers
- Small cups or a paint palette
- Tray or baking sheet
Instructions
- Step 1: Lay your cardstock or watercolor paper flat on a tray or baking sheet. This is your first step to a mess-free craft!
- Step 2: Using the white school glue, carefully draw the outline of your jellyfish. Think about a bell shape for the body and flowing tentacles. Don't worry about perfection; slightly wobbly lines add character!
- Step 3: While the glue is still wet, generously sprinkle table salt all over it. Make sure every bit of glue is covered. Once you’re happy with the salt coverage, gently tilt the paper over your tray to shake off any excess salt. The salt crystals will cling to the glue, creating amazing texture.
- Step 4: In your small cups or on your paint palette, mix your watercolor paints or liquid food coloring with a small amount of water. You want a good, vibrant color that’s not too watery.
- Step 5: Dip your paintbrush or dropper into one of your mixed colors. Gently touch the tip to the salted glue lines. Watch in awe as the color magically travels up the salt crystals, creating a beautiful, stained-glass effect.
- Step 6: Color your jellyfish: Continue adding colors to fill in the body and tentacles of your jellyfish. You can use different colors for different sections or let them blend together. Experiment with touching colors next to each other to see how they interact. This part is so satisfying, much like creating sugar water paintings where the colors bloom!
- Step 7: Let it dry: Once you’re happy with your masterpiece, let it dry completely. This usually takes a few hours, depending on how much liquid you’ve used. Resist the urge to touch it while it’s drying!