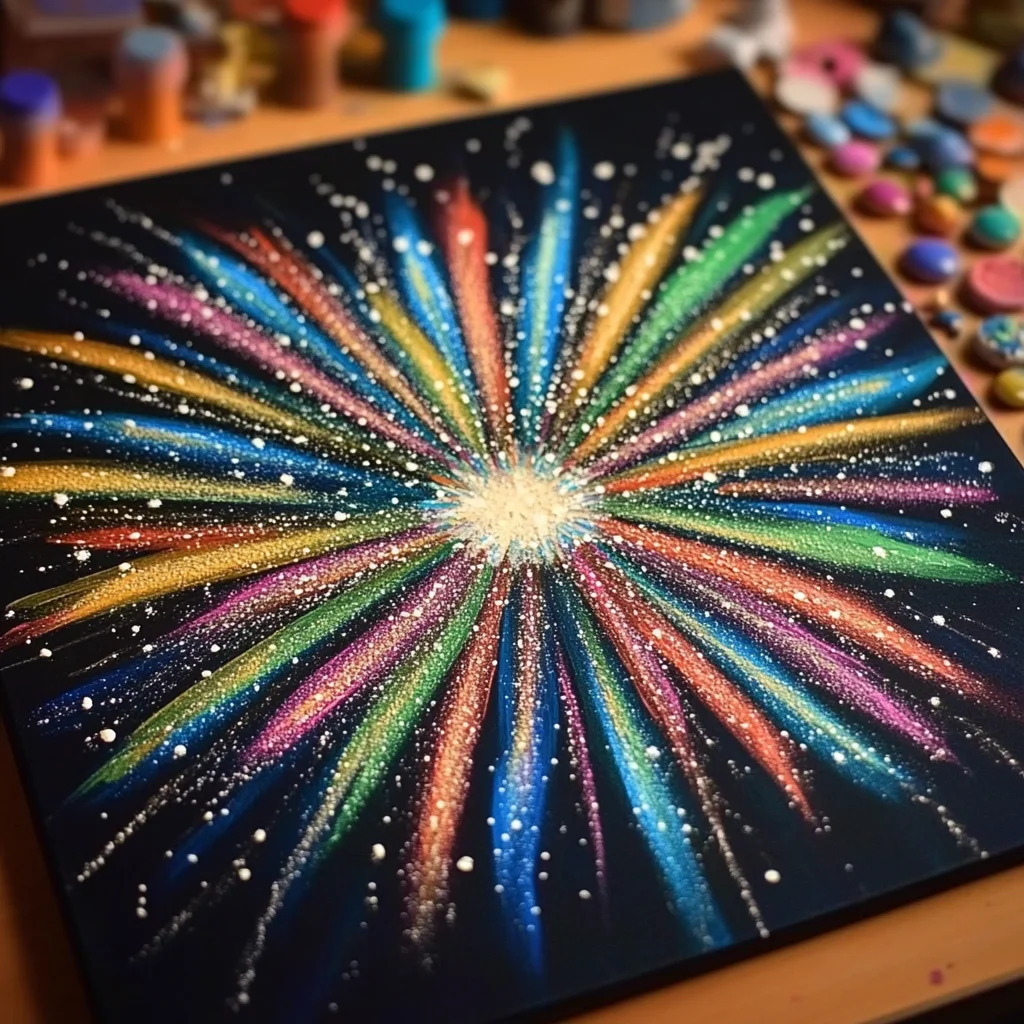
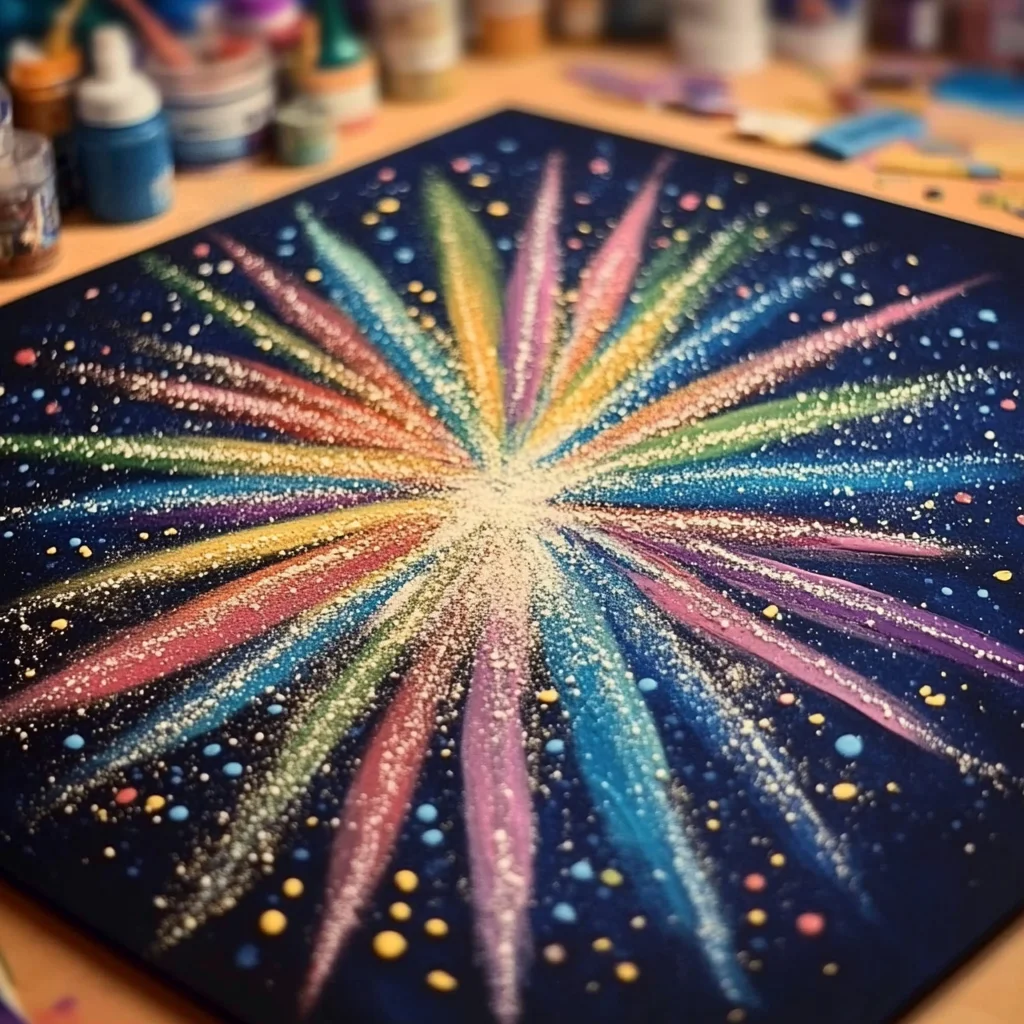
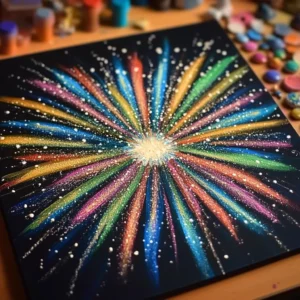
Remember those magical nights watching fireworks light up the sky? There’s something so special about those fleeting bursts of color and light. Well, today we’re bringing that excitement right into your home with a super simple, incredibly rewarding craft: Salt & Glue Fireworks Painting! This isn’t just any craft; it’s a gateway to unleashing your inner artist and creating something truly spectacular. It’s one of those activities that feels like pure magic unfolding right before your eyes, and the best part? It’s ridiculously easy!
Why You’ll Love Salt & Glue Fireworks Painting
- Fast: You can get the basic painting done in under 15 minutes!
- Easy: Perfect for little hands and big imaginations alike. No complicated steps here!
- Giftable: These sparkling creations make thoughtful, handmade gifts.
- Crowd-pleasing: Kids and adults alike will be mesmerized by the color-spreading magic.
Ingredients
Gathering your supplies is half the fun! Here’s what you’ll need to create your own dazzling fireworks:
- 4 sheets heavy black construction paper (9 × 12 inches): The dark paper makes the fireworks pop, just like a real night sky!
- 1 cup white school glue (in a squeeze bottle): This is your “firework powder.” The squeeze bottle makes drawing the designs super easy.
- 1 cup table salt (fine grain): The secret ingredient that makes the magic happen!
- 1/2 cup liquid watercolors or food coloring diluted 1:1 with water (assorted colors): Think of these as your vibrant firework explosions.
- 4 small paintbrushes or pipettes (one per color): These are your magic wands for spreading the color.
- 1 teaspoon edible glitter or silver luster dust (optional): For that extra sparkle and shimmer! Because who doesn’t love a little extra dazzle?
- Plastic tray or rimmed baking sheet: Essential for catching any runaway salt or drips.
- Paper towels: For any little oopsies or clean-ups.
How to Make Salt & Glue Fireworks Painting
Alright, let’s get our hands a little messy and create some art! This process is so satisfying.
-
Prep Your Station: First things first, lay down your plastic tray or baking sheet. This is your designated art zone! Place one sheet of that beautiful black construction paper on top. This is where your fireworks will bloom.
-
Draw Your Fireworks: Grab your white school glue bottle. Now, let your imagination run wild! Draw radiating lines, starbursts, and any fiery shapes you can think of. Make sure your glue lines are nice and thick – this is important for the salt to stick well.
-
Salt Magic: Before the glue has a chance to dry, it’s time for the salt! Generously sprinkle table salt all over the wet glue until every bit is covered. Don’t be shy with the salt! Then, gently tilt and tap your paper over the tray to let go of any extra salt. See that lovely textured layer forming? Amazing!
-
Add Some Sparkle (Optional): If you’re feeling extra fancy, now’s the time to add that edible glitter or silver luster dust. Just a light dusting over the salted glue lines will add an incredible shimmer. Let the glue set for about 5 minutes. You want it to form a crust, but still be a little damp so the color can spread.
-
Bring on the Color!: This is where the real magic happens. Load up one of your paintbrushes or pipettes with a vibrant liquid watercolor or your diluted food coloring. Gently touch the tip of the brush or pipette to one of the salted glue lines. Watch in awe as the color magically travels and spreads along the salt! It’s like watching tiny explosions of color. Repeat this with different colors on your firework designs. I love seeing how the colors blend and bleed into each other – it’s so unpredictable and beautiful.
-
Dry and Reveal: Once all your colors are applied, carefully lay the paintings flat to dry. This usually takes about 4 hours. Patience is key here! Once they’re completely dry, give the paper a gentle tap to shake off any loose salt. Behold! Your stunning salt and glue fireworks are revealed!
Substitutions & Additions
Want to switch things up or add your own personal flair? Here are a few ideas:
- Different Paper: While black construction paper is ideal, you could also try dark blue or even a deep purple.
- More Textures: Experiment with different types of salt, like Epsom salt for a crystalline effect, or even coarse sugar for a different sparkle.
- Glue Variety: If you don’t have a squeeze bottle, you can carefully spoon glue onto the paper and spread it with a toothpick or the back of a spoon.
- Adding a Base Layer: For a different look, try applying a wash of watered-down paint to the paper before drawing with glue.
- Beyond Fireworks: This technique isn’t just for fireworks! Try making flowers, abstract designs, or even letters. It’s a versatile technique, similar to how you can transform simple ingredients into delightful treats like easy cake mix toffee bars or create vibrant colors with our Kool-Aid gummy treats.
Tips for Success
A few little pointers to make your experience even smoother:
- Thick Glue Lines are Key: If your glue lines are too thin, the salt won’t adhere properly, and the color won’t spread as dramatically.
- Don’t Rush the Drying: Ensure the paintings are completely dry before tapping off the excess salt to prevent smudging.
- Experiment with Color Placement: Try touching the color to the middle of a glued line to see how it spreads outwards, or touch it to the end of a line for a different effect.
- Protect Your Surfaces: Always use a tray or newspaper to protect your work area from salt and paint. Think of it like preparing to bake your favorite cookies, such as these soft-baked M&M cookies – a little prep goes a long way!
How to Store Salt & Glue Fireworks Painting
Once your beautiful artwork is dry, you can easily store it. Lay the paintings flat in a portfolio or a large envelope. They are quite delicate, so handle them with care. They should last for years as a lovely reminder of your creative session!
FAQs
-
Can kids do this on their own?
Yes! This is a fantastic craft for kids. Younger children might need a little help with drawing the glue lines, but they’ll love sprinkling the salt and watching the colors spread.
-
Why does the color spread?
The salt crystals absorb the liquid color, and because salt is porous, it draws the liquid up and along the glue lines. It’s a simple science experiment hidden within a beautiful art project!
-
Can I use markers instead of liquid watercolors?
Markers won’t work for this technique because they don’t have enough liquid to be absorbed by the salt. Stick to liquid watercolors, diluted food coloring, or even watered-down acrylic paints.
-
What if my salt falls off before I add the color?
This usually happens if the glue has dried too much. Make sure to sprinkle the salt immediately after drawing your glue designs. If some does fall off, you can try dabbing a little more glue in that spot and re-salting.
I hope you have an absolute blast making these Salt & Glue Fireworks Paintings! They’re such a fun way to bring a little sparkle and excitement into your day. If you enjoyed this, you might also like exploring other creative crafts like our easy DIY bioplastic suncatchers or trying out a new recipe like our blueberry lemon ricotta pancakes!
Don’t forget to share your beautiful creations! Follow us on Pinterest for more fun craft ideas and delicious recipes!
Salt & Glue Fireworks Painting
Equipment
- Black construction paper
- White school glue (squeeze bottle)
- Table salt (fine grain)
- Liquid watercolors or diluted food coloring
- Paintbrushes or pipettes
- Edible glitter or silver luster dust (optional)
- Plastic tray or rimmed baking sheet
- Paper towels
Ingredients
- 4 sheets heavy black construction paper 9 × 12 inches
- 1 cup white school glue in a squeeze bottle
- 1 cup table salt fine grain
- 1/2 cup liquid watercolors or food coloring diluted 1:1 with water assorted colors
- 4 pieces small paintbrushes or pipettes one per color
- 1 teaspoon edible glitter or silver luster dust optional
Instructions
- Step 1: Prep Your Station: First things first, lay down your plastic tray or baking sheet. This is your designated art zone! Place one sheet of that beautiful black construction paper on top. This is where your fireworks will bloom.
- Step 2: Draw Your Fireworks: Grab your white school glue bottle. Now, let your imagination run wild! Draw radiating lines, starbursts, and any fiery shapes you can think of. Make sure your glue lines are nice and thick – this is important for the salt to stick well.
- Step 3: Salt Magic: Before the glue has a chance to dry, it's time for the salt! Generously sprinkle table salt all over the wet glue until every bit is covered. Don't be shy with the salt! Then, gently tilt and tap your paper over the tray to let go of any extra salt. See that lovely textured layer forming? Amazing!
- Step 4: Add Some Sparkle (Optional): If you’re feeling extra fancy, now’s the time to add that edible glitter or silver luster dust. Just a light dusting over the salted glue lines will add an incredible shimmer. Let the glue set for about 5 minutes. You want it to form a crust, but still be a little damp so the color can spread.
- Step 5: Bring on the Color!: This is where the real magic happens. Load up one of your paintbrushes or pipettes with a vibrant liquid watercolor or your diluted food coloring. Gently touch the tip of the brush or pipette to one of the salted glue lines. Watch in awe as the color magically travels and spreads along the salt! It's like watching tiny explosions of color. Repeat this with different colors on your firework designs. I love seeing how the colors blend and bleed into each other – it’s so unpredictable and beautiful.
- Step 6: Dry and Reveal: Once all your colors are applied, carefully lay the paintings flat to dry. This usually takes about 4 hours. Patience is key here! Once they're completely dry, give the paper a gentle tap to shake off any loose salt. Behold! Your stunning salt and glue fireworks are revealed!