
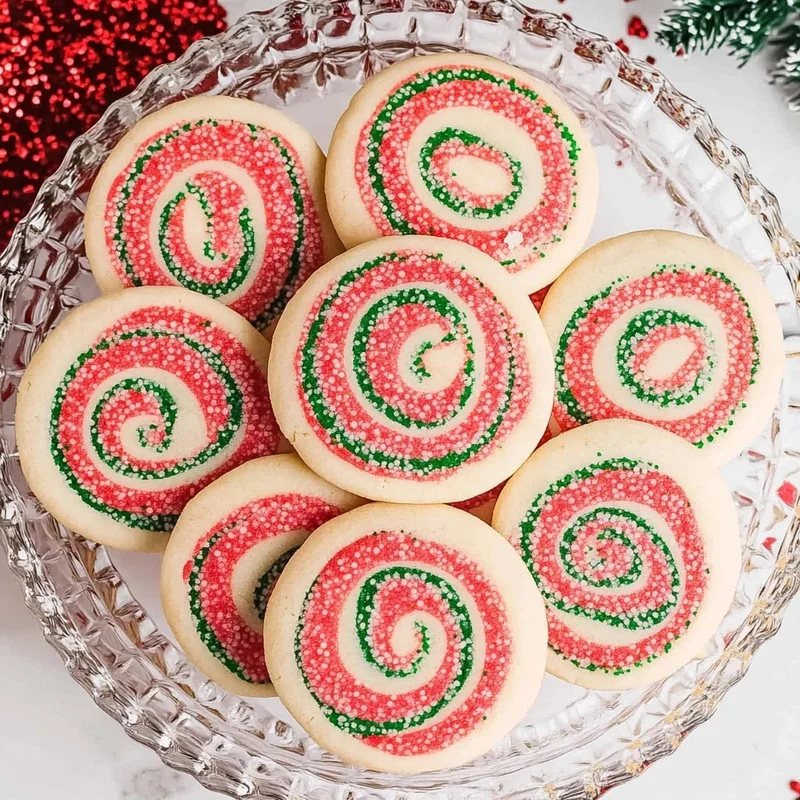
Oh, the holidays! They just wouldn’t be the same without a little bit of magic sprinkled into our kitchens, right? And what’s more magical than a batch of beautiful, swirled cookies that taste as good as they look? Today, we’re diving into a recipe that brings back all those cozy, nostalgic feelings of Christmases past: Christmas Pinwheel Cookies! These beauties are surprisingly easy to whip up, making them the perfect project for a chilly afternoon, a fun activity with the kids, or even a delightful way to get ahead on your holiday baking. Get ready to impress everyone with these classic, festive treats!
Why You’ll Love Christmas Pinwheel Cookies
- Fast: While there’s chill time, the active prep is super quick!
- Easy: Simple steps that even beginner bakers can master.
- Giftable: Package them up beautifully for a thoughtful homemade gift.
- Crowd-pleasing: The classic vanilla and hint of fruitiness (if you add it!) are always a hit.
Ingredients
Here’s what you’ll need to make these charming cookies:
- 1 ¼ cups granulated sugar: The sweet base that makes these cookies so delightful.
- 1 cup salted butter, softened: Make sure it’s nice and soft so it creams beautifully!
- 1 ½ teaspoons vanilla extract: For that classic, comforting cookie flavor.
- 1 large egg: To bind everything together perfectly.
- 3 cups all-purpose flour: The backbone of our cookie dough.
- ½ teaspoon baking powder: Just a touch to give them a little lift.
- ½ teaspoon red liquid food coloring: For that festive Christmas pop of color!
How to Make Christmas Pinwheel Cookies
Let’s get baking! Follow these simple steps:
- First things first, grab your stand mixer. We’re going to cream together the granulated sugar, softened butter, and vanilla extract. Beat them on medium speed until they’re nice and creamy, which usually takes about 2 minutes. This is where the magic starts!
- Time to scrape down the sides of your bowl with a handy rubber spatula. Then, add in your large egg and continue mixing just until everything is combined. Don’t overmix here; we’re just incorporating it gently.
- Now, it’s time for the dry ingredients. Add in your all-purpose flour and baking powder. Mix everything on low speed until you don’t see any more streaks of flour. You want a smooth, cohesive dough.
- Give your bowl another scrape down. We’re going to divide the dough in half. Take one half out and place it onto a piece of parchment paper. To the dough remaining in the mixer bowl, add the red liquid food coloring. Mix it on low speed until the color is nice and uniform.
- Now, divide each of those halves in half again. So, you should have two portions of plain dough and two portions of red dough. Shape each portion into a separate rectangle. Wrap each rectangle snugly in plastic wrap and pop them into the refrigerator for about 30 minutes to chill. This makes them easier to work with.
- Once chilled, take one piece of dough out of the fridge. On a fresh piece of parchment paper, roll it out into an approximately 11×7 inch rectangle. Try to get the edges as straight as you can, as this will help with your final cookie shape. Repeat this with all the remaining dough pieces. If they get a little wonky, don’t worry! You can trim the edges with a knife to get those nice, straight lines.
- This is where the pretty pinwheels come to life! Carefully place one red dough rectangle on top of one plain dough rectangle. For the other two pieces, place a red dough rectangle on the bottom and a plain dough rectangle on top.
- Now, gently roll each layered rectangle into a long log. Think of it like rolling up a jelly roll. Once they’re rolled, wrap each log tightly in plastic wrap and refrigerate them for another 1-2 hours, or even overnight. This is crucial for getting clean slices when you cut them.
- When you’re ready to bake, preheat your oven to 350°F (175°C). Line a baking sheet with parchment paper. This prevents sticking and makes cleanup a breeze.
- Take one of your chilled cookie dough logs out of the refrigerator. Carefully slice the log into ¼ to ½ inch thick cookies. I like to use a sharp knife for clean cuts.
- Arrange your beautiful cookie slices on the prepared baking sheet, leaving about 1 inch of space between them. They’ll spread a little as they bake.
- Bake for about 9-11 minutes, or until the edges of the cookies are just starting to turn a light golden brown. Keep an eye on them, as ovens can vary!
- Let the cookies cool on the baking sheet for 2-3 minutes before gently transferring them to a wire rack to cool completely. Patience is key here to prevent them from breaking.
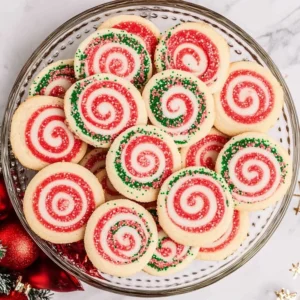
- Repeat those last few steps with the remaining cookie dough logs. Soon, you’ll have a beautiful stack of Christmas Pinwheel Cookies ready to enjoy!
Substitutions & Additions
Want to put your own spin on these? Here are some ideas:
- Color: Instead of red, try green for a classic Christmas duo, or even blue and silver for a winter wonderland theme!
- Flavor: Add a touch of almond extract along with the vanilla for a different flavor profile.
- Swirls: For a more complex swirl, you could make a small batch of chocolate dough or even a green dough and layer them together. Think of it like our blueberry cheesecake swirl rolls, but in cookie form!
- Decorations: Once cooled, you could drizzle them with a simple white chocolate ganache or sprinkle them with festive edible glitter.
Tips for Success
A few little tricks can make all the difference:
- Chill Time is Key: Don’t skip the chilling steps! Cold dough is much easier to roll and slice, resulting in cleaner pinwheels.
- Even Rolling: Try to roll your dough rectangles to a consistent thickness. This ensures your cookies bake evenly.
- Sharp Knife: A sharp knife will give you cleaner cuts, making your pinwheels look extra neat.
- Prep Ahead: You can make the dough logs and keep them in the refrigerator for up to 2 days before slicing and baking. This is a great way to spread out your holiday baking!
How to Store Christmas Pinwheel Cookies
These cookies are best enjoyed fresh, but they store wonderfully too! Once completely cooled, you can store them in an airtight container at room temperature for up to 3-4 days. They also freeze beautifully! Wrap the cooled, baked cookies tightly in plastic wrap, then place them in a freezer-safe bag or container for up to 2-3 months. Just let them thaw at room temperature when you’re ready for a delicious treat.
FAQs
- Can I make these cookies without food coloring? Absolutely! They’ll still be delicious, just without the festive red swirl.
- Can I use margarine instead of butter? While butter gives the best flavor and texture, you can use margarine. Just be sure it’s a good quality one meant for baking.
- How thick should I slice the logs? Slicing them between ¼ and ½ inch thick is ideal. Thicker cookies will be chewier, while thinner ones will be crispier.
Happy Baking, everyone! These Christmas Pinwheel Cookies are a simple yet spectacular way to add a touch of homemade cheer to your holidays. If you try this recipe, be sure to share your creations! And for more baking inspiration, don’t forget to follow us on Pinterest!
Easy Christmas Pinwheel Cookies
Equipment
- Stand Mixer
- Rubber spatula
- parchment paper
- Plastic wrap
- Baking sheets
- sharp knife
- Wire rack
Ingredients
- 1 ¼ cups granulated sugar
- 1 cup salted butter, softened
- 1 ½ teaspoons vanilla extract
- 1 large egg
- 3 cups all-purpose flour
- ½ teaspoon baking powder
- ½ teaspoon red liquid food coloring
Instructions
- First things first, grab your stand mixer. We're going to cream together the granulated sugar, softened butter, and vanilla extract. Beat them on medium speed until they're nice and creamy, which usually takes about 2 minutes. This is where the magic starts!
- Time to scrape down the sides of your bowl with a handy rubber spatula. Then, add in your large egg and continue mixing just until everything is combined. Don't overmix here; we're just incorporating it gently.
- Now, it's time for the dry ingredients. Add in your all-purpose flour and baking powder. Mix everything on low speed until you don't see any more streaks of flour. You want a smooth, cohesive dough.
- Give your bowl another scrape down. We're going to divide the dough in half. Take one half out and place it onto a piece of parchment paper. To the dough remaining in the mixer bowl, add the red liquid food coloring. Mix it on low speed until the color is nice and uniform.
- Now, divide each of those halves in half again. So, you should have two portions of plain dough and two portions of red dough. Shape each portion into a separate rectangle. Wrap each rectangle snugly in plastic wrap and pop them into the refrigerator for about 30 minutes to chill. This makes them easier to work with.
- Once chilled, take one piece of dough out of the fridge. On a fresh piece of parchment paper, roll it out into an approximately 11x7 inch rectangle. Try to get the edges as straight as you can, as this will help with your final cookie shape. Repeat this with all the remaining dough pieces. If they get a little wonky, don't worry! You can trim the edges with a knife to get those nice, straight lines.
- This is where the pretty pinwheels come to life! Carefully place one red dough rectangle on top of one plain dough rectangle. For the other two pieces, place a red dough rectangle on the bottom and a plain dough rectangle on top.
- Now, gently roll each layered rectangle into a long log. Think of it like rolling up a jelly roll. Once they're rolled, wrap each log tightly in plastic wrap and refrigerate them for another 1-2 hours, or even overnight. This is crucial for getting clean slices when you cut them.
- When you're ready to bake, preheat your oven to 350°F (175°C). Line a baking sheet with parchment paper. This prevents sticking and makes cleanup a breeze.
- Take one of your chilled cookie dough logs out of the refrigerator. Carefully slice the log into ¼ to ½ inch thick cookies. I like to use a sharp knife for clean cuts.
- Arrange your beautiful cookie slices on the prepared baking sheet, leaving about 1 inch of space between them. They'll spread a little as they bake.
- Bake for about 9-11 minutes, or until the edges of the cookies are just starting to turn a light golden brown. Keep an eye on them, as ovens can vary!
- Let the cookies cool on the baking sheet for 2-3 minutes before gently transferring them to a wire rack to cool completely. Patience is key here to prevent them from breaking.
- Repeat those last few steps with the remaining cookie dough logs. Soon, you'll have a beautiful stack of Christmas Pinwheel Cookies ready to enjoy!
Notes
Color: Instead of red, try green for a classic Christmas duo, or even blue and silver for a winter wonderland theme!
Flavor: Add a touch of almond extract along with the vanilla for a different flavor profile.
Swirls: For a more complex swirl, you could make a small batch of chocolate dough or even a green dough and layer them together. Think of it like our blueberry cheesecake swirl rolls, but in cookie form!
Decorations: Once cooled, you could drizzle them with a simple white chocolate ganache or sprinkle them with festive edible glitter.