
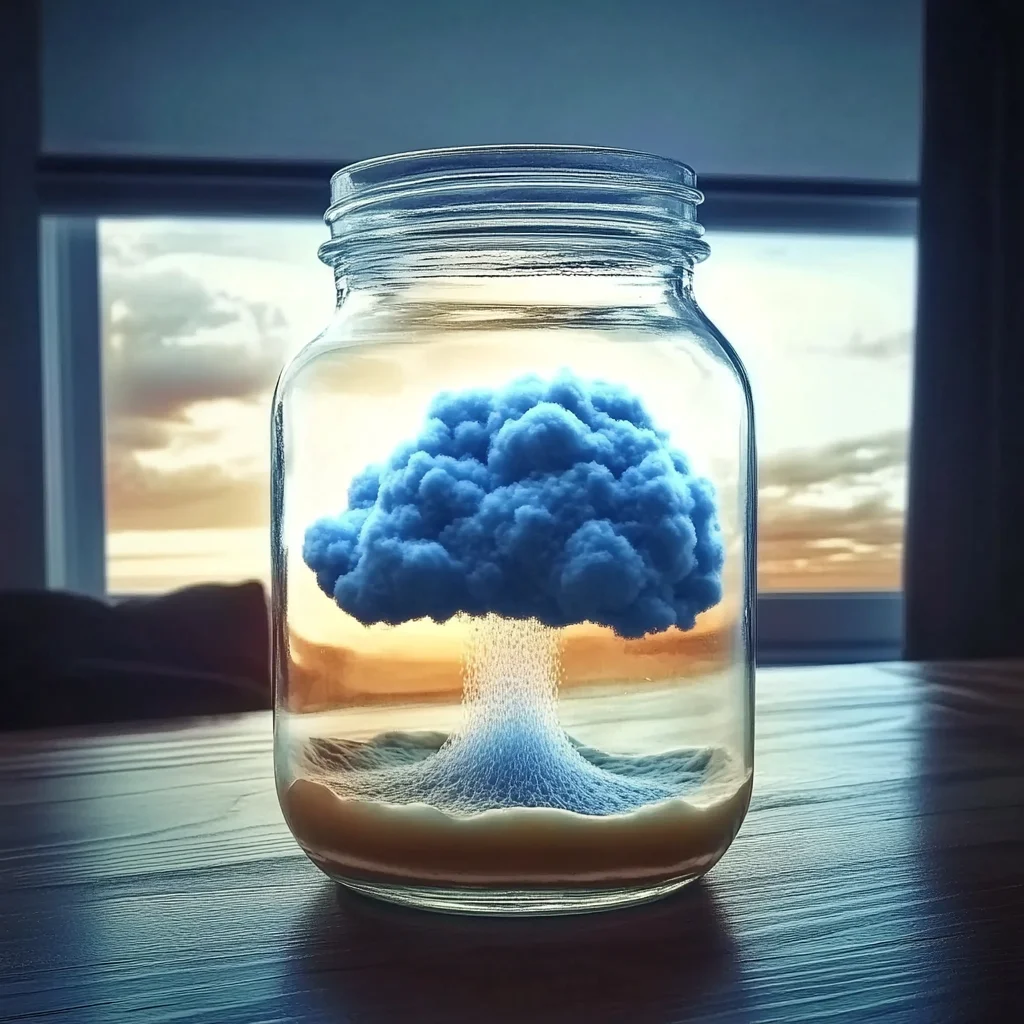
Have you ever looked up at a cloudy sky and marveled at the beauty of nature? The way the clouds float softly, ready to sprinkle rain and nourish the earth is truly magical. Today, I want to share with you a delightful DIY project that captures that very essence—a Rain Cloud in a Jar! This project is not only visually stunning but also incredibly simple and fun to make. Imagine the joy of watching the blue droplets fall through the fluffy clouds you create. It’s a wonderful way to spark curiosity and creativity, especially if you involve your kids or friends. Let’s dive into this sensory experience together and make something beautiful!
Why You’ll Love Rain Cloud in a Jar
- Beginner-friendly
- Budget-friendly
- Creative and fun
- Great for kids and families
- Perfect for gifts or decorations
- Customizable
The Heart Behind This DIY
Crafting a Rain Cloud in a Jar is more than just a fun activity; it’s an experience that encourages mindfulness and creativity. As you mix the colors and watch the transformation, you engage your senses and stimulate your imagination. This project is a wonderful way to teach kids about weather patterns in a hands-on manner, making learning feel like magic. Plus, it allows us to connect with one another as we share the joy of creating something together. Whether you’re a seasoned crafter or just starting out, you’ll find peace and satisfaction in this simple yet enchanting project.
A Gentle Look at the Process
As you embark on this journey, you can expect to fill your space with laughter and awe. First, you will layer water and shaving cream, creating a fluffy cloud. Then, you’ll mix blue food coloring with water, which will resemble rain. The best part? Watching the blue droplets cascade through the shaving cream, mimicking the beauty of a real rain cloud. It’s a calming and rewarding experience that will leave you with a stunning display to enjoy long after the crafting is done.
Materials You’ll Need
- Clear jar or glass container – This will hold your beautiful creation.
- Shaving cream – Creates the fluffy cloud effect.
- Blue food coloring – Adds that magical rain color.
- Water – Essential for your cloud and rain mixture.
- Dropper or pipette – Helps you add the blue water delicately.
Step-by-Step Directions
Step 1
Fill your clear jar or glass container about three-quarters full with water. Take a moment to watch the water ripple; it’s a soothing sight that sets the tone for your project.
Step 2
Add a generous amount of shaving cream on top of the water to create a cloud layer. Use a spoon or your hands to spread it gently, forming a lovely, fluffy cloud that floats above the water.
Step 3
In a separate small bowl, mix a few drops of blue food coloring with a small amount of water. Watch as the color swirls and blends, creating a vibrant blue mixture that will mimic rain.
Step 4
Using a dropper or pipette, carefully add the blue water mixture onto the shaving cream. Allow it to seep through gradually. You will see the blue droplets break through the cloud layer, resembling rain falling from a cloud.
Step 5
Observe the magic as the blue water slowly trickles down. Feel free to add more blue mixture for a heavier rain effect. Take a moment to appreciate your creation and the calmness it brings.
Creative Ways to Use Rain Cloud in a Jar
Your Rain Cloud in a Jar is not just a fun project; it can be a beautiful centerpiece or a thoughtful gift! Here are some creative ideas:
- Display it on a shelf or table as a whimsical decoration.
- Gift it to a friend or family member who appreciates unique crafts.
- Use it as a teaching tool for kids to learn about weather.
- Incorporate it into a calming mindfulness space in your home.
- Change the colors for different themes or occasions!
How to Store, Preserve, or Reuse Rain Cloud in a Jar
To preserve your Rain Cloud in a Jar, simply keep it in a cool, dry place away from direct sunlight. If you want to reuse the jar for another cloud, you can easily wash it out and start fresh! Just remember to clean it thoroughly before trying a new color or mixture.
Creative Variations and Customizations
- Color variations – Try different colors like purple or green for unique effects.
- Theme ideas – Create seasonal clouds, like white for winter or pastel colors for spring.
- Seasonal adaptations – Make a sunny cloud with yellow food coloring for summer!
- Kid-friendly modifications – Let kids create their own version by adding glitter for magical rain.
- Advanced creative upgrades – Experiment with scented oils in the water for a sensory experience.
Tips for Success
- Avoid overfilling the jar to prevent spills.
- Be gentle when adding the blue mixture to maintain the cloud shape.
- Prepare a clean workspace to make cleanup easier.
- Use a paper towel to catch any drips while you add the color.
- Have fun and don’t stress about perfection; creativity is all about exploring!
FAQs About Rain Cloud in a Jar
Can beginners make this?
Absolutely! This project is perfect for beginners and requires minimal supplies.
Can children participate?
Yes! Kids will love watching the colors mix and creating their own clouds.
How long does it last?
It can last for weeks if kept in a cool, dry place, but the colors may fade over time.
Can I customize it?
Definitely! Feel free to experiment with different colors and themes.
A Final Creative Note
I hope you feel inspired to create your own Rain Cloud in a Jar! Remember, the beauty of crafting lies in the joy of self-expression and the connections we make while creating. So gather your materials, invite a friend or family member, and let your creativity flow! For more delicious recipes, check out the blueberry lemon ricotta pancakes or the grilled chicken creamy pasta bowl for treats you will love! Don’t forget to share your creations and spread the joy of DIY!
For even more DIY inspiration, be sure to follow Pinterest.
Rain Cloud in a Jar
Equipment
- Clear jar or glass container
- Dropper or Pipette
Ingredients
Materials You'll Need
- Clear jar or glass container
- Shaving cream
- Blue food coloring
- Water
Instructions
- Step 1: Fill your clear jar or glass container about three-quarters full with water. Take a moment to watch the water ripple.
- Step 2: Add a generous amount of shaving cream on top of the water to create a cloud layer.
- Step 3: In a separate small bowl, mix a few drops of blue food coloring with a small amount of water.
- Step 4: Using a dropper or pipette, carefully add the blue water mixture onto the shaving cream.
- Step 5: Observe the magic as the blue water slowly trickles down.
