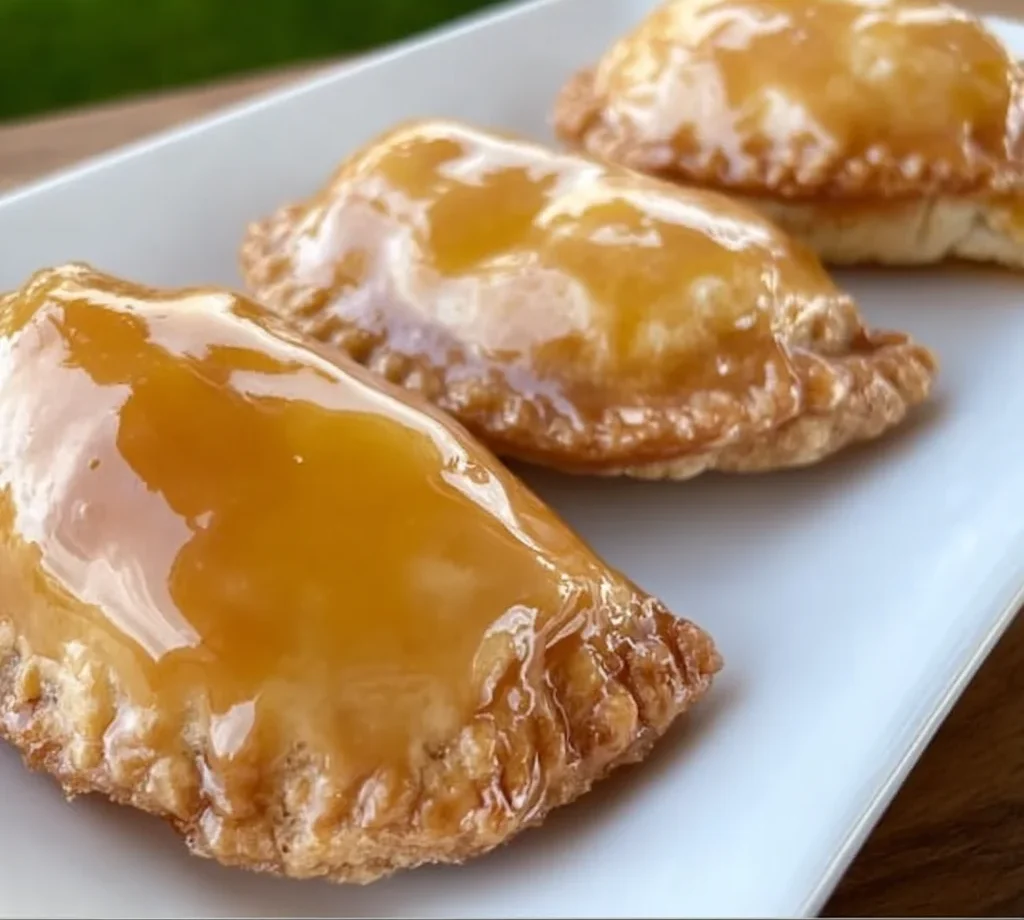
Hey friend! Grab your apron and let’s get cozy in the kitchen. There’s something magical about peach cobbler, isn’t there? It just screams warm summer nights or comforting holiday desserts. But let’s be real, sometimes you want that amazing flavor without the fuss of a whole big pie or cobbler. And maybe, just maybe, you also LOVE that sweet, simple glaze you find on a classic donut? Well, get ready, because I’ve got a treat that combines all those perfect things into one adorable, handheld package: Peach Cobbler Donut Hand Pies!
These little beauties are incredibly easy to whip up, surprisingly quick from start to finish, and taste absolutely divine. Think flaky crust, warm spiced peach filling, and that irresistible sugary donut glaze. They’re perfect for a quick dessert, a portable snack, or even a delightful brunch treat. Trust me, once you make these, they’ll become a go-to in your recipe collection!
Why You’ll Love This Recipe
- Fast
- Easy
- Giftable
- Crowd-pleasing
Ingredients
Gathering your ingredients is the first step to kitchen happiness! Here’s what you’ll need for these peachy delights:
For the Filling:
- 2 cups fresh or canned peaches, diced: Use whatever you have on hand! Fresh peaches bring a lovely bright flavor (just peel and dice ’em), but canned peaches (drained well) are a total shortcut hero here.
- ¼ cup granulated sugar: Just enough sweetness to enhance the peaches.
- 2 tbsp brown sugar: Adds a little depth and a touch of molasses-y warmth.
- 1 tbsp cornstarch: Our secret weapon for a perfectly thick filling that won’t make your hand pies soggy!
- ½ tsp cinnamon: Because peaches and cinnamon are just meant to be together.
- ¼ tsp nutmeg: A little pinch for that classic cobbler spice blend.
- 1 tsp vanilla extract: Pure vanilla makes everything taste better.
- 1 tbsp lemon juice: Brightens up the flavor and balances the sweetness.
For the Dough:
- 1 package refrigerated pie crusts (or homemade pie dough): This is where the “easy” really shines! Using store-bought crusts saves so much time. If you’re feeling ambitious or already have some homemade dough, absolutely use it!
- 1 egg, beaten (for egg wash): This gives our hand pies that beautiful golden-brown color as they bake.
For the Glaze:
- 1 cup powdered sugar: The base for our sweet, simple glaze.
- 2 tbsp milk or heavy cream: Helps create the right consistency. Cream makes it a little richer, but milk works perfectly too.
- ½ tsp vanilla extract: Another splash of vanilla for that classic donut glaze flavor.
How to Make It
Alright, let’s turn these simple ingredients into delicious hand pies! Follow these steps, and you’ll be enjoying warm, gooey goodness in no time.
1. First things first, let’s get that yummy peach filling going. Grab a saucepan and toss in your diced peaches, granulated sugar, brown sugar, cornstarch, cinnamon, nutmeg, vanilla extract, and lemon juice. Place the pan over medium heat.
2. Now, stir everything together and cook. You’ll want to stir frequently to prevent it from sticking. Watch as the mixture starts to bubble and thicken – this usually takes about 5–7 minutes. Once it’s nice and thick like pie filling, take it off the heat and let it cool completely. This step is important so you don’t end up with a soggy bottom crust!
3. While the filling is cooling, preheat your oven to 375°F (190°C). Line a baking sheet with parchment paper. This makes cleanup a breeze!
4. Unroll your refrigerated pie dough on a lightly floured surface. Grab a cookie cutter or just a small bowl and a knife and cut out circles. I like to go for about 4-6 inches in diameter, depending on how big I want the hand pies to be. You should get several circles from each crust.
5. Now for the good stuff! Take a cooled dough circle and spoon a small amount of that glorious peach filling onto one side of the circle. Don’t be tempted to overfill them, or the filling might ooze out.
6. Carefully fold the dough over the filling, making a half-moon shape. Gently press the edges together with your fingers. Then, grab a fork and press the tines along the sealed edge. This crimps the edges closed nice and tight and gives them a pretty look!
7. In a small bowl, whisk up your egg. Place your sealed hand pies on the prepared baking sheet. Now, brush the tops of each hand pie with the beaten egg. This is your egg wash and helps them turn that beautiful golden brown color in the oven.
8. Pop the baking sheet into your preheated oven. Bake for 18–22 minutes, or until they are puffed up and beautifully golden brown on top and bottom. Ovens can vary, so keep an eye on them!
9. Carefully remove the hand pies from the oven and let them cool slightly on the baking sheet or a wire rack. You want them to be warm but not so hot that the glaze melts right off.
10. While the hand pies are cooling a bit, let’s make the donut glaze! In a small bowl, whisk together the powdered sugar, milk (or cream), and vanilla extract until it’s smooth and drizzly. If it seems too thick, add another tiny splash of milk. Too thin? Add a little more powdered sugar.
11. Once the hand pies have cooled down enough to handle comfortably, it’s time for the best part! You can either dip the tops of the hand pies into the glaze or use a spoon to drizzle it generously over each one. Make sure you get that lovely, classic donut look!
12. Let the glazed hand pies sit for a few minutes to allow the glaze to set up slightly before you dive in. Try not to eat them all at once!
Substitutions & Additions
Get creative with your hand pies! Here are a few ideas to switch things up:
- Different Fruit: Not a peach fan, or want to try something new? This filling method works great with diced apples (cook a little longer), berries, or even pitted and diced plums or cherries.
- Spice It Up: Add a pinch of ground ginger, cardamom, or even a tiny hint of allspice to the peach filling for extra warmth.
- Almond Love: Swap the vanilla extract in the filling or glaze for almond extract for a lovely nutty flavor twist.
- Different Topping: Instead of the glaze, brush with melted butter and sprinkle with cinnamon-sugar before baking for a cobbler-like crust topping. Or, add a simple streusel topping!
- Dough Swap: Want to make your own pie dough from scratch? Go for it! Puff pastry would also work for a flakier hand pie.
- Glaze Variations: Add a little lemon zest to the glaze, use browned butter in the glaze for a nutty flavor, or even add a tiny pinch of cinnamon.
Tips for Success
A few little pointers to make sure your hand pies turn out perfectly every time:
- Cool the Filling Completely: This is key! Hot filling equals soggy dough. Make sure it’s fully cooled before you spoon it onto the dough.
- Don’t Overfill: It’s tempting, but too much filling will cause the hand pies to burst open in the oven. Stick to about 1-2 tablespoons per hand pie, depending on the size of your circles.
- Seal Those Edges!: Pressing with your fingers first, then crimping with a fork is the best way to make sure your filling stays put.
- Egg Wash for Color: Don’t skip the egg wash! It gives the hand pies that beautiful golden color and slightly crisp exterior.
- Adjust Glaze Consistency: The amount of liquid needed for the glaze can vary slightly depending on humidity. Add milk a tablespoon at a time until you get a smooth, pourable (or dippable) consistency.
How to Store It
If you happen to have any left (a big “if”!), here’s how to keep them fresh:
- Store cooled hand pies in an airtight container at room temperature for 1-2 days.
- For longer storage, you can refrigerate them for up to 3-4 days. The glaze might get a little sticky in the fridge.
- You can gently warm them up in a toaster oven or microwave for a few seconds if you like a warm pie (skip reheating if they have the glaze, or it will melt).
FAQs
Got questions? I’ve got answers!
Can I use frozen peaches?
Yes, absolutely! Thaw them first and drain off any excess liquid before dicing and using them in the filling.
Can I air fry these hand pies?
You sure can! Air fry at about 350°F (175°C) for 10-14 minutes, flipping halfway through, until golden brown. Keep a close eye on them as air fryers vary.
Can I make the peach filling ahead of time?
Yes, you can make the filling a day or two in advance and store it in an airtight container in the refrigerator. Just make sure it’s completely cooled before using it.
What size cutter should I use?
Anywhere from 4 to 6 inches works great! A 4-inch cutter gives you smaller, mini pies, while a 6-inch cutter makes larger, more substantial ones. It’s totally up to your preference!
Enjoy making (and eating!) these delightful Peach Cobbler Donut Hand Pies. They’re a little bit of comfort, a little bit of fun, and a whole lot of deliciousness all wrapped up together!
Easy Peach Cobbler Donut Hand Pies
Equipment
- saucepan
- baking sheet
- parchment paper
- Cookie Cutter
- fork
- Small bowl
- whisk
Ingredients
For the Filling
- 2 cups fresh or canned peaches diced, drained well if canned
- 1/4 cup granulated sugar
- 2 tbsp brown sugar
- 1 tbsp cornstarch
- 1/2 tsp cinnamon
- 1/4 tsp nutmeg
- 1 tsp vanilla extract
- 1 tbsp lemon juice
For the Dough
- 1 package refrigerated pie crusts or homemade pie dough
- 1 egg beaten, for egg wash
For the Glaze
- 1 cup powdered sugar
- 2 tbsp milk or heavy cream
- 1/2 tsp vanilla extract
Instructions
- Step 1: Make the peach filling. In a saucepan, combine diced peaches, granulated sugar, brown sugar, cornstarch, cinnamon, nutmeg, vanilla extract, and lemon juice. Cook over medium heat, stirring frequently, until the mixture bubbles and thickens, about 5–7 minutes.
- Step 2: Remove the filling from the heat and let it cool completely. This is important to prevent a soggy crust.
- Step 3: While the filling cools, preheat your oven to 375°F (190°C). Line a baking sheet with parchment paper.
- Step 4: Unroll the refrigerated pie dough on a lightly floured surface. Cut out circles about 4-6 inches in diameter using a cookie cutter or a bowl and knife.
- Step 5: Spoon a small amount (about 1-2 tablespoons) of the cooled peach filling onto one side of each dough circle. Avoid overfilling.
- Step 6: Fold the dough over the filling to create a half-moon shape. Press the edges together with your fingers, then crimp them firmly with a fork to seal.
- Step 7: Place the sealed hand pies on the prepared baking sheet. Whisk the egg in a small bowl and brush the tops of each hand pie with the beaten egg (egg wash) for a golden color.
- Step 8: Bake for 18–22 minutes, or until the hand pies are puffed up and golden brown on top and bottom. Keep an eye on them as ovens vary.
- Step 9: Carefully remove the hand pies from the oven and let them cool slightly on the baking sheet or a wire rack until warm but not too hot for glazing.
- Step 10: Make the glaze. In a small bowl, whisk together the powdered sugar, milk (or cream), and vanilla extract until smooth and drizzly. Adjust consistency with more liquid or powdered sugar if needed.
- Step 11: Dip the tops of the warm hand pies into the glaze or drizzle it generously over each one.
- Step 12: Let the glazed hand pies sit for a few minutes to allow the glaze to set up slightly before serving.