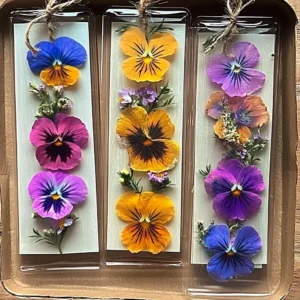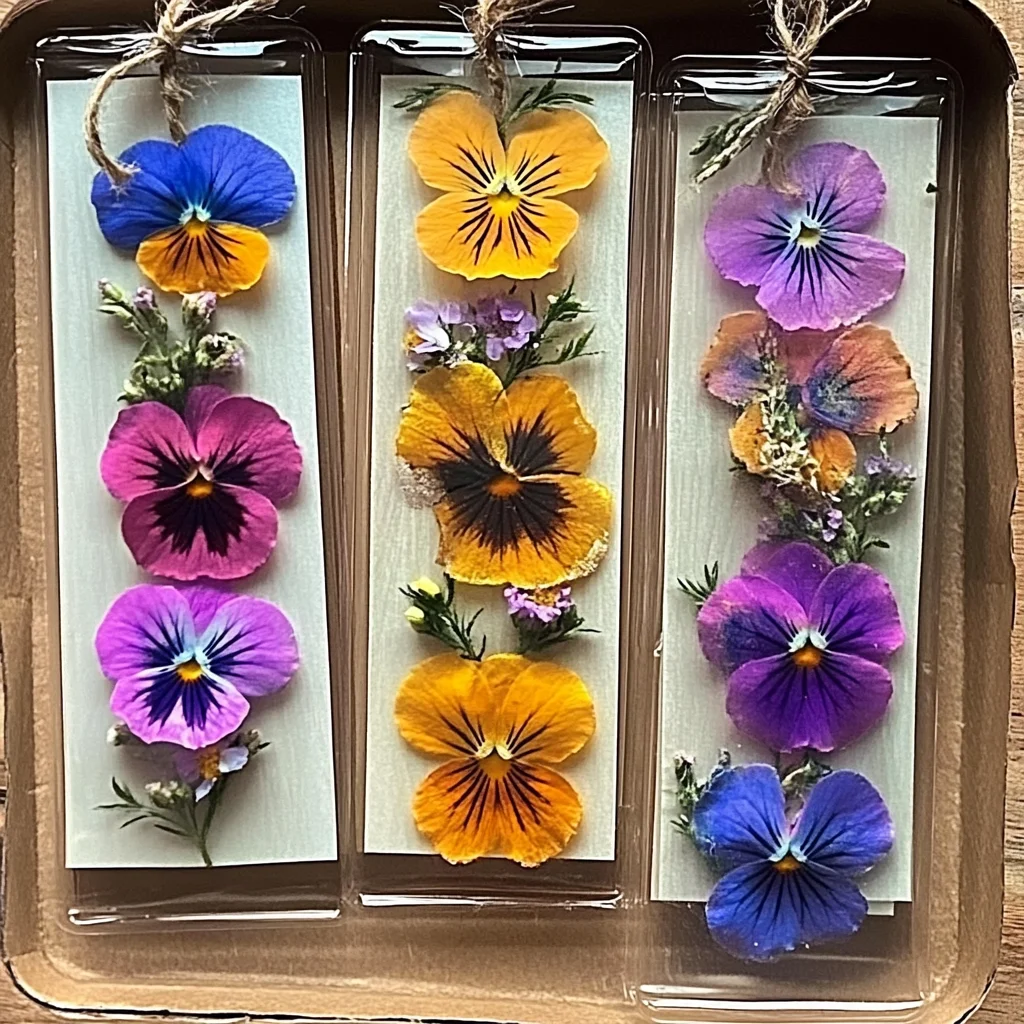
There’s something truly magical about capturing the beauty of nature and turning it into a keepsake. When I think of pressed flower bookmarks, I am transported back to sunlit afternoons spent wandering through gardens, collecting delicate petals and vibrant blooms. This DIY project not only allows you to preserve the beauty of flowers but also creates a personal, functional piece of art that you can cherish or gift. Imagine flipping through your favorite book and coming across a lovingly crafted bookmark, reminding you of a special moment in nature. Let’s embark on this delightful journey together!
Why You’ll Love DIY Pressed Flower Bookmarks
- Beginner-friendly
- Budget-friendly
- Creative and fun
- Great for kids and families
- Perfect for gifts or decorations
- Customizable
The Heart Behind This DIY
Creating pressed flower bookmarks is more than just a craft; it’s an experience that nourishes the soul. Engaging in this project encourages mindfulness as you carefully select your flowers and arrange them with intention. It’s a wonderful way to cultivate creativity, as you can experiment with different flower combinations and colors. Each bookmark becomes a unique expression of your artistic vision. Moreover, crafting together can foster connections and create cherished memories with family and friends. The soft crunch of dried petals and the gentle scent of fresh blooms bring a sensory experience that calms the mind and ignites inspiration.
A Gentle Look at the Process
As you begin this project, picture yourself surrounded by a palette of colors and textures. You will select fresh flowers, feeling their softness and admiring their intricate details. Then, you’ll layer them between sheets of parchment or wax paper, a gentle embrace that prepares them for their transformation. After a little patience while they dry, you will see your flowers come to life again as they adorn your bookmarks. The process is both soothing and rewarding, allowing you to connect with nature and your creative spirit.
Materials You’ll Need
- Fresh flowers (such as daisies, pansies, or violets) – these will be the stars of your bookmarks.
- A heavy book or a flower press – to press and preserve the flowers.
- Parchment paper or wax paper – to protect the flowers while they dry.
- Scissors – for trimming and cutting your bookmarks.
- Clear adhesive or craft glue – to attach the flowers securely.
- Cardstock or thick paper – for creating sturdy bookmarks.
- Hole punch (optional) – for adding decorative ribbons or strings.
- Ribbon or string (optional) – for a charming finish.
Step-by-Step Directions
Step 1: Select Your Flowers
Begin by selecting fresh flowers that inspire you. Daisies, pansies, and violets are lovely choices, but feel free to explore your garden or local florist. Trim the stems to a suitable length, allowing just enough to handle without damaging the blooms.
Step 2: Prepare the Flowers
Lay the freshly cut flowers between sheets of parchment or wax paper. Arrange them thoughtfully, considering how they will look on your bookmark. Once satisfied with their layout, gently press down on the flowers to secure them in place.
Step 3: Press the Flowers
Place the parchment paper with the flowers into a heavy book or a flower press. Close the book carefully, ensuring the flowers are evenly flattened. Leave them to press for about 1-2 weeks. During this time, the anticipation of seeing your beautiful bookmarks will build, creating a delightful sense of excitement!
Step 4: Assemble Your Bookmarks
Once the flowers are fully dried and pressed, carefully remove them from the parchment paper. Take your cardstock or thick paper and cut it into bookmark-sized rectangles. You can choose a classic size or get creative with shapes that inspire you.
Step 5: Attach the Flowers
Using clear adhesive or craft glue, carefully attach the pressed flowers to the bookmarks. I like to arrange them in a way that showcases their beauty, allowing some flowers to overlap for a more natural look. Allow the glue to dry completely, ensuring your design is secure.
Step 6: Add Finishing Touches
(Optional) If you’d like, use a hole punch to create a hole at the top of the bookmark. This is a perfect opportunity to add a ribbon or string for a charming touch. Choose colors that complement your flowers, and tie a lovely bow.
Creative Ways to Use DIY Pressed Flower Bookmarks
Your beautiful pressed flower bookmarks can be used in numerous ways! They make thoughtful gifts for friends and family, adding a personal touch to any book. You can also use them as decorations in your home, tucked into picture frames or displayed on a bulletin board. Each bookmark becomes a little piece of art that tells a story, reminding you of the beauty of nature and the joy of crafting.
How to Store, Preserve, or Reuse DIY Pressed Flower Bookmarks
To keep your pressed flower bookmarks looking their best, store them in a cool, dry place away from direct sunlight. This will help preserve their colors and prevent them from fading. If you ever want to refresh your bookmarks, you can always create more using new flowers or different designs, ensuring your collection stays lively and inspiring.
Creative Variations and Customizations
- Color variations – experiment with different flower colors to match your mood or season.
- Theme ideas – create bookmarks based on holidays, seasons, or favorite colors.
- Seasonal adaptations – use seasonal flowers for a fresh look throughout the year.
- Kid-friendly modifications – let children pick flowers and help with the arrangement for a fun family activity.
- Advanced creative upgrades – consider adding pressed leaves or using decorative scissors for unique edges.
Tips for Success
- Avoid using flowers that are too thick, as they may not press well.
- Be gentle when removing the flowers from the parchment to avoid damage.
- Prepare your materials beforehand to make the crafting process smoother.
- Clean up any glue spills promptly for a tidy crafting area.
- Trust your creative instincts; there’s no wrong way to design your bookmarks!
FAQs About DIY Pressed Flower Bookmarks
Can beginners make this?
Absolutely! This project is perfect for beginners and allows for creative expression at any skill level.
Can children participate?
Yes! Involve your little ones in selecting flowers and arranging them. It’s a wonderful way to bond and foster creativity.
How long does it last?
With proper care, your pressed flower bookmarks can last for years, serving as beautiful reminders of your crafting experience.
Can I customize it?
Definitely! Personalize your bookmarks with different flowers, colors, and decorative elements to make them uniquely yours.
A Final Creative Note
I hope you feel inspired to gather your materials and start crafting your own pressed flower bookmarks. Remember, the joy of creating lies in the process, not just the end result. Embrace your creativity and let each bookmark tell a story of your artistic journey. For more delicious recipes, check out the delightful Blueberry Cheesecake Swirl Rolls or Easy Small Batch Peaches & Cream Danish for treats you will love! Happy crafting!
For more delightful DIY inspiration, be sure to follow our Pinterest account!