
Hey there, fellow snack lovers! As the leaves start to turn and a crisp chill fills the air, my mind immediately goes to cozy nights, spooky movies, and, of course, ALL the delicious treats. There’s something so nostalgic about that crunchy, sweet, chocolatey goodness that puppy chow brings, and this Halloween version? Oh, it’s a game-changer!
If you’re looking for a last-minute Halloween party treat, a fun activity to do with the kids, or just a way to get into the spooky spirit, this Halloween Puppy Chow is your answer. It’s incredibly easy, comes together super fast, and the results are just so festive and fun. You’ll have everyone asking for the recipe!
Why You’ll Love Halloween Puppy Chow
- Fast: Seriously, you can whip this up in no time. Perfect for those sudden party invitations!
- Easy: Even if you’re new to the kitchen, you can totally nail this recipe. No fancy skills required.
- Giftable: Package it up in cute little bags or jars, and you’ve got the perfect homemade Halloween party favor or neighborly treat.
- Crowd-pleasing: Who doesn’t love puppy chow? This Halloween twist just adds a touch more magic.
Ingredients
Gathering your ingredients is half the fun! Here’s what you’ll need to make this Halloween delight:
- 1 cup vibrant green candy melts: These give us that eerie, ghoulish glow!
- 1 cup lavender candy melts: For a touch of spooky mystery.
- 1 cup black candy melts: Because every good Halloween needs a little darkness.
- 1 cup orange candy melts: The quintessential Halloween color!
- 4 cups Chex cereal: The perfect crispy base for all that sweet goodness.
- 1 ⅓ cups powdered sugar (divided): For that signature sweet coating.
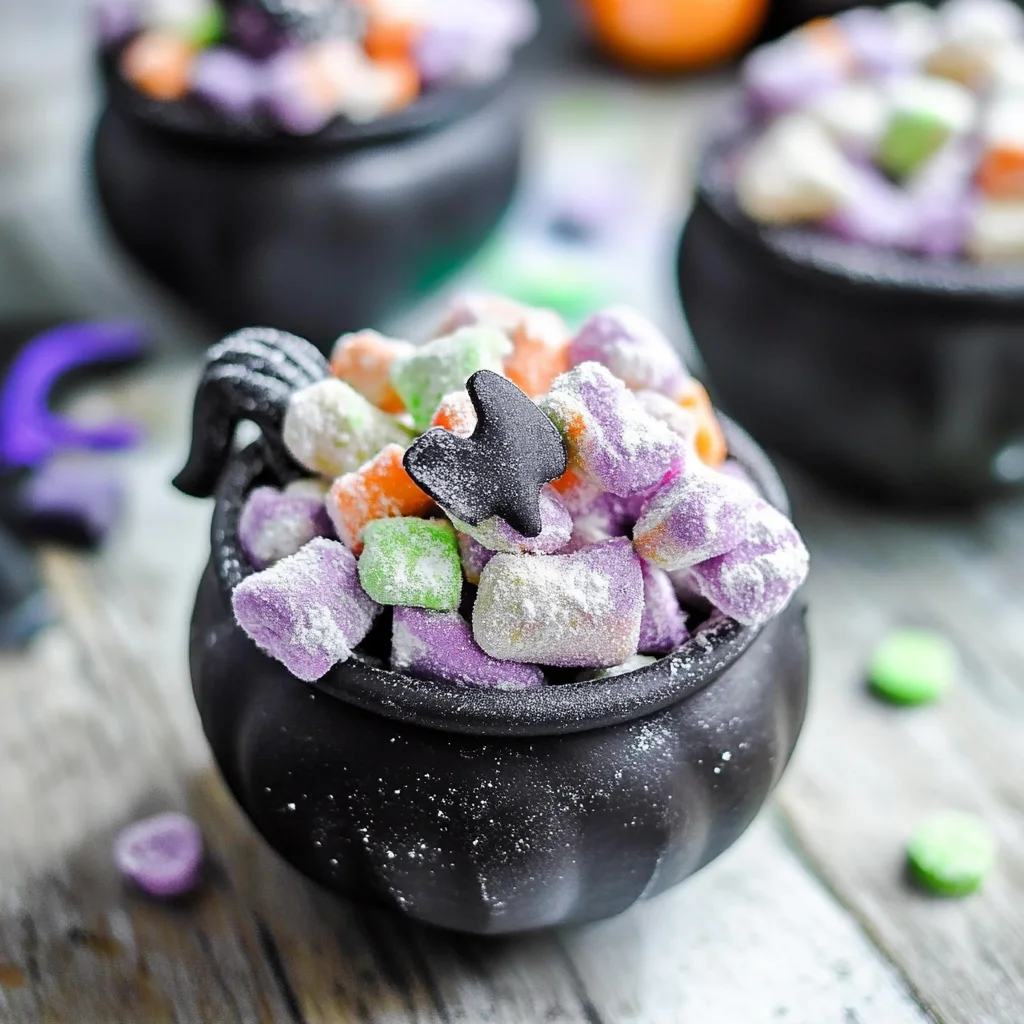
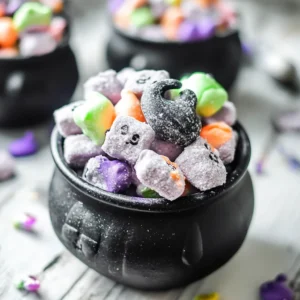
- ½ cup festive Halloween sprinkles: Because more is more when it comes to Halloween!
- ¼ cup candy bones: For that extra creepy-crawly touch.
- ¼ cup candy eyeballs: So your puppy chow can stare back at you!
How to Make Halloween Puppy Chow
Alright, let’s get our hands a little messy and create some Halloween magic! It’s simpler than you think.
- Melt Your Colors: First things first, grab four separate microwave-safe bowls. Add each color of candy melts (green, lavender, black, and orange) into its own bowl. Melt them according to the package directions. Usually, this involves microwaving in short bursts and stirring in between until smooth and creamy. Be patient here; you don’t want to scorch them!
- Coat the Cereal: Now, take 1 cup of Chex cereal and add it to each bowl of melted candy. Gently toss the cereal until every single piece is coated in that glorious, colorful candy. If some pieces stick together, don’t worry, just gently break them apart with a spoon or spatula.
- Sweeten Things Up: Carefully divide the coated cereal into four large zip-top storage bags. To each bag, add ⅓ cup of powdered sugar.
- Shake it Till You Make It: Seal those bags up super tight, making sure to get as much air out as possible. Now, the fun part! Shake those bags vigorously! You want to coat all that yummy cereal evenly with the sweet powdered sugar. This is where the magic really happens.
- Spread and Separate: Once everything is nicely coated, pour the contents of each bag onto a large sheet of parchment paper. Spread it all out so it’s in a single layer. If any pieces are still stuck together, gently separate them. If you want an extra-dusty, soft coating, you can lightly dust with a little extra powdered sugar at this stage.
- Let it Dry: Now, let your creation dry completely. This usually takes about 15-30 minutes, depending on how humid it is.
- Mix the Magic: Once everything is dry, gently combine all the different colored puppy chow in a big bowl. Toss them together lightly to create that perfect Halloween mix of colors.
- Portion It Out: If you’re serving this in individual treat bags or containers, now’s the time to scoop the mixture in. This makes it super easy for guests to grab and go.
- Add the Final Spooky Touches: Right before you’re ready to serve or share, sprinkle generously with your festive Halloween sprinkles, candy bones, and those fun candy eyeballs. It’s the perfect finishing touch that really screams “Halloween!”
Substitutions & Additions
This recipe is super forgiving and open to your creative flair! Here are a few ideas:
- Different Cereal: While Chex is classic, you can totally use Golden Grahams, Honeycomb cereal, or even Rice Krispies for a different texture.
- More Colors: Feel free to add more colors if you find them! Purple, white, or even a bright blue can add to the Halloween vibe.
- Candy Corn Craze: Crush up some candy corn for an extra burst of Halloween flavor and texture.
- Chocolate Lover’s Dream: Melt milk chocolate or dark chocolate candy melts instead of or in addition to the colored ones. You could even add a drizzle of melted chocolate over the top!
- Spicy Kick: If you’re feeling adventurous, a pinch of cinnamon or even a tiny bit of cayenne pepper in one of the batches can add a surprising, delightful warmth.
Tips for Success
A few little tricks to ensure your Halloween Puppy Chow is absolutely perfect:
- Don’t Overheat the Melts: Candy melts can seize up or burn if they get too hot. Microwave in short intervals (15-30 seconds) and stir well.
- Patience with Coating: Make sure to toss the cereal thoroughly in the melted candy and powdered sugar. Even coating is key to that signature puppy chow texture and flavor.
- Prevent Sticking: Parchment paper is your best friend here! It makes it so much easier to spread out the puppy chow to dry and prevents it from sticking to your counter.
- Prep Ahead: You can absolutely make this a day or two in advance! Just store it in an airtight container at room temperature until you’re ready to add the final decorations. It’s a lifesaver when you need a quick Halloween treat. Looking for other easy make-ahead treats? You might enjoy these easy blueberry pie bombs or perhaps some fun Jolly Rancher candy grapes.
How to Store Halloween Puppy Chow
Storing your Halloween Puppy Chow is super simple! Once it’s completely dry and you’ve added your festive decorations, transfer it to an airtight container. It will stay fresh and delicious at room temperature for up to a week. Avoid storing it in the refrigerator, as the moisture can make it a bit soggy.
FAQs
- Can I use regular chocolate chips instead of candy melts?
- While candy melts are specifically designed to melt smoothly and harden nicely, you can use real chocolate. However, you’ll likely need to add a bit of shortening or oil to make it more fluid, and the final texture might be a little softer. For this specific recipe, candy melts give the best vibrant colors and the classic puppy chow coating.
- Is this recipe safe for nut allergies?
- Chex cereal is typically gluten-free and nut-free, but it’s always a good idea to double-check the packaging of your specific cereal and candy melts to ensure they meet your dietary needs. If you’re making this for someone with allergies, it’s best to confirm all ingredients.
- Can I make this glow-in-the-dark?
- That’s a super fun idea! While this recipe doesn’t include glow-in-the-dark elements, you might find inspiration in our posts about glow-in-the-dark bubbles or glow-in-the-dark Rice Krispies treats for future spooky creations!
This Halloween Puppy Chow is more than just a treat; it’s a little bit of edible fun that captures the spirit of the season. I hope you have a blast making (and eating!) it. Happy Halloween, everyone!
For more festive recipes and DIY ideas, be sure to follow our Pinterest account!
Halloween Puppy Chow
Equipment
- Microwave-safe bowls
- Zip-top storage bags
- parchment paper
- large bowl
Ingredients
- 1 cup vibrant green candy melts
- 1 cup lavender candy melts
- 1 cup black candy melts
- 1 cup orange candy melts
- 4 cups Chex cereal
- 1.33 cups powdered sugar divided
- 0.5 cup festive Halloween sprinkles
- 0.25 cup candy bones
- 0.25 cup candy eyeballs
Instructions
- Step 1: Grab four separate microwave-safe bowls. Add each color of candy melts (green, lavender, black, and orange) into its own bowl. Melt them according to the package directions, microwaving in short bursts and stirring in between until smooth and creamy.
- Step 2: Take 1 cup of Chex cereal and add it to each bowl of melted candy. Gently toss the cereal until every piece is coated in the colored candy. Gently break apart any pieces that stick together.
- Step 3: Carefully divide the coated cereal into four large zip-top storage bags. To each bag, add ⅓ cup of powdered sugar.
- Step 4: Seal the bags tightly, removing as much air as possible. Shake vigorously to coat all the cereal evenly with the powdered sugar.
- Step 5: Pour the contents of each bag onto a large sheet of parchment paper, spreading it out in a single layer. Gently separate any stuck-together pieces. You can lightly dust with extra powdered sugar for a softer coating.
- Step 6: Let the puppy chow dry completely, which usually takes about 15-30 minutes.
- Step 7: Once dry, gently combine all the different colored puppy chow in a big bowl, tossing lightly to create a mixed Halloween color effect.
- Step 8: Scoop the mixture into individual treat bags or containers if serving that way.
- Step 9: Right before serving or sharing, sprinkle generously with festive Halloween sprinkles, candy bones, and candy eyeballs.