
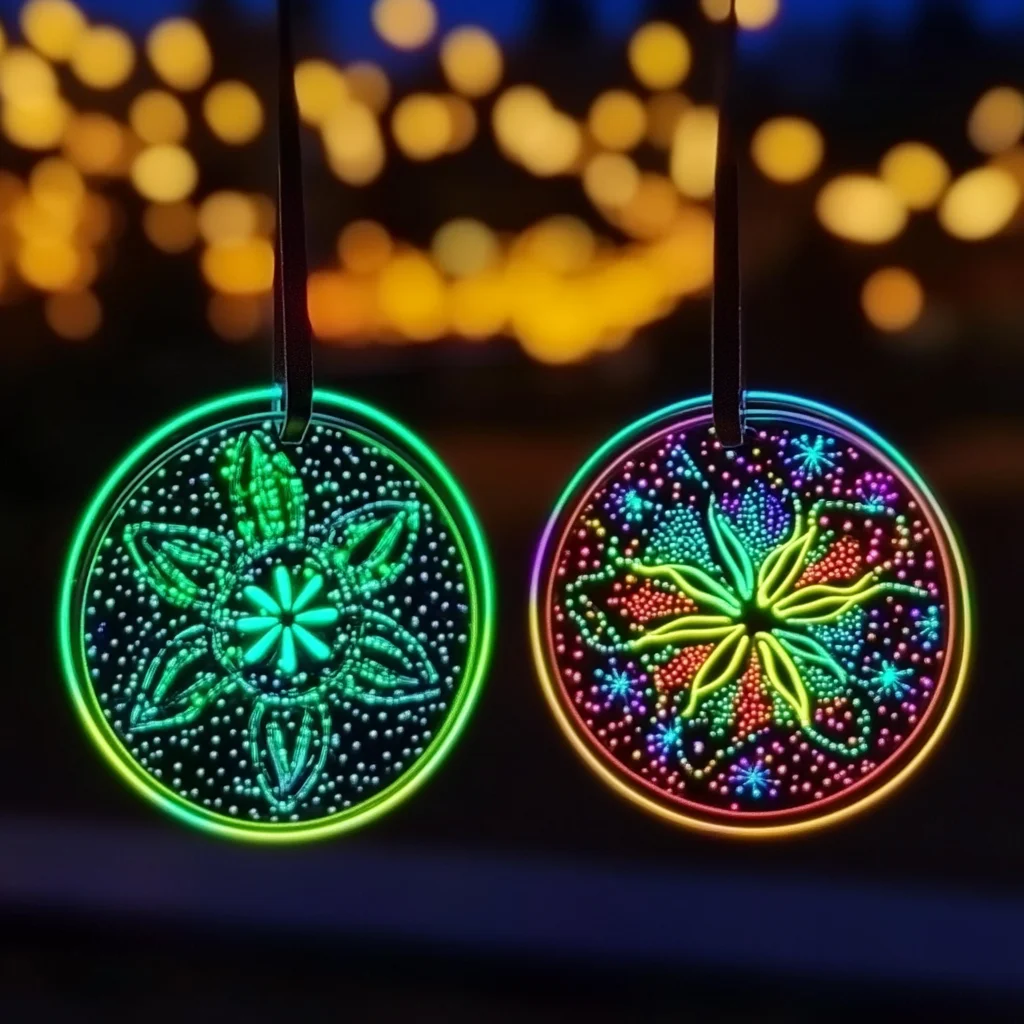
Have you ever gazed in wonder at the stars twinkling above you, or felt your heart swell at the sight of a beautifully painted sunset? Crafting is a way to capture that magic and bring it into your own home. Today, I invite you to embark on a delightful DIY journey as we create glow-in-the-dark suncatchers. This project is not just about making something beautiful; it’s about fostering creativity, spending quality time with loved ones, and experiencing the joy that comes from creating something with your own hands. Imagine the soft glow lighting up your room at night, a gentle reminder of the sunny moments captured during the day.
Why You’ll Love Glow-in-the-Dark Suncatchers
- Beginner-friendly
- Budget-friendly
- Creative and fun
- Great for kids and families
- Perfect for gifts or decorations
- Customizable
The Heart Behind This DIY
There’s something incredibly fulfilling about creating art that can be both seen and felt. Glow-in-the-dark suncatchers offer a unique blend of creativity and sensory experience. The process encourages mindfulness, allowing you to focus on each step, from mixing colors to applying glue. As you craft, you’ll find a sense of peace and accomplishment. This project is especially lovely to do with children, as it sparks their imagination and builds confidence. Plus, the result is a beautiful piece that glows softly in the dark, reminding you of the joy of crafting and the love that went into making it.
A Gentle Look at the Process
Creating your glow-in-the-dark suncatchers is a straightforward and calming process. You’ll start by cutting out shapes from black construction paper, which will serve as the frame for your artwork. Then, you’ll mix the clear glue with glow-in-the-dark paint, letting your creative spirit guide your color choices. As you apply the mixture to the plastic sheet, you’ll feel the excitement build. Watching your creation come to life is incredibly rewarding, especially as it transforms from a simple craft into a glowing work of art that you can proudly display at home.
Materials You’ll Need
- Clear glue: This will be the base for your glowing paint.
- Glow-in-the-dark paint: Choose your favorite colors to make your suncatcher unique.
- Black construction paper: This will create a striking frame for your artwork.
- Small paintbrush: Perfect for applying the glue mixture with precision.
- Scissors: For cutting your shapes and frames.
- Plastic sheet or transparency film: This is where the magic happens, allowing your design to shine.
- Tape: To secure your frame while you work.
- Optional: Glitter or beads for decoration, adding an extra sparkle to your creation.
Step-by-Step Directions
Step 1: Cut Your Frame
Start by cutting a shape out of the black construction paper. It could be a star, heart, or any design that inspires you. This frame will hold your glow-in-the-dark artwork.
Step 2: Secure the Frame
Place your cut-out frame on a flat surface and use tape to secure it in place. This will help keep everything steady as you work.
Step 3: Mix Your Materials
Pour some clear glue into a bowl and mix in the glow-in-the-dark paint. Stir until you achieve your desired color intensity. The anticipation of seeing your colors come together is part of the fun!
Step 4: Apply the Mixture
Using the small paintbrush, apply the glow-in-the-dark mixture onto the plastic sheet or transparency film within the confines of your frame. Take your time here; enjoy the process and let your creativity flow.
Step 5: Let It Dry
Allow your mixture to dry completely, following the manufacturer’s instructions on the paint and glue. This is the perfect time to tidy up your workspace or enjoy a cup of tea while you wait!
Step 6: Remove Your Suncatcher
Once dry, carefully remove the suncatcher from the frame. You’ll see your artwork shining and ready to be displayed.
Step 7: Add Final Touches
If you’d like, now is the time to add some glitter or beads for extra decoration. It’s all about personalizing your creation!
Step 8: Display Your Art
Hang your glow-in-the-dark suncatcher in a window to charge it with sunlight. When night falls, enjoy the gentle glow illuminating your space.
Creative Ways to Use Glow-in-the-Dark Suncatchers
There are so many delightful ways to enjoy your suncatchers! Hang them in windows to brighten up your home, or use them as unique night lights in bedrooms. They make wonderful gifts for friends and family, bringing a touch of magic to their spaces. You can even turn this into a fun family activity by creating themed suncatchers for holidays or seasons, like snowflakes for winter or flowers for spring.
How to Store, Preserve, or Reuse Glow-in-the-Dark Suncatchers
To preserve your suncatchers, store them flat in a cool, dry place away from direct sunlight when not in use. If your suncatcher starts to lose its glow, simply bring it back to the light to recharge. You can also reuse the frame for new designs whenever inspiration strikes!
Creative Variations and Customizations
- Color variations: Experiment with different glow-in-the-dark paint colors.
- Theme ideas: Create seasonal designs like pumpkins for Halloween or flowers for spring.
- Seasonal adaptations: Make suncatchers to celebrate holidays like Christmas or Valentine’s Day.
- Kid-friendly modifications: Let children choose their shapes and colors to personalize their own suncatchers.
- Advanced creative upgrades: Use multiple layers of glow paint for a more vibrant effect.
Tips for Success
- Avoid using too much glue, as it can take longer to dry and may not glow as brightly.
- Be mindful of safety if you’re working with younger children, especially with scissors and small materials.
- Prep your workspace with newspaper or a mat to catch any drips.
- Cleanup is easy—just wash your brushes and tools with soap and water right after use!
- Trust your instincts and have fun; crafting is all about expressing yourself!
FAQs About Glow-in-the-Dark Suncatchers
Can beginners make this?
Absolutely! This project is perfect for beginners, with simple steps that anyone can follow.
Can children participate?
Yes! Kids will love helping with this project, especially mixing colors and applying the glow paint.
How long does it last?
The glow typically lasts for several hours after being charged by sunlight, making it a lovely addition to your evening routine.
Can I customize it?
Of course! Feel free to use different colors, shapes, or even add embellishments like beads or glitter.
A Final Creative Note
As you wrap up your glow-in-the-dark suncatcher, take a moment to appreciate the creativity and effort you put into this project. Each handmade piece tells a story and reflects your unique style. Remember, the joy of crafting is in the process as much as the final product. For more delicious recipes, check out Blueberry Cheesecake Swirl Rolls or Easy Peaches and Cream Pie Recipe for treats you will love! So gather your materials, let your imagination soar, and enjoy the magic of creating something beautiful!
For even more DIY inspiration, be sure to follow our Pinterest page!
Garlic Butter Chicken Bites with Creamy Parmesan Pasta
Equipment
- Large skillet
- Large Pot
- Tongs or Spatula
Ingredients
For the Garlic Butter Chicken Bites
- 1 lb boneless chicken breasts cut into bite-sized pieces
- 2 tbsp olive oil
- 3 tbsp unsalted butter
- 3 cloves garlic minced
For the Creamy Parmesan Pasta
- 12 oz fettuccine or linguine
- 1.5 cups heavy cream
- 1 cup Parmesan cheese grated
Instructions
- Step 1: Cook pasta in a large pot of salted water until al dente. Reserve 1/2 cup of pasta water. Drain and set aside.
- Step 2: In a skillet, heat olive oil over medium-high. Season chicken with paprika, Italian seasoning, salt, and pepper. Sear for 3-4 minutes per side until golden and cooked through. Remove and set aside.
- Step 3: In the same skillet, melt butter and add minced garlic. Saute for 1 minute. Return chicken to the pan and toss in garlic butter.
