
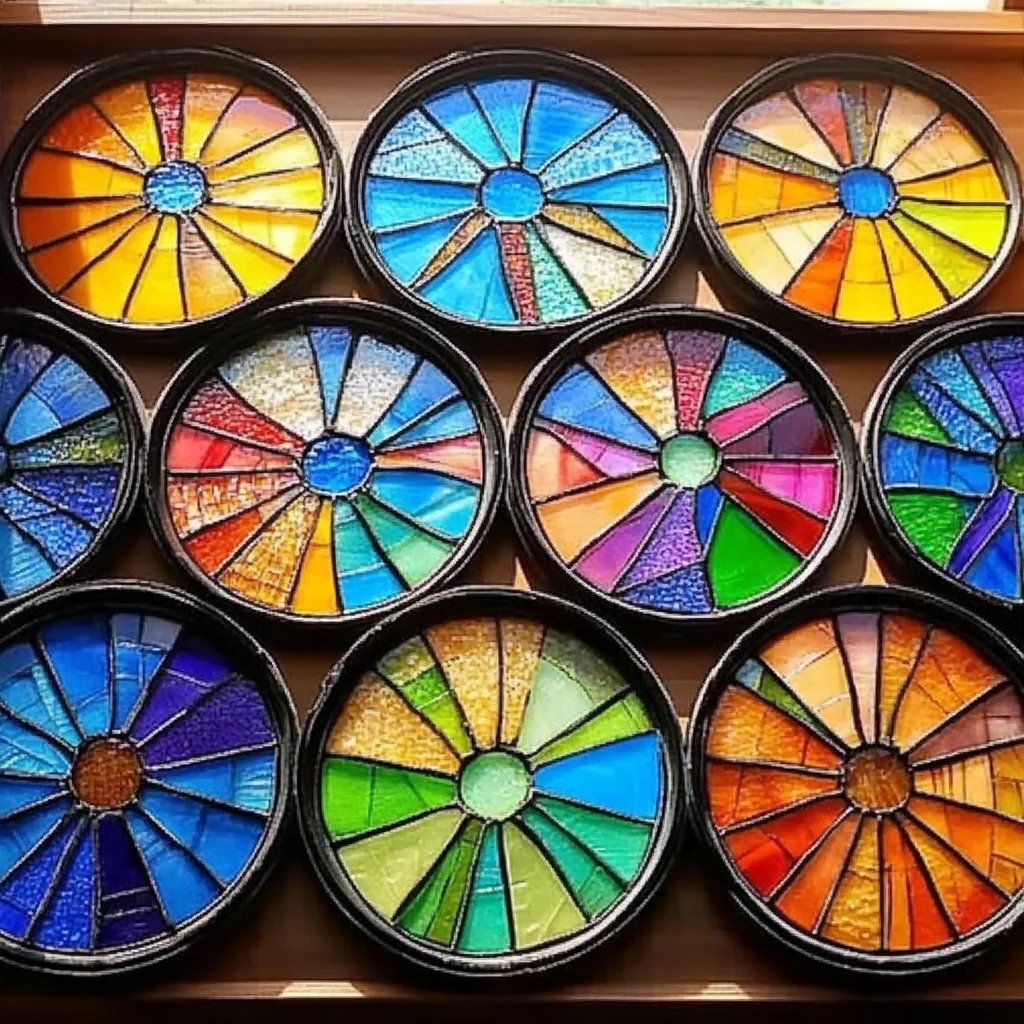
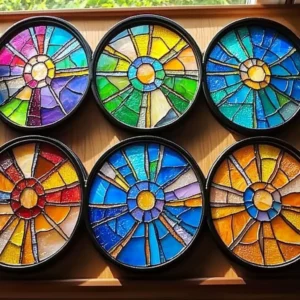
Remember those days as a kid, staring out the window, wishing you could add a splash of color to make everything a little more magical? Well, get ready to relive that childhood wonder because today we’re diving into a super simple, incredibly fun craft: Stained Glass Glue Window Art! This project is so easy and rewarding, you’ll be making colorful creations to adorn every window in your house.
Why You’ll Love Stained Glass Glue Window Art
- Fast: Once you get the hang of it, you can whip up a design pretty quickly!
- Easy: Perfect for all ages, from little ones to grown-ups who just need a creative escape.
- Giftable: Imagine gifting these vibrant window hangings to friends and family – a homemade treasure!
- Crowd-pleasing: Everyone loves seeing these colorful suncatchers catch the light. They add such a cheerful vibe!
Ingredients
Gathering your supplies is super straightforward. You probably have most of these things already, which makes this project even more appealing! It’s a great way to use up leftover craft supplies too.
- 1 plastic sheet protector, laminator pouch, or clear plastic lid: This is your canvas! Make sure it’s nice and clear so the light can shine through.
- Clear school glue (approximately 1/2 bottle per design): The base of our colorful glass. Using a good quality clear school glue works best.
- Black glue (or homemade black glue: mix black acrylic paint into clear glue): This is what creates those beautiful, bold outlines, just like real stained glass. If you don’t have black glue, don’t worry, making your own is a breeze!
- Food coloring or liquid watercolors: This is where the magic happens! Pick your favorite vibrant colors to bring your designs to life.
- Paintbrushes or cotton swabs: To help you neatly fill in those colorful sections.
- Optional: Printable stained glass templates, glitter, suction cups with hooks for hanging: These extras can take your creations to the next level! Templates are great for beginners, and glitter? Well, who doesn’t love a little sparkle?
How to Make Stained Glass Glue Window Art
Alright, let’s get our hands a little messy and create some beauty! It’s a simple process that’s so satisfying.
-
Create the Frame or Outline:
First things first, grab your template. You can find tons of free printable stained glass designs online, or if you’re feeling artistic, you can draw your own! Slide your template inside a sheet protector, or place it underneath your clear plastic lid. Now, take your black glue and carefully trace the lines of your design. Try to make the lines as smooth as possible. Once you’re done tracing, set it aside and let that black glue dry completely. This usually takes about overnight, so plan accordingly!
-
Add Color Inside the Shapes:
While your black outlines are drying, let’s get our colors ready. In separate small bowls or cups, mix your clear glue with your food coloring or liquid watercolors. You can experiment with how much coloring you add to get the perfect shade. I like to make a variety of bright colors! Now, using your paintbrushes or cotton swabs, carefully fill in each section of your design with the colored glue. Be mindful not to let the colors run into each other too much if you want distinct shapes. If you’re adding glitter, you can sprinkle it on top of the wet colored glue. This is where you can really let your creativity shine!
-
Let It Dry Completely:
This is the hardest part – waiting! You need to let your beautiful glue art dry completely flat. This can take anywhere from 24 to 48 hours, depending on how thick you applied the glue. Resist the urge to touch it or move it too much. A good tip is to place it in a spot where it won’t be disturbed. If you’re looking for other fun crafts to keep you busy while you wait, check out some of our other kid-friendly projects like our easy DIY bioplastic suncatchers or our crayon suncatchers. They offer similar colorful vibes!
-
Peel & Display:
Once your creation is totally dry and feels firm to the touch, it’s time for the grand reveal! Carefully peel your stained glass art off the plastic sheet. It should come off cleanly, like a transparent sticker. If it’s sticking a bit, gently try to lift an edge with a thin spatula or craft knife. Then, you can adhere it to your window using a small piece of tape or, for a more seamless look, a suction cup with a hook. Watch as the sunlight shines through, transforming your window into a vibrant masterpiece!
Substitutions & Additions
Don’t be afraid to get creative with this craft! Here are a few ideas to spice things up:
- Glitter Galore: Mix fine glitter into your colored glue for extra sparkle.
- Layering: Once the first layer of color is dry, you can add another layer of a different color on top for a more opaque or layered effect.
- Shape Shifters: Instead of templates, try freehand drawing shapes directly onto the plastic. Think hearts, stars, or even abstract designs!
- Textured Touch: Use different applicators like old toothbrushes for a splattered effect or even try a simple sugar recipe for texture if you’re feeling experimental (though this might alter the transparency).
- Outdoor Fun: While these are primarily for windows, you could try making them on thicker plastic lids and attaching them to garden stakes for a colorful outdoor display.
Tips for Success
A few pointers to make your crafting experience even smoother:
- Protect Your Workspace: Glue can be messy! Cover your table with newspaper or a plastic tablecloth.
- Don’t Rush the Drying: Patience is key. Letting the glue dry thoroughly prevents your art from falling apart.
- Thicker Lines for Durability: Make your black glue outlines a little thicker to help hold the colored glue in place and prevent colors from mixing.
- Clean Edges: If you accidentally get colored glue outside the lines, try to gently wipe it away with a damp cotton swab before it dries.
- Prep Ahead: You can print out a bunch of templates and have them ready to go for a quick craft session anytime.
How to Store Stained Glass Glue Window Art
Once your beautiful stained glass art is dry, it’s surprisingly durable! You can store them flat in a box or portfolio if you’re not displaying them right away. They generally hold their shape well. If they do happen to curl a little at the edges after being taken down, you can try placing them under a heavy book for a few hours to flatten them out again. They can last for a very long time, bringing colorful cheer for seasons to come!
FAQs
Here are a few common questions about this fun craft:
Q: Can I use glitter glue instead of clear glue and glitter?
A: You can, but glitter glue can sometimes be less transparent and might make the overall piece a bit cloudy. Mixing fine glitter into clear glue usually gives a more vibrant stained-glass effect.
Q: What if my black glue isn’t drying quickly enough for the colored glue?
A: Make sure your black glue line is not too thick. If it’s still not drying, you can try a hair dryer on a cool setting for a few minutes, but avoid direct heat which can warp the plastic.
Q: Can I wash these creations?
A: It’s best not to wash them. While the glue is fairly sturdy, excessive water could weaken it or cause colors to bleed. A gentle dusting with a soft brush is usually sufficient.
Q: Can I make these designs without a template?
A: Absolutely! If you feel confident with your drawing skills, you can freehand your designs directly onto the plastic. It’s a great way to get really unique results!
This craft is just one of many ways to add a touch of handmade magic to your home. If you enjoy creative projects, you might also like to explore making easy homemade worry stones or even some fun sugar water paintings. Happy crafting, friends!
For more inspiring craft ideas and delicious recipes, be sure to follow us on Pinterest!
Stained Glass Glue Window Art
Equipment
- Plastic sheet protector, laminator pouch, or clear plastic lid
- Small bowls or cups
- Paintbrushes or cotton swabs
- Printable stained glass templates (optional)
- Suction cups with hooks (optional)
- Newspaper or plastic tablecloth
- Thin spatula or craft knife
- Heavy book
- Hair dryer (optional)
- Soft brush
Ingredients
- Plastic sheet protector, laminator pouch, or clear plastic lid
- 1/2 bottle Clear school glue per design
- Black glue or homemade black glue mix black acrylic paint into clear glue
- Food coloring or liquid watercolors vibrant colors
- Glitter (optional) fine glitter for extra sparkle
Instructions
- Step 1: Place your template inside a sheet protector or under a clear plastic lid. Use black glue to carefully trace the lines of your design. Let the black glue dry completely, typically overnight.
- Step 2: Mix clear glue with food coloring or liquid watercolors in separate bowls to create desired colors. Fill in each section of your design with colored glue using paintbrushes or cotton swabs. Sprinkle glitter on wet glue if desired.
- Step 3: Let the glue art dry completely flat. This can take 24 to 48 hours. Avoid disturbing the piece during drying.
- Step 4: Carefully peel the dried stained glass art off the plastic. Adhere it to a window using tape or a suction cup with a hook.