
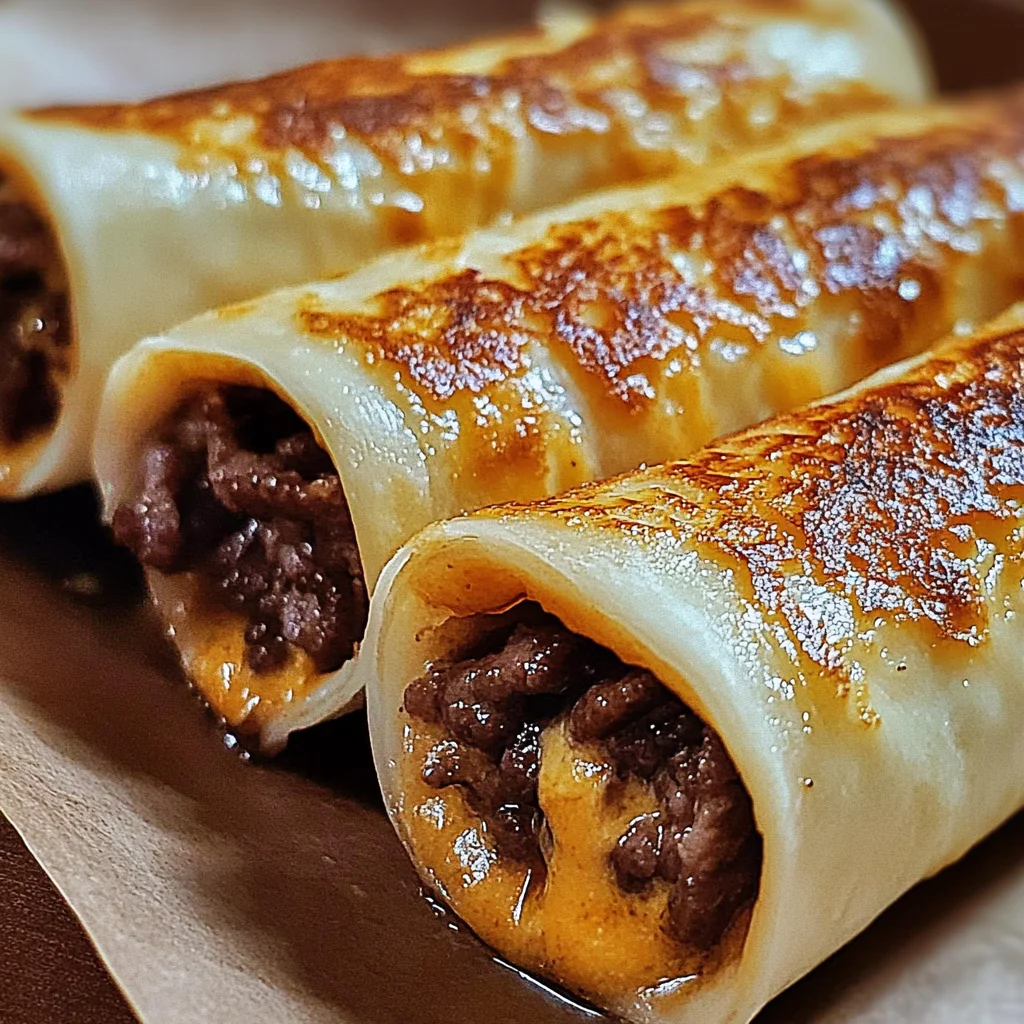
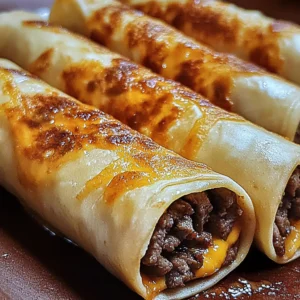
Remember those cozy evenings when the aroma of something delicious filled the kitchen? For me, that smell often meant comfort food, something simple yet utterly satisfying. Today, I want to share a recipe that brings back all those warm feelings – Garlic Butter Beef Rollups! They’re incredibly easy to whip up, perfect for busy weeknights, and surprisingly elegant enough for guests. Honestly, they’re the kind of thing you can make ahead and still have them taste amazing, making them a fantastic option for sharing or even gifting!
Why You’ll Love Garlic Butter Beef Rollups
- Fast: Ready in under 30 minutes total cooking time!
- Easy: Simple steps that even beginner cooks can master.
- Giftable: Package them up for a thoughtful homemade treat.
- Crowd-pleasing: Everyone loves the savory beef and cheesy goodness wrapped in flaky dough.
Ingredients
Here’s what you’ll need to make these delightful little bites. They’re all pretty standard kitchen staples, which is always a win in my book!
- For the Savory Beef Filling:
- 1 pound ground beef: A good base for that hearty flavor.
- ½ teaspoon salt: To bring out all the savory notes.
- ½ teaspoon black pepper: For a little zing!
- ½ teaspoon garlic powder: Because we love garlic, obviously!
- ½ teaspoon onion powder: Adds another layer of savory depth.
- ½ cup yellow onion, diced: For a touch of sweetness and texture.
- 1 cup sharp cheddar cheese, shredded: Because cheese makes everything better!
- For the Dough and Garlic Butter Topping:
- 1 can (8 oz) refrigerated crescent roll dough: The magic behind the flaky crust.
- 2 tablespoons butter, melted: The perfect base for our garlicky glaze.
- 1 teaspoon garlic powder: More garlic? Yes, please!
- 1 tablespoon fresh parsley, chopped (optional for garnish): For a pop of color and freshness.
How to Make Garlic Butter Beef Rollups
Alright, let’s get cooking! This is where the magic happens, and trust me, it’s way easier than it looks.
- Get the Oven Ready: First things first, preheat your oven to 375°F (190°C). Grab a baking sheet and line it with parchment paper or give it a quick spray with cooking spray. This prevents any sticky situations later on.
- Cook the Beef Filling: In a large skillet, cook your ground beef and diced onions over medium heat. Let them sizzle away for about 8-10 minutes until the beef is nicely browned and the onions are soft and fragrant. Now, sprinkle in that salt, pepper, garlic powder, and onion powder. Give it a good stir to combine all those yummy seasonings. Once it’s all cooked, drain off any excess grease. It’s a good idea to let the mixture cool down a bit before adding the cheese.
- Cheese Please! Once your beef mixture has cooled slightly, stir in that shredded sharp cheddar cheese. Oh yeah, that’s the good stuff! The warmth from the beef will help it get nice and melty.
- Roll Out the Dough: Carefully unroll your refrigerated crescent roll dough. You’ll see it’s pre-cut into triangles. Separate them gently.
- Assemble the Rollups: Now, take about a tablespoon of your delicious beef and cheese mixture and spoon it onto the wide end of each crescent roll triangle. Gently roll up each triangle, starting from the wide end and rolling towards the point. Place these little beauties seam-side down on your prepared baking sheet. I like to arrange them with a little space between each one so they can puff up nicely.
- Garlic Butter Bliss: In a small bowl, mix together your melted butter and the 1 teaspoon of garlic powder. This is going to give them that irresistible garlic butter flavor. Brush this glorious mixture generously over the tops of each rollup.
- Bake to Perfection: Pop your baking sheet into the preheated oven and bake for about 12-15 minutes. You’re looking for that perfect golden brown color and for them to be cooked all the way through. If you’re feeling fancy, sprinkle a little fresh chopped parsley over the top once they come out of the oven. It adds a nice touch of color! These are so good, they remind me of some of the amazing flavors in my easy one-pan garlic butter beef and rice.
Substitutions & Additions
Feeling a little adventurous? You can totally play around with this recipe! Here are a few ideas:
- Cheese Swap: If sharp cheddar isn’t your jam, try Monterey Jack, mozzarella, or even a blend of cheeses. A little bit of Parmesan mixed in is also divine.
- Spice it Up: For a little kick, add a pinch of red pepper flakes to the beef mixture or brush on a spicy garlic butter.
- Veggie Boost: Feel free to add finely chopped mushrooms or bell peppers to the beef mixture along with the onions.
- Herbal Heaven: Don’t have parsley? Chives or even a sprinkle of dried Italian herbs in the filling can be lovely. If you’re a big fan of creamy chicken dishes, you might also enjoy my lemony garlic butter chicken pasta for similar flavor profiles.
Tips for Success
A few little tricks up my sleeve to make sure your Garlic Butter Beef Rollups turn out perfectly every time!
- Don’t Overstuff: While it’s tempting to pile on the filling, too much can make rolling difficult and cause them to burst open during baking.
- Cool the Filling: Letting the beef mixture cool slightly before adding the cheese and filling the dough helps prevent the dough from becoming too greasy and makes it easier to handle.
- Prep Ahead: You can make the beef filling up to a day in advance and store it in the refrigerator. Assemble and bake just before serving for the freshest taste.
- Drain Well: Properly draining the excess grease from the cooked ground beef is key to preventing soggy rollups.
How to Store Garlic Butter Beef Rollups
Got leftovers? Lucky you! Once cooled completely, store your Garlic Butter Beef Rollups in an airtight container in the refrigerator. They should stay delicious for about 3-4 days. You can reheat them gently in the oven or a toaster oven to regain some of that lovely crispness.
FAQs
Here are some common questions I get about this recipe:
- Can I make these ahead of time? Yes! You can prepare the filling a day in advance and store it in the fridge. Assemble the rollups just before baking for the best results.
- What can I serve with these? They’re fantastic on their own as an appetizer or snack! For a meal, they pair wonderfully with a fresh green salad or some roasted vegetables.
- Can I freeze them? You can freeze assembled, unbaked rollups. Place them on a baking sheet until firm, then transfer to a freezer-safe container. Bake from frozen, adding a few extra minutes to the baking time.
I hope you adore these Garlic Butter Beef Rollups as much as I do! They’re truly a little taste of comfort. Don’t forget to check out my Pinterest for even more delicious recipes!
Garlic Butter Beef Rollups
Equipment
- Large skillet
- baking sheet
- Parchment Paper or Cooking Spray
- Small bowl
Ingredients
For the Savory Beef Filling
- 1 pound ground beef
- 0.5 teaspoon salt
- 0.5 teaspoon black pepper
- 0.5 teaspoon garlic powder
- 0.5 teaspoon onion powder
- 0.5 cup yellow onion diced
- 1 cup sharp cheddar cheese shredded
For the Dough and Garlic Butter Topping
- 1 can refrigerated crescent roll dough 8 oz
- 2 tablespoons butter melted
- 1 teaspoon garlic powder
- 1 tablespoon fresh parsley chopped (optional for garnish)
Instructions
- Step 1: First things first, preheat your oven to 375°F (190°C). Grab a baking sheet and line it with parchment paper or give it a quick spray with cooking spray. This prevents any sticky situations later on.
- Step 2: In a large skillet, cook your ground beef and diced onions over medium heat. Let them sizzle away for about 8-10 minutes until the beef is nicely browned and the onions are soft and fragrant. Now, sprinkle in that salt, pepper, garlic powder, and onion powder. Give it a good stir to combine all those yummy seasonings. Once it’s all cooked, drain off any excess grease. It’s a good idea to let the mixture cool down a bit before adding the cheese.
- Step 3: Once your beef mixture has cooled slightly, stir in that shredded sharp cheddar cheese. Oh yeah, that’s the good stuff! The warmth from the beef will help it get nice and melty.
- Step 4: Carefully unroll your refrigerated crescent roll dough. You’ll see it’s pre-cut into triangles. Separate them gently.
- Step 5: Now, take about a tablespoon of your delicious beef and cheese mixture and spoon it onto the wide end of each crescent roll triangle. Gently roll up each triangle, starting from the wide end and rolling towards the point. Place these little beauties seam-side down on your prepared baking sheet. I like to arrange them with a little space between each one so they can puff up nicely.
- Step 6: In a small bowl, mix together your melted butter and the 1 teaspoon of garlic powder. This is going to give them that irresistible garlic butter flavor. Brush this glorious mixture generously over the tops of each rollup.
- Step 7: Pop your baking sheet into the preheated oven and bake for about 12-15 minutes. You’re looking for that perfect golden brown color and for them to be cooked all the way through. If you’re feeling fancy, sprinkle a little fresh chopped parsley over the top once they come out of the oven. It adds a nice touch of color!
Notes
* Cheese Swap: If sharp cheddar isn’t your jam, try Monterey Jack, mozzarella, or even a blend of cheeses. A little bit of Parmesan mixed in is also divine.
* Spice it Up: For a little kick, add a pinch of red pepper flakes to the beef mixture or brush on a spicy garlic butter.
* Veggie Boost: Feel free to add finely chopped mushrooms or bell peppers to the beef mixture along with the onions.
* Herbal Heaven: Don’t have parsley? Chives or even a sprinkle of dried Italian herbs in the filling can be lovely. If you’re a big fan of creamy chicken dishes, you might also enjoy my lemony garlic butter chicken pasta for similar flavor profiles. A few little tricks up my sleeve to make sure your Garlic Butter Beef Rollups turn out perfectly every time!
* Don't Overstuff: While it’s tempting to pile on the filling, too much can make rolling difficult and cause them to burst open during baking.
* Cool the Filling: Letting the beef mixture cool slightly before adding the cheese and filling the dough helps prevent the dough from becoming too greasy and makes it easier to handle.
* Prep Ahead: You can make the beef filling up to a day in advance and store it in the refrigerator. Assemble and bake just before serving for the freshest taste.
* Drain Well: Properly draining the excess grease from the cooked ground beef is key to preventing soggy rollups. Got leftovers? Lucky you! Once cooled completely, store your Garlic Butter Beef Rollups in an airtight container in the refrigerator. They should stay delicious for about 3-4 days. You can reheat them gently in the oven or a toaster oven to regain some of that lovely crispness.