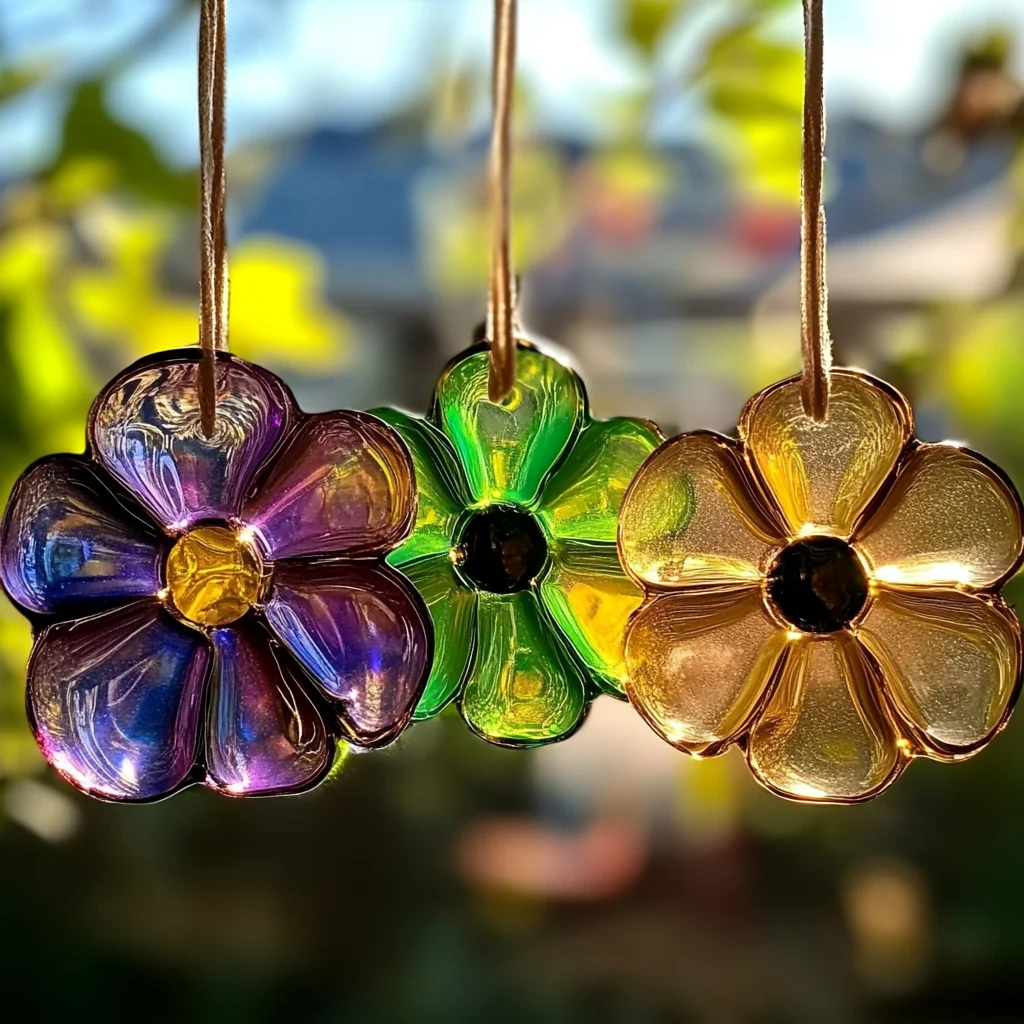
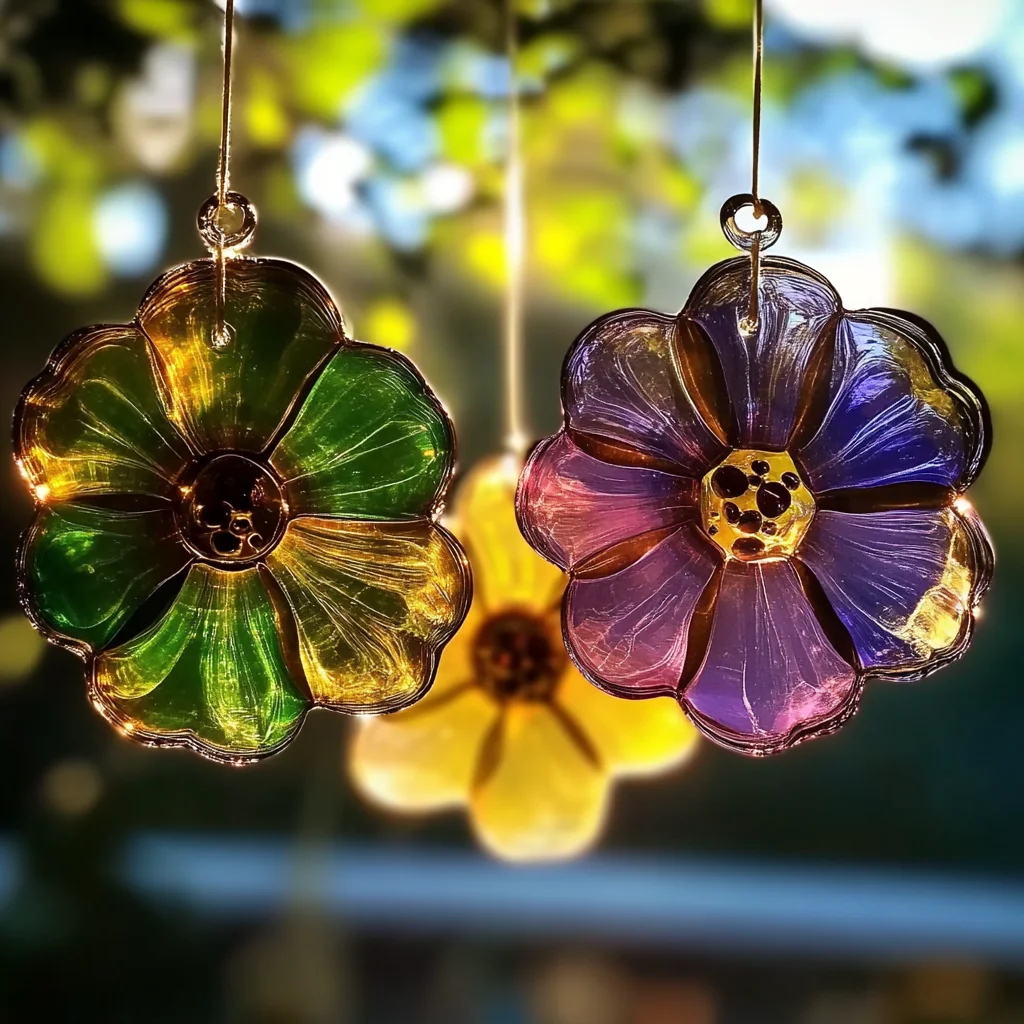
Remember those carefree afternoons spent crafting as a kid? The smell of glue, the vibrant colors, the sheer joy of creating something beautiful with your own two hands? Well, get ready to channel that nostalgia because today, we’re diving into a wonderfully simple and enchanting craft: DIY Bioplastic Suncatchers! These little beauties catch the light and cast colorful patterns around your room, bringing a touch of magic to any window. And the best part? They’re incredibly easy to make, perfect for a cozy afternoon project or even a fun activity with the little ones.
Why You’ll Love DIY Bioplastic Suncatchers
- Fast: Get crafting in no time with a super quick prep!
- Easy: Seriously, it’s almost foolproof. Perfect for beginners!
- Giftable: Hand-made gifts always have that extra special touch.
- Crowd-pleasing: Kids and adults alike will adore these colorful creations.
Ingredients
Gathering your supplies is a breeze! You probably have most of these in your pantry already.
- 1/2 cup cornstarch: This is our main star, the magic ingredient that makes it all come together.
- 1 cup water: Just plain old water to get the party started.
- 1 tablespoon glycerin (optional): This helps make the suncatchers more flexible and less brittle. Totally worth it if you have it!
- 1 tablespoon vinegar: A little acid helps the mixture thicken up nicely.
- Food coloring (optional): The key to making these super colorful and vibrant! Feel free to go wild with your favorite hues.
- Wax paper or parchment paper: This is your crafting canvas.
- Pipettes, straws, or molds (optional): For creating fun shapes and designs.
- Spoon or craft stick: For all that important stirring.
How to Make DIY Bioplastic Suncatchers
Alright, let’s get our hands a little bit gooey and create some sunshine! It’s a simple process that’s super satisfying.
- Mix It Up: Grab a saucepan and pour in your cornstarch, water, vinegar, and glycerin (if you’re using it). Give it a good stir until the cornstarch has completely dissolved. No lumps allowed!
- Get That Gel: Place the saucepan over medium heat. Now, this is where the magic happens! You’ll need to stir constantly. Keep going until the mixture transforms into a thick, gel-like consistency. It should be smooth and translucent. Once it reaches that perfect gel stage, take it off the heat.
- Color Your World: If you’re feeling colorful (and who isn’t?), now’s the time to add your food coloring. Stir it in gently until the color is evenly spread throughout your bioplastic mixture. You can even swirl in a couple of colors for a marbled effect!
- Create Your Canvas: Lay out your wax paper or parchment paper on a flat, clean surface. This is where your suncatchers will take shape. Carefully pour or spoon the bioplastic mixture onto the paper. Spread it out to whatever thickness you like – I find a nice thin layer works best for light to shine through. If you have pipettes, straws, or molds, this is your chance to get creative with shapes!
- Design Details: Now for the fun part! Use straws to create holes for hanging, or even cut out little shapes from the still-setting bioplastic. Think stars, hearts, or even little animal outlines! Just remember to leave a small opening at the top for threading your ribbon or string later. If you’re looking for some inspiration on colorful crafts, you might enjoy our DIY Crayon Star Suncatchers.
- Patience, Young Crafter: Let your creations dry completely. This usually takes several hours, or even overnight. They should feel firm and look beautifully translucent when they’re ready.
- Hang Them High: Once fully dry, carefully peel your suncatchers off the paper. If needed, you can trim any rough edges. Thread a piece of string or ribbon through the hole you made, and find the perfect sunny spot to hang them. Watch the light dance through your handmade art!
Substitutions & Additions
Feeling adventurous? You can totally switch things up!
- Glitter Power: Add a sprinkle of eco-friendly glitter to your mixture before it cools for extra sparkle.
- Natural Dyes: Instead of food coloring, try natural dyes from berries or turmeric for unique, earthy tones.
- Embellishments: Gently press small, lightweight embellishments like sequins or tiny beads into the wet bioplastic before it dries.
- Different Shapes: Experiment with cookie cutters or even cut out your own freehand designs!
Tips for Success
A few little secrets to make your suncatchers even more stunning!
- Don’t Overcook: Be careful not to overcook the mixture, or it can become gummy and hard to work with. It should be thick but still pliable.
- Smooth Surface is Key: Make sure your wax or parchment paper is laid out perfectly flat, or you might end up with uneven suncatchers.
- Thin is In: A thinner layer of bioplastic will allow more light to pass through, creating a more vibrant effect.
- Prep Ahead: You can make the bioplastic mixture ahead of time and store it in an airtight container in the fridge for a day or two if needed. Just warm it up gently before using.
How to Store DIY Bioplastic Suncatchers
These little gems are pretty delicate once dry. To keep them looking their best, store them flat in a box or container so they don’t bend or break. They’re best enjoyed soon after making, but they can last for quite a while if stored properly, especially if you used glycerin to keep them a bit flexible.
FAQs
Can I make these without glycerin?
Yes, you can! Your suncatchers might be a bit more brittle and prone to cracking, but they’ll still turn out beautifully. The glycerin just adds a little extra flexibility.
How long does it take for them to dry?
It can take anywhere from a few hours to overnight, depending on the thickness of your suncatcher and the humidity in the air. You’ll know they’re ready when they feel firm and slightly translucent.
Can I reuse the wax paper?
Once the bioplastic has dried and been peeled off, the wax paper might be a bit sticky. It’s usually best to use a fresh sheet for your next batch of suncatchers to avoid any sticking issues.
I hope you have as much fun making these as I do! They’re such a delightful way to add a pop of color and handmade charm to your home. If you’re on the lookout for more creative and easy crafts, be sure to check out our guide on DIY Glow in the Dark Bubbles for some outdoor fun, or perhaps our Easy Clear Glue Suncatchers for a different take on window art!
For more crafty ideas and delicious recipes, follow us on Pinterest!

DIY Bioplastic Suncatchers
Equipment
- saucepan
- Spoon or craft stick
- Wax paper or parchment paper
- Pipettes, straws, or molds (optional)
Ingredients
Bioplastic Mixture
- 1/2 cup cornstarch
- 1 cup water
- 1 tablespoon glycerin optional, for flexibility
- 1 tablespoon vinegar
- food coloring optional, for color
Crafting Supplies
- wax paper or parchment paper for crafting surface
- pipettes, straws, or molds optional, for shaping
- string or ribbon for hanging
Instructions
- Step 1: In a saucepan, combine cornstarch, water, vinegar, and glycerin (if using). Stir until cornstarch is fully dissolved.
- Step 2: Place the saucepan over medium heat. Stir constantly until the mixture transforms into a thick, smooth, and translucent gel. Remove from heat.
- Step 3: If using food coloring, stir it gently into the gel until evenly distributed. You can swirl multiple colors for a marbled effect.
- Step 4: Lay out wax paper or parchment paper on a flat surface. Carefully pour or spoon the bioplastic mixture onto the paper, spreading it to your desired thinness.
- Step 5: Get creative with shapes using pipettes, straws, or molds. You can also create holes for hanging with a straw while the mixture is still setting.
- Step 6: Allow the suncatchers to dry completely, which typically takes several hours or overnight. They should feel firm and look translucent.
- Step 7: Carefully peel the dried suncatchers off the paper. Trim any rough edges if needed. Thread string or ribbon through the hanging hole and display them in a sunny window!