There’s something incredibly special about a cookie that tastes like a hug from the holidays. As soon as the air gets a little crisp and the leaves start to turn, my mind drifts back to childhood Christmases, the scent of pine needles, and the pure joy of baking. And you know what always makes an appearance on my cookie tray? These adorable Peppermint Snowball Cookies! They’re not just pretty to look at; they’re a little bite of festive cheer that’s surprisingly easy to whip up, making them perfect for those spontaneous baking moods or when you need a quick, delightful treat.
Why You’ll Love Peppermint Snowball Cookies
- Fast: You can have these ready to bake in no time!
- Easy: Perfect for bakers of all skill levels, even beginners.
- Giftable: They look absolutely stunning when packaged up for friends and family.
- Crowd-pleasing: The classic flavor combination is a guaranteed hit with everyone.
Ingredients
- 2 cups + 2 tablespoons all-purpose flour: The base for our tender cookies.
- 2 teaspoons cornstarch: This little secret makes them extra tender and melt-in-your-mouth.
- 1 cup salted sweet cream butter, softened: Make sure it’s nice and soft for easy creaming!
- 3 cups powdered sugar, divided: We’ll use some in the dough for sweetness and plenty for that iconic snowball coating.
- 1 teaspoon pure peppermint extract: For that perfect, refreshing peppermint punch.
- ½ teaspoon pure vanilla extract: A classic pairing that enhances the other flavors.
- 1¼ cup mini semi-sweet chocolate chips: Little bursts of chocolatey goodness in every bite.
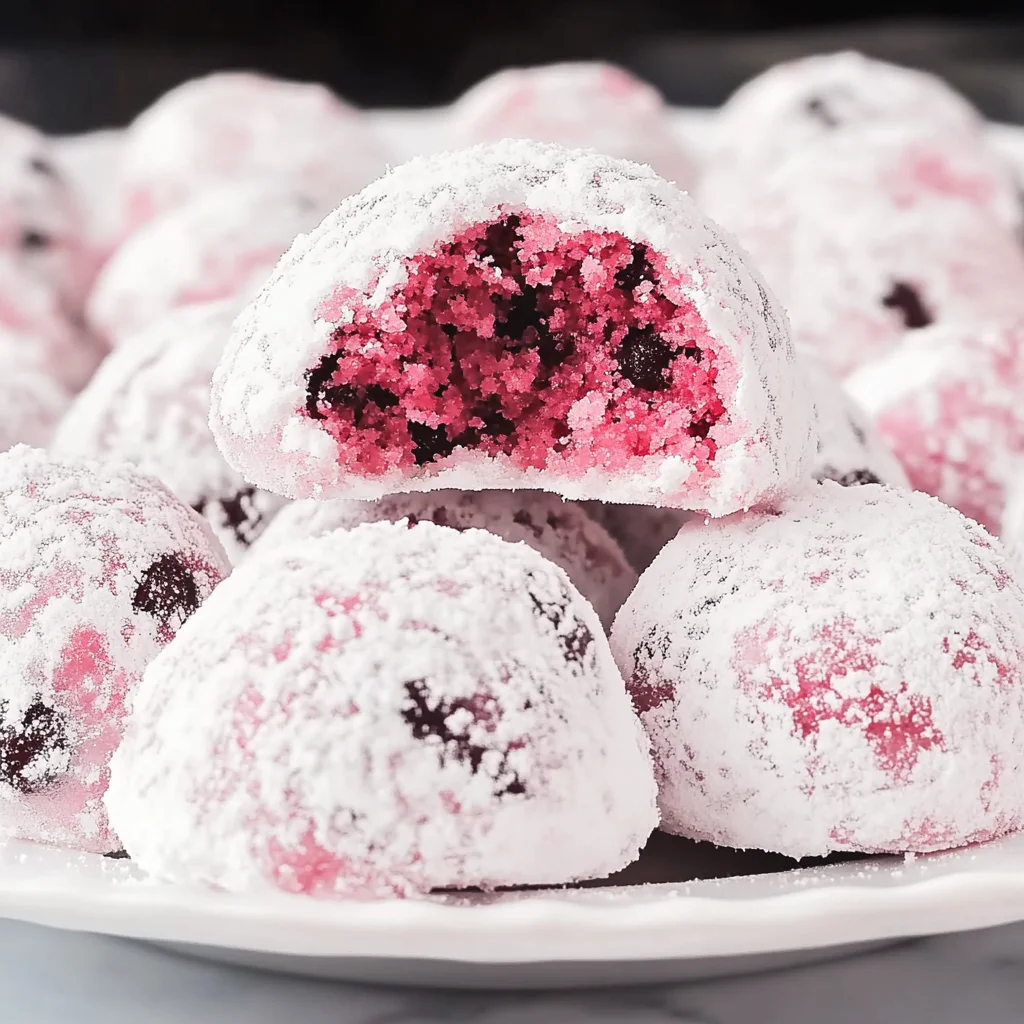
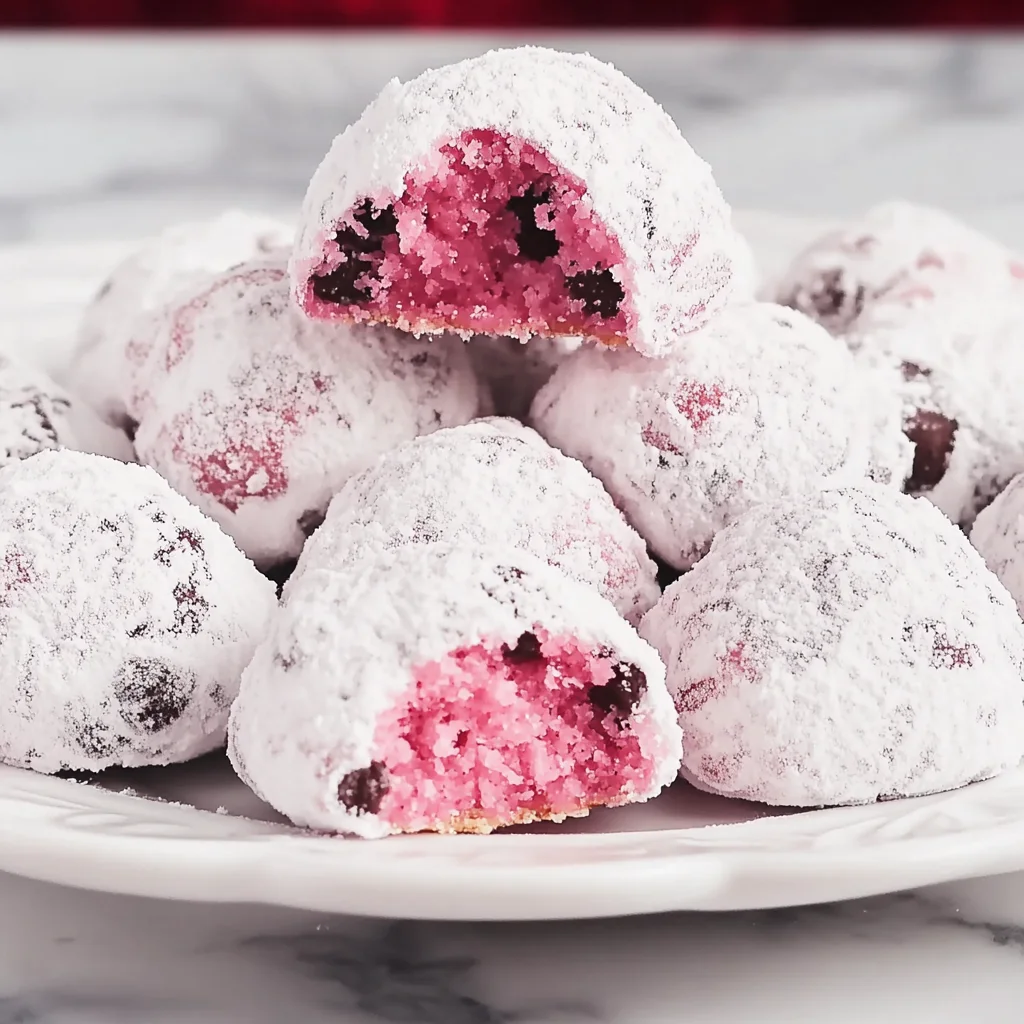
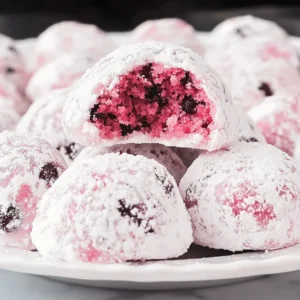
- 5-6 drops hot pink/rose food color gel: To give our snowballs a touch of winter wonderland magic.
- ¼ cup finely crushed peppermint candies: For an extra pop of peppermint and a lovely sparkle.
How to Make Peppermint Snowball Cookies
Ready to create some magic? Let’s get baking!
First things first, let’s get our dry ingredients ready. In a medium bowl, whisk together the all-purpose flour and cornstarch. This simple step ensures everything is evenly distributed for a consistent texture. Set this aside for now.
Now, grab your mixer! In a large bowl, beat the softened butter on medium-high speed for about 30 seconds until it’s nice and creamy. Add 1 cup of the powdered sugar and continue beating for 1 to 1.5 minutes. You want it to be light and fluffy.
Next, it’s time for those lovely extracts. On medium-low speed, slowly add the pure peppermint extract and the pure vanilla extract. This is where that wonderful aroma starts to fill your kitchen!
Gradually add your flour mixture to the butter mixture on medium-low speed. Mix until everything is just combined. Don’t overmix here; we want tender cookies, not tough ones!
Now for the fun part! Increase your mixer speed to medium and carefully add the food coloring. Mix until the dough is a uniform, beautiful color. I love using a gel food coloring for a vibrant hue without adding too much liquid.
Gently fold in the mini semi-sweet chocolate chips until they’re just mixed into the dough. These little pops of chocolate are a delightful surprise!
Cover the dough and pop it into the refrigerator for about 10 minutes to chill. This makes it a little easier to handle.
While the dough is chilling, preheat your oven to 350°F (175°C). Line two baking sheets with parchment paper. This prevents sticking and makes for easy cleanup – a win-win!
Once the dough has chilled slightly, use a 1-tablespoon cookie scoop (or just a tablespoon measure) to form dough into balls. Place them on one of the prepared baking sheets, leaving about 1 inch between each cookie. They won’t spread too much, but giving them a little breathing room is always a good idea.
Bake for 10 to 12 minutes. You want them to be lightly golden around the edges, but still soft in the center.
While the cookies are baking, let’s prepare our snowball coating! In a medium bowl, combine the remaining 2 cups of powdered sugar with the finely crushed peppermint candies. Give it a good whisk to combine them thoroughly.
Let the cookies rest on the baking sheet for about 5 minutes after they come out of the oven. This is crucial! Then, carefully roll the warm cookies in the powdered sugar mixture. The warmth helps the coating adhere. Place these coated beauties on your second prepared baking sheet.
Once the cookies have completely cooled (and trust me, it’s worth the wait!), give them another roll in the powdered sugar mixture. This second coating gives them that perfect, snowy appearance and extra sweetness. It’s like giving them a second hug of winter magic!
Substitutions & Additions
Feeling creative? You can totally switch things up!
- For a different flavor: Instead of peppermint, try almond extract or even a bit of orange zest. If you love chocolate as much as I do, consider adding a sprinkle of cocoa powder to the dough.
- No chocolate chips? Mini white chocolate chips or even chopped nuts would be delicious additions.
- Different color? Feel free to experiment with other food coloring shades. A light blue or a pale green would also look lovely!
- Extra crunch: If you love a bit of crunch, you could add some finely chopped pecans or walnuts to the dough.
Tips for Success
A few little tricks can make these cookies even more perfect!
- Don’t overmix the dough: Overmixing can lead to tough cookies. Mix until just combined.
- Soften the butter properly: If your butter isn’t soft enough, it will be hard to cream with the sugar, which affects the cookie’s texture.
- Chill time is your friend: While it’s only 10 minutes, it does help prevent the cookies from spreading too much.
- Roll warm cookies first: The warmth helps the first coating of powdered sugar stick.
- Cool completely before the second roll: This ensures you get a nice, thick coating of “snow.”
- Prep Ahead: You can make the dough a day in advance and keep it chilled in the refrigerator. Just let it soften slightly before scooping. You can also make the powdered sugar/peppermint mixture ahead of time.
How to Store Peppermint Snowball Cookies
These delightful cookies are best enjoyed when stored properly.
Once completely cooled, store your Peppermint Snowball Cookies in an airtight container at room temperature. They’ll stay fresh and delicious for about 3-4 days. If you happen to have a slightly warmer kitchen or want to keep them around longer, you can also store them in the refrigerator, though they might firm up a bit.
FAQs
Q: Can I make these cookies gluten-free?
A: Yes! You can likely substitute a good quality gluten-free all-purpose flour blend. You might need to adjust the liquid slightly, so start with the recommended amount and add a touch more if the dough seems too dry.
Q: How finely should the peppermint candies be crushed?
A: For the coating, aim for a fine crumb. A food processor or placing them in a plastic bag and crushing with a rolling pin works well. You don’t want large chunks, but a little variation in size is okay.
Q: Can I freeze the dough?
A: Absolutely! You can scoop the dough balls, place them on a parchment-lined tray, and freeze until solid. Then transfer them to a freezer-safe bag or container. Bake from frozen, adding a minute or two to the baking time. You can also freeze the baked and cooled cookies.
Q: My cookies are spreading too much. What did I do wrong?
A: This usually happens if the butter was too soft or the dough wasn’t chilled enough. Make sure your butter is softened but not melted, and don’t skip the chilling step!
Happy baking, friends! I hope these Peppermint Snowball Cookies bring as much joy to your kitchen as they do to mine. Don’t forget to share your creations with us by following our Pinterest for more delicious ideas!
Peppermint Snowball Cookies
Equipment
- Medium bowl
- large bowl
- Mixer
- 1-tablespoon cookie scoop
- Baking sheets
- parchment paper
- Food Processor (optional)
- Rolling Pin (Optional)
- airtight container
Ingredients
For the Cookies
- 2 cups all-purpose flour plus 2 tablespoons
- 2 teaspoons cornstarch
- 1 cup salted sweet cream butter softened
- 3 cups powdered sugar divided
- 1 teaspoon pure peppermint extract
- 0.5 teaspoon pure vanilla extract
- 1.25 cup mini semi-sweet chocolate chips
- 5-6 drops hot pink/rose food color gel
For the Snowball Coating
- 2 cups powdered sugar
- 0.25 cup finely crushed peppermint candies
Instructions
- In a medium bowl, whisk together the all-purpose flour and cornstarch. Set aside.
- In a large bowl, beat the softened butter on medium-high speed for about 30 seconds until creamy. Add 1 cup of powdered sugar and continue beating for 1 to 1.5 minutes until light and fluffy.
- On medium-low speed, slowly add the peppermint extract and vanilla extract.
- Gradually add the flour mixture to the butter mixture on medium-low speed. Mix until just combined.
- Increase mixer speed to medium and carefully add the food coloring. Mix until the dough is a uniform color.
- Gently fold in the mini chocolate chips.
- Cover the dough and refrigerate for about 10 minutes to chill.
- Preheat oven to 350°F (175°C). Line two baking sheets with parchment paper.
- Use a 1-tablespoon cookie scoop to form dough into balls. Place them on a prepared baking sheet, leaving about 1 inch between each cookie.
- Bake for 10 to 12 minutes, until lightly golden around the edges but still soft in the center.
- While cookies bake, combine the remaining 2 cups of powdered sugar with the crushed peppermint candies in a medium bowl. Whisk to combine.
- Let cookies rest on the baking sheet for 5 minutes after removing from the oven. Then, carefully roll the warm cookies in the powdered sugar mixture. Place on the second prepared baking sheet.
- Once cookies have completely cooled, give them another roll in the powdered sugar mixture for a second coating.