
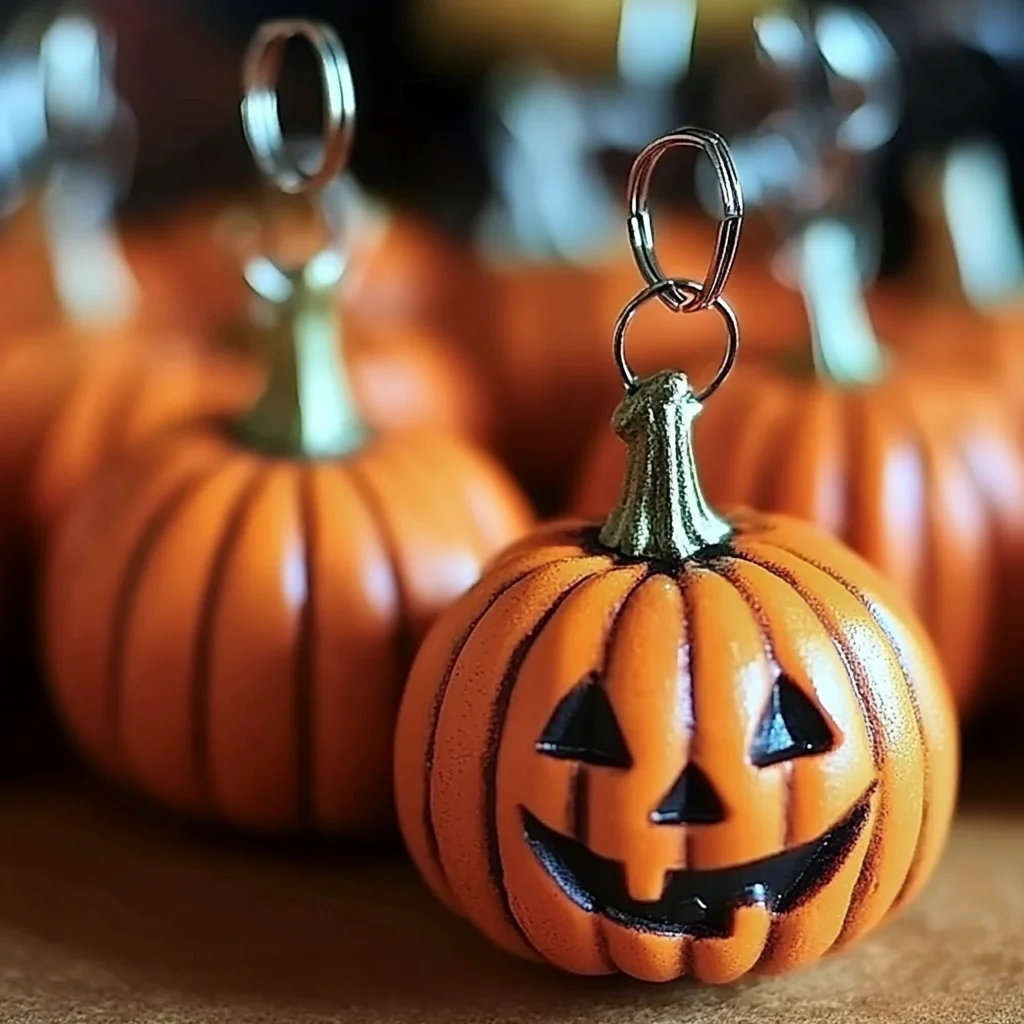
As the leaves start to change and the air turns crisp, there’s something magical about the fall season that invites us to embrace our creativity. Imagine sitting down with a few vibrant pieces of polymer clay, the scent of pumpkin spice wafting through the air, and a warm cup of cider by your side. This DIY project is not just about making a cute keychain pumpkin; it’s about the joy of crafting, the satisfaction of creating something with your own hands, and the delightful feeling of bringing a bit of autumn into your everyday life.
Why You’ll Love Keychain Pumpkin
- Beginner-friendly
- Budget-friendly
- Creative and fun
- Great for kids and families
- Perfect for gifts or decorations
- Customizable
The Heart Behind This DIY
There’s a unique joy that comes from crafting, especially when it involves seasonal themes. This keychain pumpkin project allows you to explore your artistic side while providing a sense of accomplishment. As you mold the clay, you engage your senses—the coolness of the material in your hands, the vibrant colors coming together, and the satisfying sounds of sculpting. Crafting helps cultivate mindfulness, encourages creativity, and fosters connections with loved ones as you share the experience. It’s a beautiful way to celebrate the season and the simple pleasure of making something special.
A Gentle Look at the Process
In this project, you will create a charming little pumpkin that you can attach to your keys, backpack, or even gift to a friend. The process is straightforward and allows for personal expression. You’ll start by shaping the clay into a round pumpkin form, adding intricate details like grooves, leaves, and a stem. As you work through each step, you’ll find yourself more immersed in the experience, enjoying every moment of creation.
Materials You’ll Need
- Orange polymer clay: The main material for your pumpkin.
- Green polymer clay: For the leaves and vines that add a touch of charm.
- Brown polymer clay: To create the pumpkin’s stem.
- Keychain ring: To make your pumpkin a functional accessory.
- Craft knife: For detailing and shaping.
- Rolling pin: To flatten and shape the clay.
- Toothpick or sculpting tool: For adding intricate details.
- Oven: To bake the polymer clay and set your creation.
Step-by-Step Directions
Step 1
Preheat your oven according to the instructions on the polymer clay packaging. This is an important first step to ensure your pumpkin bakes perfectly!
Step 2
Take a portion of the orange polymer clay and roll it into a ball. Then, gently flatten the bottom while rounding the top to form the classic pumpkin shape. You’ll feel the clay warm up in your hands, becoming more malleable as you work.
Step 3
Roll small pieces of green polymer clay into leaves and vines. Attach them to the pumpkin by pressing them gently onto the surface. This is where you can let your creativity shine, experimenting with different leaf shapes and sizes.
Step 4
Use the craft knife to carefully create grooves on the pumpkin’s surface. This adds a realistic texture, making your pumpkin come to life. Listen to the soft sound of the knife gliding through the clay as you carve.
Step 5
Next, take a small piece of brown polymer clay and roll it into a stem. Attach this to the top of your pumpkin, securing it well so it stays in place.
Step 6
With your toothpick or sculpting tool, add fine details to the leaves and grooves. This step allows you to personalize your creation even more, adding your unique touch.
Step 7
Before baking, insert the keychain ring into the top of the pumpkin. This will make it easy to attach once your pumpkin is complete.
Step 8
Place your pumpkin on a baking tray lined with parchment paper and bake according to the polymer clay instructions. The delightful aroma of baking clay will fill your space as your pumpkin transforms.
Step 9
Allow your pumpkin to cool completely before using it. Take a moment to admire your handiwork—each detail a testament to your creativity and effort.
Creative Ways to Use Keychain Pumpkin
Once your adorable keychain pumpkin is complete, the possibilities are endless! Attach it to your keys for a seasonal touch, clip it onto your backpack for a fun accessory, or use it as a charming zipper pull on your favorite bag. It also makes a thoughtful gift for friends or family who love fall. Consider creating a whole set in different colors to celebrate the changing seasons, or use them as decorations around your home. The little pumpkin can brighten up any space!
How to Store, Preserve, or Reuse Keychain Pumpkin
To keep your keychain pumpkin looking fresh, store it in a cool, dry place away from direct sunlight. If you notice any dust collecting, simply wipe it gently with a soft cloth. If you want to change things up, you can always paint or embellish your pumpkin for different seasons or holidays!
Creative Variations and Customizations
- Color variations: Experiment with different shades of orange, or try a whimsical purple or blue pumpkin for a unique twist.
- Theme ideas: Create pumpkins with different expressions or themes, like spooky faces for Halloween or friendly smiles for a cheerful look.
- Seasonal adaptations: Add glitter for a festive touch, or use metallic clay for a more sophisticated autumn look.
- Kid-friendly modifications: Let kids decorate their pumpkins with stickers or paint to personalize their creations.
- Advanced creative upgrades: Try sculpting a mini pumpkin patch by making several pumpkins of various sizes and colors!
Tips for Success
- Avoid common mistakes: Make sure to not overwork the clay, as this can make it crumbly. Take your time shaping and detailing.
- Safety tips: When using a craft knife, be sure to cut away from your body and keep fingers clear of the blade.
- Preparation suggestions: Have all your materials ready before you start for a smooth crafting experience.
- Cleanup recommendations: Keep a wet cloth nearby to wipe your hands and workspace as you go—this helps maintain a tidy area.
- Expert crafting tips: Don’t be afraid to experiment! Each pumpkin can tell a story based on your choices and creativity.
FAQs About Keychain Pumpkin
Can beginners make this?
Absolutely! This project is perfect for beginners and offers a great way to practice your sculpting skills.
Can children participate?
Yes! Kids will love making their own pumpkins, especially with adult supervision during the cutting and baking steps.
How long does it last?
When stored properly, your keychain pumpkin can last for many seasons. Just keep it out of direct sunlight and away from moisture.
Can I customize it?
Definitely! Feel free to play with colors, shapes, and details to make it uniquely yours.
A Final Creative Note
As you wrap up this delightful crafting session, remember that the heart of DIY projects lies in the joy of creation. Every pumpkin you make is a celebration of your creativity and a reminder of the beauty of handmade items. So gather your materials, unleash your imagination, and let your inner artist shine! For more delicious recipes, check out Blueberry Lemon Ricotta Pancakes or Easy One Pan Garlic Butter Beef Rice for treats you will love!
For even more DIY inspiration, be sure to follow our Pinterest account!
Craft Your Own Adorable Keychain Pumpkin
Equipment
- oven
- Craft Knife
- Rolling pin
- Toothpick or sculpting tool
Ingredients
Materials You'll Need
- Orange polymer clay
- Green polymer clay
- Brown polymer clay
- Keychain ring
- Craft knife
- Rolling pin
- Toothpick or sculpting tool
Instructions
- Step 1: Preheat your oven according to the instructions on the polymer clay packaging.
- Step 2: Take a portion of the orange polymer clay and roll it into a ball, then gently flatten the bottom while rounding the top to form the classic pumpkin shape.
- Step 3: Roll small pieces of green polymer clay into leaves and vines, and attach them to the pumpkin.
- Step 4: Use the craft knife to carefully create grooves on the pumpkin’s surface.
- Step 5: Roll a small piece of brown polymer clay into a stem and attach it to the top of your pumpkin.
- Step 6: Add fine details to the leaves and grooves using a toothpick or sculpting tool.
- Step 7: Insert the keychain ring into the top of the pumpkin before baking.
- Step 8: Place your pumpkin on a baking tray lined with parchment paper and bake according to the polymer clay instructions.
- Step 9: Allow your pumpkin to cool completely before using it.
