
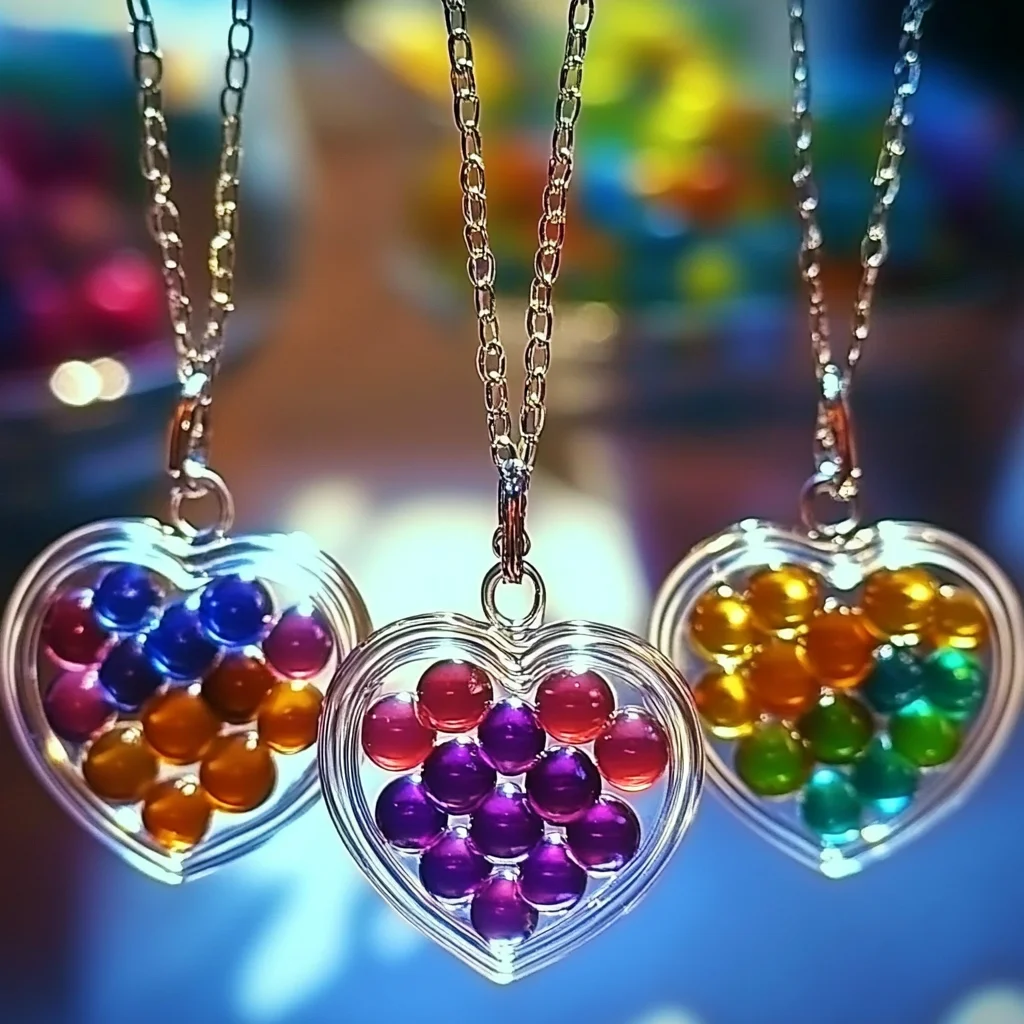
Do you remember those sunny afternoons spent crafting something beautiful with your hands? There’s something magical about immersing yourself in a creative project that transforms ordinary materials into a dazzling creation. Today, we’re diving into the world of DIY Melted Bead Suncatchers. This project is not only fun and easy, but it also brings a splash of color to your home, filling your space with warmth and light. Imagine hanging your vibrant suncatcher in a window, watching it dance with colors as the sun shines through. It’s a wonderful way to invite a little more joy into your daily life.
Why You’ll Love DIY Melted Bead Suncatchers
- Beginner-friendly
- Budget-friendly
- Creative and fun
- Great for kids and families
- Perfect for gifts or decorations
- Customizable
The Heart Behind This DIY
Crafting is a beautiful way to connect with your creativity and express yourself. When you engage in a project like making melted bead suncatchers, you not only create something lovely, but you also experience the calming effects of focusing on a hands-on activity. As you sort through colorful beads, the tactile sensations and bright hues stimulate your senses, encouraging mindfulness and relaxation. This project is perfect for all ages, making it a wonderful opportunity to bond with family or friends. You’ll find that every piece you create carries a bit of your spirit, and that’s truly special.
A Gentle Look at the Process
As we embark on this crafting journey, you can expect a delightful experience from start to finish. We’ll begin by gathering our materials and creating a cozy crafting space. The process of arranging the beads is both meditative and exciting, as you decide on your color combinations and designs. Once in the oven, the beads will melt and fuse together, transforming into a stunning suncatcher that captures light beautifully. You’ll feel a sense of accomplishment as you unveil your creation and hang it in a sunny spot.
Materials You’ll Need
- Colorful plastic beads: These vibrant beads will melt into beautiful shapes.
- Metal cookie cutters: Use these to form your suncatcher shapes.
- Parchment paper: This will line your baking sheet and prevent sticking.
- Baking sheet: A sturdy surface to hold your creations while baking.
- Oven: The magic happens here as the beads melt into stunning designs.
Step-by-Step Directions
Step 1
Preheat your oven to 400°F (200°C). The anticipation of seeing those beads melt is half the fun!
Step 2
Place a sheet of parchment paper on your baking sheet. This will keep your suncatchers from sticking, making cleanup a breeze.
Step 3
Arrange your colorful beads inside the metal cookie cutters, filling them as desired. You can create patterns or mix the colors for a more random look.
Step 4
Carefully place the baking sheet in the preheated oven. Keep an eye on the beads as they begin to melt – it’s mesmerizing to watch!
Step 5
Bake for 10-20 minutes, watching closely until the beads have melted and fused together. The time may vary depending on your oven, so stay nearby.
Step 6
Once the beads are melted, remove the baking sheet from the oven and let it cool completely. This is a great time to admire your work!
Step 7
Carefully remove the melted beads from the cookie cutters. They should pop out easily with the parchment paper.
Step 8
Use string or wire to hang your suncatchers in a sunny window. Enjoy the beautiful light display that brightens your space!
Creative Ways to Use DIY Melted Bead Suncatchers
Once you’ve created your beautiful suncatchers, the fun doesn’t stop there! You can hang them in windows, use them as garden decorations, or even give them as heartfelt gifts. Imagine how delighted a friend would be to receive a custom suncatcher made just for them. You can also create a whole collection to brighten up a room or garden space. The possibilities are as endless as your imagination!
How to Store, Preserve, or Reuse DIY Melted Bead Suncatchers
To preserve your beautiful creations, store them in a cool, dry place away from direct sunlight when not in use. If you want to change up your decor, simply repurpose them by using them in different spaces or incorporating them into different seasonal decorations.
Creative Variations and Customizations
- Color variations: Experiment with different color palettes to match your home decor.
- Theme ideas: Create holiday-themed suncatchers for festive occasions.
- Seasonal adaptations: Make spring flowers or autumn leaves to celebrate the seasons.
- Kid-friendly modifications: Let kids choose their favorite colors and shapes for personalized pieces.
- Advanced creative upgrades: Try layering different shapes for a more complex design.
Tips for Success
- Avoid overcrowding the cookie cutters to ensure even melting.
- Always supervise children during the baking process for safety.
- Prepare your workspace in advance to make the process smoother.
- Cleanup is easier if you line the baking sheet with parchment paper.
- Don’t hesitate to experiment with colors and shapes – the more creative, the better!
FAQs About DIY Melted Bead Suncatchers
Can beginners make this?
Absolutely! This project is perfect for beginners and requires minimal materials and steps.
Can children participate?
Yes! Kids will love sorting and arranging the beads. Just ensure adult supervision during baking.
How long does it last?
With proper care, your melted bead suncatchers can last for years, brightening your space with color.
Can I customize it?
Definitely! You can choose your colors, shapes, and even create themed pieces for special occasions.
A Final Creative Note
As we wrap up this colorful crafting adventure, I hope you feel inspired to dive into your DIY Melted Bead Suncatcher project. Remember, crafting is about the joy of creation and the connections we build along the way. Celebrate every moment you spend creating, and don’t hesitate to share your beautiful creations with others. For more delicious recipes, check out Blueberry Lemon Ricotta Pancakes or Grilled Chicken Creamy Pasta Bowl Recipe for treats you will love! Embrace your creativity and let the light shine through your handmade suncatchers!
For even more DIY inspiration, make sure to follow our Pinterest account for endless crafting ideas and projects.

DIY Melted Bead Suncatchers: A Colorful Craft for Everyone
Equipment
- oven
- baking sheet
- Metal cookie cutters
- parchment paper
Ingredients
For the Suncatchers
- Colorful plastic beads These vibrant beads will melt into beautiful shapes.
- 1 sheet Parchment paper To line your baking sheet and prevent sticking.
- 1 baking sheet Baking sheet A sturdy surface to hold your creations while baking.
- 1 oven Oven The magic happens here as the beads melt into stunning designs.
Instructions
- Step 1: Preheat your oven to 400°F (200°C).
- Step 2: Place a sheet of parchment paper on your baking sheet.
- Step 3: Arrange your colorful beads inside the metal cookie cutters.
- Step 4: Carefully place the baking sheet in the preheated oven.
- Step 5: Bake for 10-20 minutes, watching closely until the beads have melted.
- Step 6: Once the beads are melted, remove the baking sheet from the oven and let it cool completely.
- Step 7: Carefully remove the melted beads from the cookie cutters.
- Step 8: Use string or wire to hang your suncatchers in a sunny window.
