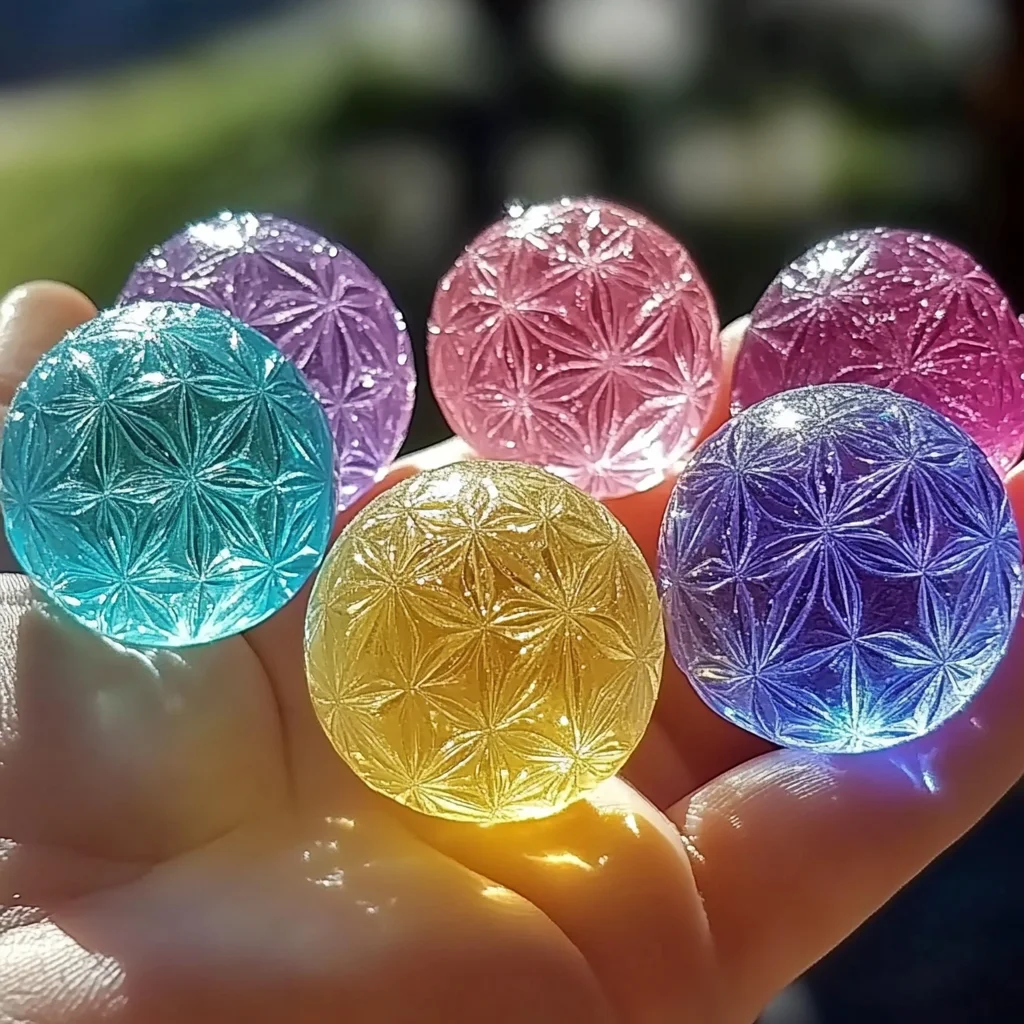
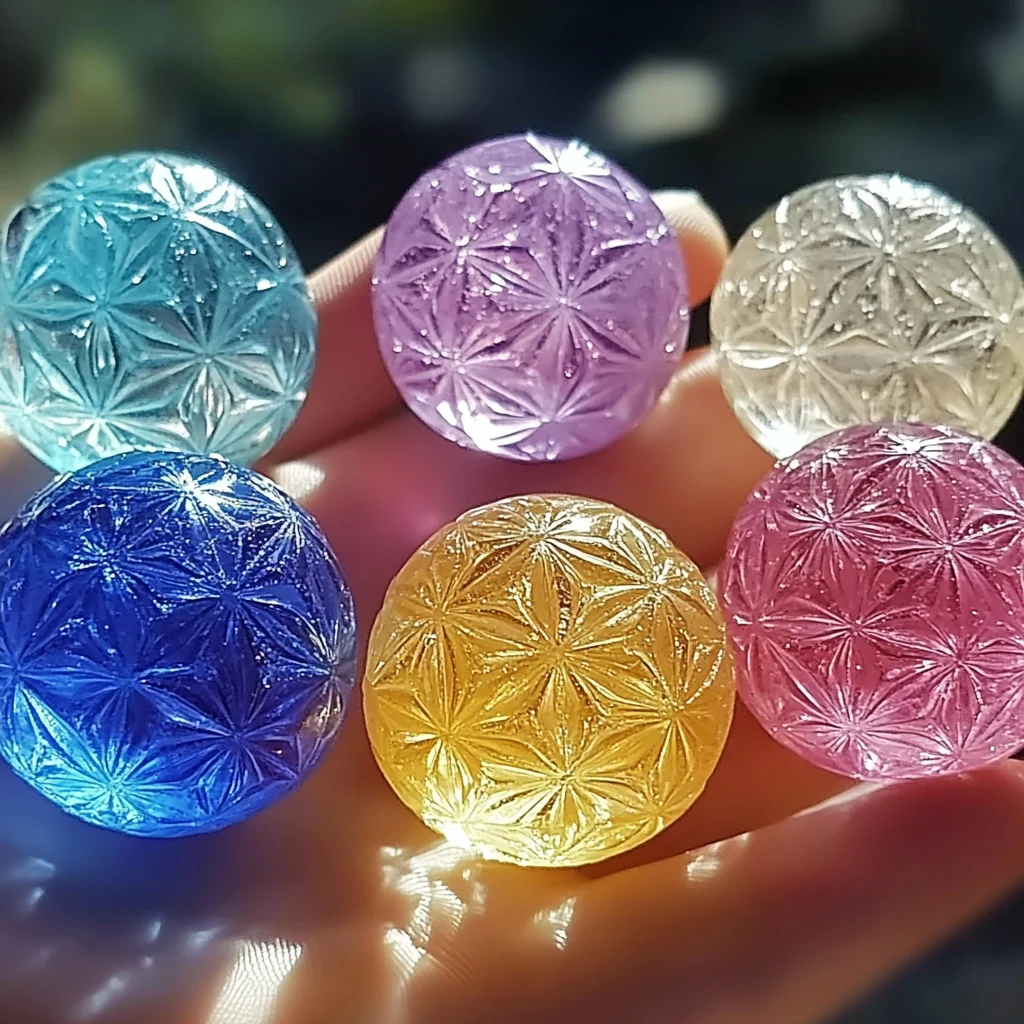
Remember those carefree days of childhood, filled with simple joys and bursts of creativity? There’s something truly magical about making something with your own hands, especially when it involves a touch of sparkle and a whole lot of bouncing fun! Today, we’re diving into a super simple, incredibly fun DIY project that’s perfect for a rainy afternoon, a birthday party craft, or just a sweet way to add some homemade magic to your day. Get ready to create your very own DIY Sweet Sugar Crystal Bouncy Balls!
Why You’ll Love DIY Sweet Sugar Crystal Bouncy Balls
- Fast: You can whip these up in no time!
- Easy: Even the littlest crafters can get involved with a little supervision.
- Giftable: Package them up in a cute jar for a thoughtful, handmade gift.
- Crowd-pleasing: Kids (and maybe even some adults!) will be mesmerized by these shimmering, bouncy creations.
Ingredients
Gathering your supplies is half the fun! Here’s what you’ll need to bring these delightful bouncy balls to life:
- 1/2 cup white school glue (the classic kind works best for that perfect bounce!)
- 1/4 cup warm water (just warm enough to dissolve the baking soda)
- 1/4 cup liquid starch (this is the secret to the bounce!)
- 1 tablespoon baking soda (helps with the texture and structure)
- 1 tablespoon cornstarch (adds a bit of firmness)
- 1/4 cup sugar crystals (for that irresistible sparkle – you can find these at most craft or baking supply stores)
- Food coloring (optional, but oh-so-fun for adding pops of color!)
How to Make DIY Sweet Sugar Crystal Bouncy Balls
Alright, let’s get our hands a little sticky and create some magic! It’s a straightforward process, and before you know it, you’ll have a collection of shimmering bouncy balls.
-
Get Mixing: In a medium-sized mixing bowl, pour in your white school glue. Add the warm water and give it a good stir until everything is nice and smooth. No lumps allowed!
-
Baking Soda Magic: Now, sprinkle in the baking soda. Stir it gently until it’s completely dissolved into the glue and water mixture. This is an important step to ensure a smooth texture.
-
The Bounce Factor: Here comes the star! Slowly pour in your liquid starch while you continue to stir. You’ll notice the mixture starting to thicken up and get a bit gooey. Keep stirring until it starts to pull away from the sides of the bowl.
-
Knead Away: Once the mixture becomes too thick to stir easily and starts feeling sticky, it’s time to use your hands! Take it out of the bowl and knead it like dough. Add the cornstarch to help it become less sticky and more smooth and pliable. Keep kneading until you have a nice, firm but still slightly stretchy dough.
-
Crystal Sparkle: Time to add the bling! Gently stir in your sugar crystals. Make sure they are distributed evenly throughout the mixture. This is where the magic really happens!
-
Color Burst (Optional): If you’re feeling colorful (and why wouldn’t you be?), add a few drops of your favorite food coloring. Knead it in until the color is evenly spread. You can even swirl in different colors for a tie-dye effect, similar to our DIY Tie-Dye Bouncy Balls!
-
Ball Rolling Fun: Now for the really fun part! Take small portions of the mixture and roll them between your palms to create small balls, about 1/2 inch in diameter. Try to get a good amount of those sugar crystals into each ball for maximum sparkle.
-
Let Them Rest: Once you’ve rolled all your bouncy balls, let them sit undisturbed for a few minutes. This helps them firm up a bit before you start bouncing them around!
Substitutions & Additions
Feeling creative? You can totally switch things up and make these bouncy balls even more unique!
- Glitter: Instead of, or in addition to, sugar crystals, add some fine glitter for an extra shimmer.
- Different Colors: Experiment with different food coloring combinations. Think rainbow swirls or ombre effects!
- Scent: A drop or two of your favorite essential oil (like lavender or lemon) can add a lovely scent. Just be sure it’s skin-safe!
- Glow-in-the-Dark: For extra nighttime fun, try adding a bit of glow-in-the-dark paint (make sure it’s non-toxic and washable) for some DIY Glow-in-the-Dark Bouncy Balls!
Tips for Success
A few little tricks can make your bouncy ball making experience even smoother:
- Don’t Over-Knead: While you want the mixture to be pliable, over-kneading can make it too tough.
- Sticky Situation?: If the mixture is too sticky to handle, add a tiny bit more cornstarch. If it’s too dry, add a very small amount of glue.
- Even Crystal Distribution: Try to mix the sugar crystals in thoroughly so every ball gets its share of sparkle.
- Prep Ahead: You can mix the glue, water, baking soda, and liquid starch mixture a little ahead of time and then add the cornstarch and crystals when you’re ready to roll.
How to Store DIY Sweet Sugar Crystal Bouncy Balls
Once your bouncy balls are ready, you’ll want to keep them in good condition for maximum bouncing enjoyment!
Store your DIY Sweet Sugar Crystal Bouncy Balls in an airtight container or a resealable plastic bag. Keep them in a cool, dry place. They should last for several weeks, though they might lose a bit of their bounce over time. If they start to feel a little stiff, a few minutes of play can often revive them!
FAQs
- Can kids make these independently?
- With adult supervision, yes! Younger children might need help with the initial mixing, but rolling the balls is usually a favorite task.
- Can I use different types of glue?
- White school glue is generally the best for achieving that classic bouncy ball texture. Other glues might result in a stickier or less bouncy outcome.
- Why aren’t my balls bouncing?
- Make sure you used liquid starch, as it’s the key ingredient for bounce. Also, ensure the mixture was kneaded well to the right consistency. If you’re looking for other fun, science-related activities, check out our Baking Soda Vinegar Fireworks or Mini Volcano in a Jar!
- Are these edible?
- No, these are for play only! Please do not consume any of the ingredients or the finished bouncy balls.
These DIY Sweet Sugar Crystal Bouncy Balls are such a blast to make and play with. They’re a wonderful reminder that simple things can bring so much joy! For more fun crafts and delicious recipes, be sure to check out our other projects, like the Easy Edible Aquarium for Kids or the DIY Fireworks in a Jar Science Craft!
If you loved making these bouncy balls, you’ll love all the other creative ideas we share. Follow us on Pinterest for even more inspiration!

DIY Sweet Sugar Crystal Bouncy Balls
Equipment
- Medium-sized mixing bowl
- spoon
Ingredients
For the Bouncy Balls
- 1/2 cup white school glue the classic kind works best for that perfect bounce!
- 1/4 cup warm water just warm enough to dissolve the baking soda
- 1/4 cup liquid starch this is the secret to the bounce!
- 1 tablespoon baking soda helps with the texture and structure
- 1 tablespoon cornstarch adds a bit of firmness
- 1/4 cup sugar crystals for that irresistible sparkle – you can find these at most craft or baking supply stores
- food coloring optional, but oh-so-fun for adding pops of color!
Instructions
- Step 1: In a medium-sized mixing bowl, pour in your white school glue. Add the warm water and give it a good stir until everything is nice and smooth. No lumps allowed!
- Step 2: Now, sprinkle in the baking soda. Stir it gently until it’s completely dissolved into the glue and water mixture. This is an important step to ensure a smooth texture.
- Step 3: Here comes the star! Slowly pour in your liquid starch while you continue to stir. You’ll notice the mixture starting to thicken up and get a bit gooey. Keep stirring until it starts to pull away from the sides of the bowl.
- Step 4: Once the mixture becomes too thick to stir easily and starts feeling sticky, it’s time to use your hands! Take it out of the bowl and knead it like dough. Add the cornstarch to help it become less sticky and more smooth and pliable. Keep kneading until you have a nice, firm but still slightly stretchy dough.
- Step 5: Time to add the bling! Gently stir in your sugar crystals. Make sure they are distributed evenly throughout the mixture. This is where the magic really happens!
- Step 6: If you’re feeling colorful (and why wouldn’t you be?), add a few drops of your favorite food coloring. Knead it in until the color is evenly spread. You can even swirl in different colors for a tie-dye effect, similar to our DIY Tie-Dye Bouncy Balls!
- Step 7: Now for the really fun part! Take small portions of the mixture and roll them between your palms to create small balls, about 1/2 inch in diameter. Try to get a good amount of those sugar crystals into each ball for maximum sparkle.
- Step 8: Once you've rolled all your bouncy balls, let them sit undisturbed for a few minutes. This helps them firm up a bit before you start bouncing them around!