
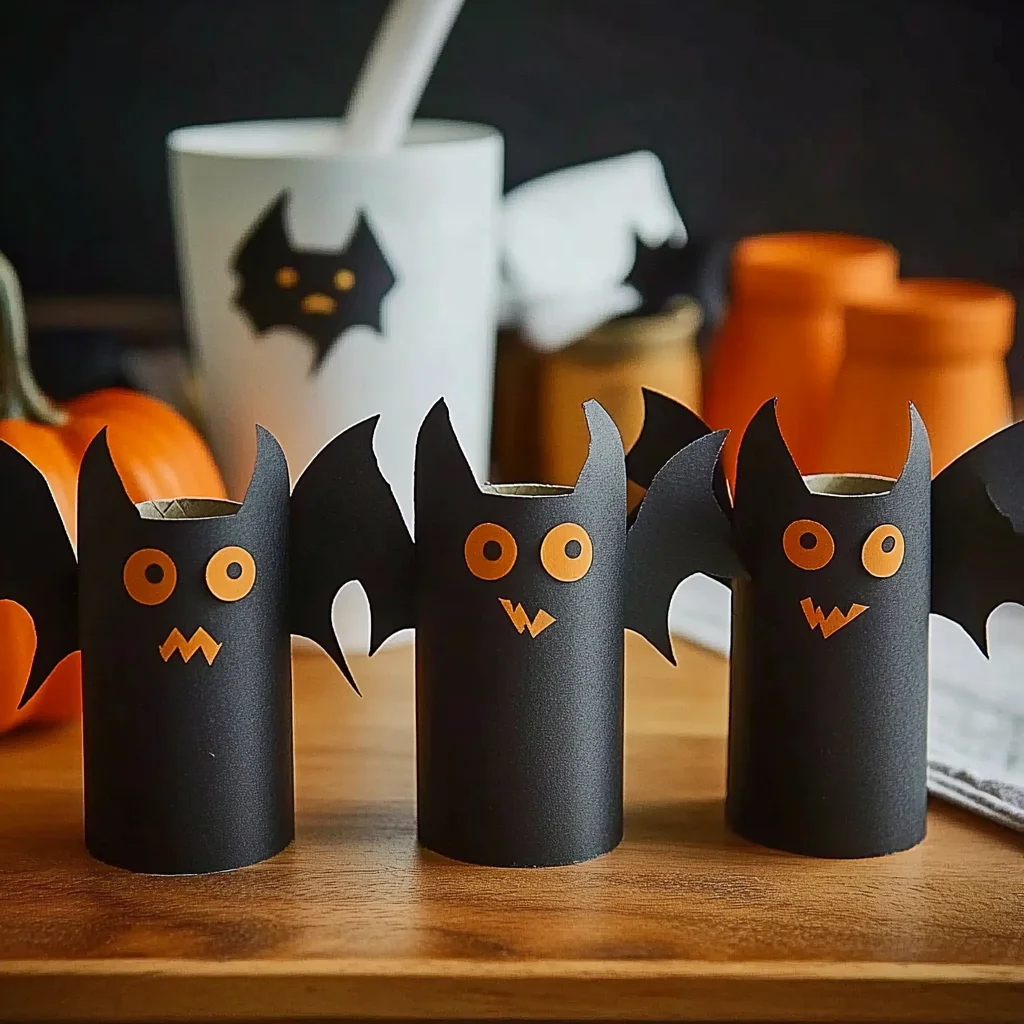
Have you ever felt the thrill of transforming something ordinary into something delightfully spooky? Picture this: a cozy afternoon spent crafting with loved ones, the scent of fresh paint filling the air, and laughter echoing as you create whimsical bats from simple toilet paper rolls. This DIY project is not just about making decorations; it’s about creating memories and embracing the joy of crafting. Imagine hanging a row of these adorable bats in your home, each one a testament to your creativity and the fun you had making it. Let’s dive into this enchanting project that will bring a touch of Halloween magic to your space!
Why You’ll Love DIY Toilet Paper Roll Bats
- Beginner-friendly
- Budget-friendly
- Creative and fun
- Great for kids and families
- Perfect for gifts or decorations
- Customizable
The Heart Behind This DIY
Crafting allows us to connect with our inner child and unleash our creativity. When we engage in projects like making these toilet paper roll bats, we not only create something beautiful but also experience the soothing benefits of crafting. It encourages mindfulness, as we focus on the colors and textures, and the repetitive actions can be quite meditative. Whether you’re working alongside your kids or enjoying some solo time, this project fosters connection, confidence, and a sense of accomplishment. Every cut, every glue stick, and every laugh shared brings us closer together.
A Gentle Look at the Process
As we embark on this crafting journey, you can expect a delightful mix of creativity and fun. You’ll start with simple materials that you likely already have at home, and before you know it, those empty toilet paper rolls will transform into charming little bats. The process is straightforward and enjoyable, filled with opportunities to express your unique style. The sight of your finished bats, with their playful wings and silly grins, will surely bring a smile to your face.
Materials You’ll Need
- Empty toilet paper rolls – These are the base for our bats, ready to be transformed!
- Black paint or black construction paper – For that classic bat look!
- Scissors – Essential for cutting out wings and features.
- Glue – To hold all your wonderful creations together.
- Googly eyes (optional) – For a fun, quirky touch.
- White paper or white paint – To create adorable fangs.
- String (optional) – Perfect for hanging your bats for all to see!
Step-by-Step Directions
Step 1
If you’re using paint, take a moment to cover your work surface with newspaper or an old tablecloth. Then, grab your empty toilet paper rolls and paint them black. Just imagine the satisfying swish of the brush as you coat the rolls with paint! If you prefer construction paper, cut strips that will wrap around the rolls and glue them in place. Allow everything to dry completely before moving on to the next step.
Step 2
Now comes the fun part! Grab your black construction paper and cut out bat wings. You can design them any way you like—sharp triangular edges for a fierce look or rounded edges for a friendly vibe. Feel free to let your creativity soar! Once you’ve cut out your wings, it’s time to attach them. Use glue to secure the wings to the sides of your painted or wrapped toilet paper roll. Picture how those wings will flap in the breeze once they’re hanging up!
Step 3
To give your bats some personality, glue googly eyes onto the front of the roll. If you don’t have googly eyes, no worries! You can easily draw or cut out eyes from white paper and use those instead. Next, let’s add some fangs! Cut small triangles from white paper and glue them under the eyes for that perfect spooky touch. You’ll start to see your bats come to life right before your eyes!
Step 4
If you want to hang your bats, now is the time to attach a piece of string to the top of the roll. Just imagine how cute they will look fluttering in the air! Finally, allow all the glue to dry completely before displaying your delightful creations.
Creative Ways to Use DIY Toilet Paper Roll Bats
Once your adorable bats are ready, there are so many ways to enjoy them! Hang them around the house for Halloween decorations or use them as part of a festive table display. You can even gift them to friends or family as a fun surprise. If you have kids, consider using them in a playful storytelling session, where your bats become characters in a spooky tale. The possibilities are endless!
How to Store, Preserve, or Reuse DIY Toilet Paper Roll Bats
To keep your bats looking their best, store them in a cool, dry place away from direct sunlight. If you want to preserve them for future Halloweens, consider using a clear sealant spray to protect the paint. Should you decide to reuse the materials, simply peel off the decorations, and you can start fresh for the next project!
Creative Variations and Customizations
- Color variations – Try using different colors for a whimsical look.
- Theme ideas – Create bats in various styles like cute, spooky, or cartoonish.
- Seasonal adaptations – Decorate with seasonal colors for different holidays.
- Kid-friendly modifications – Simplify the design for younger children.
- Advanced creative upgrades – Add glitter or other embellishments for extra flair.
Tips for Success
- Common mistakes to avoid – Make sure the glue is completely dry before moving on to the next step.
- Safety tips – Supervise children when using scissors and glue.
- Preparation suggestions – Gather all your materials before starting to keep the flow smooth.
- Cleanup recommendations – Clean up paint spills immediately to avoid messes.
- Expert crafting tips – Don’t be afraid to experiment with designs and colors!
FAQs About DIY Toilet Paper Roll Bats
Can beginners make this?
Absolutely! This project is perfect for beginners, and I promise you’ll have fun along the way.
Can children participate?
Yes! This is a family-friendly craft that kids will love, especially with some adult supervision.
How long does it last?
With proper care, these bats can last for many Halloweens to come!
Can I customize it?
Definitely! Feel free to experiment with colors, sizes, and additional decorations.
A Final Creative Note
As you finish your DIY toilet paper roll bats, take a moment to celebrate your creativity and the joy of making something with your own hands. Crafting is a beautiful way to express yourself and connect with others. For more delicious recipes, check out all our recipes or desserts that you will love! Each project, no matter how small, is a step towards building your confidence and creativity. So gather your materials and let those creative juices flow—happy crafting!
For more DIY inspiration, follow our Pinterest account!
DIY Toilet Paper Roll Bats
Equipment
- Paintbrush
- Scissors
Ingredients
For the DIY Toilet Paper Roll Bats
- 1 empty toilet paper roll per bat
- black acrylic paint
- black construction paper for the wings
- googly eyes or white paper for the eyes
- craft glue or hot glue for attaching the wings and features
- craft sequins, glitter, or ribbon optional for embellishment
Instructions
- Step 1: Paint the entire outside of the empty toilet paper roll with black acrylic paint. Apply an even coat and allow it to dry completely. Add a second coat if needed.
- Step 2: Draw two bat wing shapes on black construction paper and carefully cut them out. Make the wings large enough to extend beyond the sides of the cardboard roll.
- Step 3: Once the painted roll is dry, apply craft glue or hot glue to the sides and attach one wing to each side. Press gently until the wings are secure and allow the adhesive to dry.
- Step 4: Glue googly eyes to the front of the roll. Alternatively, cut small white circles from paper and draw pupils. Add a mouth, smile, or fangs for extra personality.
- Step 5: Add optional decorations such as glitter, sequins, ribbon, paper accessories, or other Halloween-themed embellishments. Let everything dry fully before displaying the bat.
