
Oh friend, do you remember those lazy afternoons, maybe after a walk in the park or a scavenge in the backyard, when you’d come inside with pockets full of treasures? Smooth stones, vibrant fallen leaves, maybe a particularly interesting twig? There’s something so magical about bringing a little bit of the outdoors inside, especially when you can turn it into something beautiful.
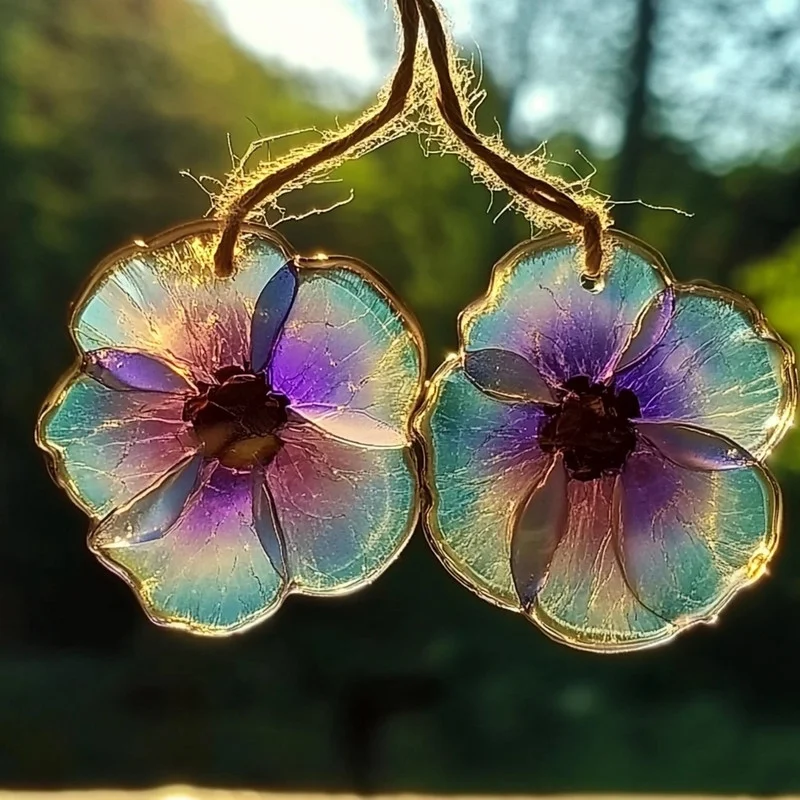
That’s exactly how I feel about these delightful DIY Bioplastic Suncatchers! They’re the perfect way to preserve those little snippets of nature you find, capturing their beauty in a shimmering, sun-drenched window display. And guess what? They are incredibly simple to make, surprisingly quick (active time, anyway!), and leave you with the most charming, totally unique pieces of art.
Why You’ll Love This Recipe
- Fast: The hands-on part takes just minutes!
- Easy: If you can boil water and stir, you can make these. No fancy equipment needed!
- Giftable: Wrap a few up with a ribbon – they make such thoughtful, handmade gifts.
- Crowd-pleasing: Kids and adults alike will adore collecting the nature bits and seeing their creations come to life.
- Eco-friendly (Mostly!): Using simple gelatin, these are a fun, temporary way to craft compared to traditional plastics.
Ingredients
Gathering your ingredients is half the fun! You likely have most of these hiding in your pantry or recycling bin.
- Unflavored Gelatin Powder: This is our magic binder! Look for the plain kind in the baking aisle.
- Boiling Water: Your tap or kettle will do the trick.
- Natural Loose Parts: Time for a nature hunt! Think colorful flower petals, interesting leaves, tiny pinecones, delicate herbs, thin twigs. Choose things that aren’t too thick.
- Plastic Lids: Recycle those lids from yogurt containers, sour cream tubs, or even larger coffee cans. They make perfect temporary molds.
- String or Yarn: To hang your finished suncatchers. Choose something sturdy but not too thick.
- Mixing Bowl & Spoon: Simple kitchen tools are all you need.
- Towel or Tray for Drying: Somewhere flat and safe to let your creations set up.
- Optional: Food Coloring or Natural Dyes: Want a tinted suncatcher? Add a drop!
- Optional: Essential Oils: A drop of lavender or lemon can add a lovely, subtle scent as they hang.
- Optional: Cookie Cutters or Silicone Molds: If you don’t have lids, or want different shapes, these work too!
- Optional: Glitter or Confetti: For a little extra sparkle (though keep in mind this makes them less “bioplastic”).
How to Make It
Okay, let’s get crafting! This is the easiest part, I promise.
First things first, gather your treasures! Head outside or rummage through your saved natural bits. Collect leaves, petals, tiny twigs – anything that catches your eye and isn’t too bulky. The flatter the items, the better they’ll sit in your mold. This is a fantastic step to do with kids!
Next, arrange your collected goodies inside your plastic lids (or chosen molds). Get creative! Make patterns, layer colors, or just scatter them randomly. There’s no wrong way to do this; make them uniquely yours.
Now, let’s make our “bioplastic” mixture. In your mixing bowl, carefully combine 1 part unflavored gelatin powder with 4 parts boiling water. So, if you use 1/4 cup gelatin, you’ll use 1 cup of boiling water. Stir, stir, stir until the gelatin is completely dissolved. You want it totally clear with no grainy bits left. Be careful – the water is hot!
Okay, the magic moment! Carefully pour a thin layer of the warm gelatin mixture over your arranged nature items in each lid. You don’t need a super thick layer – just enough to cover the items and fill the bottom of the lid. A thinner layer dries faster!
While that gelatin is still warm and liquidy, it’s time to add your hanging loop. Gently press a loop of string or yarn into the gelatin mixture near the top edge of each mold. Make sure the ends of the string are submerged in the gelatin so it sets firmly around them.
Now comes the hardest part for impatient crafters (like me sometimes!): letting them dry. Find a safe, flat spot at room temperature and let your suncatchers sit undisturbed for 1 to 2 days. The drying time can really vary depending on how thick you poured the gelatin and how humid it is. You’ll know they’re ready when they are completely hard and not sticky at all. Sometimes, I place a light tray or even a piece of parchment paper on top while they dry to help them flatten out nicely.
Once they are completely firm and dry, gently peel them away from the plastic lids. They should pop out fairly easily. If they’re sticking, they might need a little more drying time.
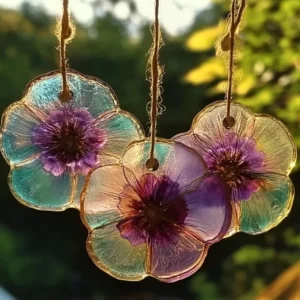
And finally, the best part! Hang your beautiful, handmade bioplastic suncatchers in a sunny window and watch the light filter through the natural elements you’ve captured. Simply lovely!
Substitutions & Additions
Want to get even more creative? Here are some ideas:
- Other Molds: Donut pans, large silicone ice cube trays, or even just pouring a thin layer onto a silicone baking mat and cutting shapes before it fully hardens can work!
- Tinted Gelatin: Add a tiny drop of food coloring or a pinch of natural dye powder (like spirulina for green, turmeric for yellow) to the warm gelatin mixture for colored suncatchers.
- Sparkle & Shine: Stir a little fine glitter or confetti into the gelatin mixture before pouring for a bit of sparkle.
- Scents: Add a drop or two of essential oil (make sure it’s skin-safe if you think little hands will touch them) to the gelatin for a lovely aroma as they hang.
- Dried Fruit: Thin slices of dried citrus (like oranges or lemons) make beautiful additions!
Tips for Success
Keep these pointers in mind for the best results:
- Don’t make the gelatin layer too thick. Thicker layers take much longer to dry and are more likely to become sticky in humidity. Aim for about 1/8 to 1/4 inch thick.
- Ensure items are relatively flat. Very bulky items can make it hard for the gelatin to set evenly around them.
- Be patient with drying. This isn’t a fast craft once the pouring is done. Humidity is the enemy of drying gelatin, so pick a dry spot if possible. If after 48 hours they are still sticky, they might be too thick or the air is too humid.
- Make sure the string is pressed into the warm gelatin. If you just lay it on top, it might pop off when dry.
How to Store It
Because these are made of gelatin, they are sensitive to moisture and heat. Think of them as temporary art!
Once fully dried, store them in a cool, dry place away from direct sunlight (until you’re ready to hang them, of course!). If you need to stack them, place a piece of parchment paper between each one to prevent sticking. Avoid storing them in humid areas like a bathroom or basement. They are best enjoyed while hanging where you can admire them!
FAQs
Here are a few common questions you might have:
Are these really “bioplastic”?
Yes, in a simple sense! Gelatin is a protein derived from collagen, making it a natural, biodegradable material. Unlike petroleum-based plastics, these suncatchers will break down naturally over time, especially if exposed to moisture.
How long do they last?
If kept dry and out of extreme heat or humidity, they can last for many months, sometimes even longer. However, they are designed to be a temporary, eco-friendly craft and will eventually degrade, especially if they get wet.
Can young children help make these?
Absolutely! Collecting the nature items and arranging them in the molds are perfect tasks for young children. The step involving boiling water and pouring hot gelatin should be done by an adult.
What happens if they get wet?
Since they are made of gelatin, they will get sticky and could potentially dissolve or lose their shape if they get wet. It’s best to hang them indoors, away from rain or high humidity.
I hope you have the absolute best time making these nature suncatchers! They truly bring such a sweet, handmade touch to any window and are a lovely reminder of the simple beauty found right outside our doors.
Easy DIY Bioplastic Suncatchers
Equipment
- Mixing Bowl
- spoon
- Towel or Tray For drying
- Plastic Lids or other Molds Such as yogurt containers, sour cream tubs, coffee cans, cookie cutters, silicone molds
Ingredients
Craft Materials
- 1 part Unflavored Gelatin Powder
- 4 parts Boiling Water
- Natural Loose Parts Colorful flower petals, interesting leaves, tiny pinecones, delicate herbs, thin twigs. Choose items that aren’t too thick.
- String or Yarn Sturdy but not too thick, for hanging.
- Optional: Food Coloring or Natural Dyes For tinted suncatchers.
- Optional: Essential Oils For scent.
- Optional: Glitter or Confetti For sparkle.
- Optional: Dried Fruit Slices Like oranges or lemons.
Instructions
- Gather your natural treasures! Collect leaves, petals, twigs, etc., that are relatively flat and not too bulky.
- Arrange your collected items inside your plastic lids or chosen molds. Get creative with patterns and layering.
- In a mixing bowl, carefully combine 1 part unflavored gelatin powder with 4 parts boiling water. Stir until completely dissolved and clear. (Optional: Add food coloring, natural dyes, essential oils, glitter, confetti, or dried fruit slices).
- Carefully pour a thin layer (about 1/8 to 1/4 inch thick) of the warm gelatin mixture over your arranged nature items in each mold.
- While the gelatin is still warm, gently press a loop of string or yarn into the mixture near the top edge of each mold, ensuring the ends are submerged.
- Let the suncatchers dry undisturbed for 1 to 2 days at room temperature in a safe, flat spot until they are completely hard and not sticky. Drying time varies based on thickness and humidity. Placing a tray or parchment paper on top while drying can help flatten them.
- Once completely firm and dry, gently peel them away from the plastic lids or molds. If they stick, they may need more drying time.
- Hang your finished suncatchers in a sunny window.
Notes
- Don't make the gelatin layer too thick (aim for about 1/8 to 1/4 inch).
- Ensure items are relatively flat for best results.
- Be patient with drying, as it takes 1-2 days and is affected by humidity.
- Make sure the string loop is well-submerged in the warm gelatin mixture. How to Store:
Store fully dried suncatchers in a cool, dry place away from direct sunlight until ready to hang. If stacking, use parchment paper between layers to prevent sticking. Avoid humid areas. They are temporary art and will degrade, especially if they get wet.