
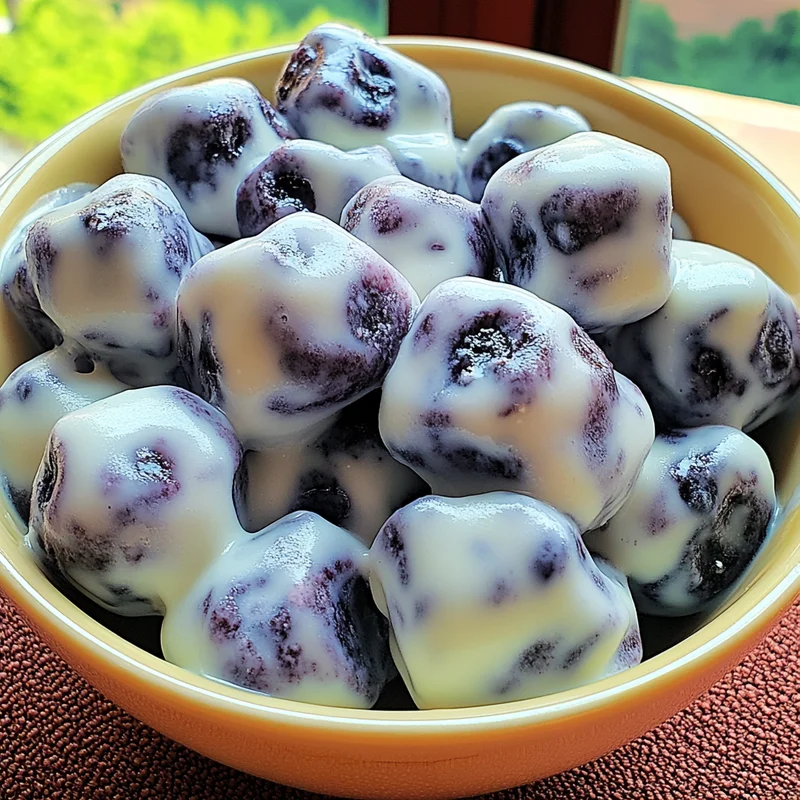
Hey there, snack lovers! Ever find yourself craving something sweet, cool, and totally guilt-free? Something that takes you back to simple summer days, maybe? Well, get ready, because I’ve got a recipe that’s about to become your new obsession: Frozen Yogurt-Dipped Blueberries! Seriously, these little gems are like tiny, frosty bites of heaven. They’re ridiculously easy to make, surprisingly healthy, and disappear faster than you can say “more please!” Whether you need a quick afternoon pick-me-up, a fun project with the kids, or a light dessert, this recipe has you covered. Let’s dive in!
Why You’ll Love This Recipe
- Fast: You can whip up a batch in under 10 minutes of active time. The freezer does the rest!
- Easy: No complicated steps, no fancy equipment. If you can stir and use a fork, you can make these.
- Giftable: Package them in cute bags or jars for a unique, homemade treat your friends will adore.
- Crowd-pleasing: Kids and adults alike go crazy for these frosty little bites.
- Healthy-ish: Packed with the goodness of blueberries and yogurt, it’s a snack you can feel good about.
Ingredients
Gather up these simple heroes:
- 1 cup vanilla Greek yogurt: Go for full-fat if you want maximum creaminess, but any vanilla Greek yogurt works. It gives us that perfect tangy base!
- 1 pint blueberries, washed and dried: Make sure these little blue powerhouses are super dry. Pat them gently with a paper towel after washing. This is key for the yogurt to stick properly!
- 2 tablespoons honey: Our natural sweetener! It adds a lovely hint of sweetness and helps the yogurt mixture become smooth.
How to Make It
Alright, let’s get these frosty treats made. It’s super simple, I promise!
- First things first, grab a medium-sized bowl. Spoon in your lovely vanilla Greek yogurt.
- Pour the honey right into the yogurt. Now, take a spoon or a whisk and stir it all together until it’s beautifully smooth and the honey is completely mixed in. Give it a little taste – sweet enough?
- Now for the fun part – coating the blueberries! Add a handful of your dry blueberries into the yogurt mixture. Don’t dump them all in at once; working in smaller batches makes it easier to get an even coating on each berry. Gently fold them into the yogurt using a spoon or spatula until they are completely covered.
- Using a fork (this is my favorite tool for this job!), carefully lift each yogurt-coated blueberry out of the bowl. Let the excess yogurt drip back into the bowl for a second or two. You want a nice coat, but not a huge glob.
- As you lift them out, place the coated blueberries in a single layer on a baking sheet that you’ve lined with parchment paper. The parchment paper is your best friend here – it prevents them from sticking! Make sure they aren’t touching each other too much, or they’ll freeze into one big clump.
- Once your baking sheet is full, carefully place it in the freezer. Leave them uncovered for at least 2 hours. You want them to be completely solid and firm. This step is crucial for getting that perfect frozen bite!
- Once they are frozen solid, you can transfer them off the baking sheet into an airtight container or a freezer-safe zip-top bag for longer storage. This frees up your baking sheet for the next batch (if you’re making more!) or just gets them into a more permanent home in your freezer.
- When you’re ready to enjoy your delicious frozen bites, just grab a few from the freezer. I like to let them sit out at room temperature for just about 1 minute. This makes them slightly less hard on your teeth and brings out the flavors a little more.
Substitutions & Additions
Want to mix things up? Get creative!
- Yogurt Flavor: Instead of vanilla, try plain Greek yogurt with a splash of vanilla extract, or even a fruit-flavored Greek yogurt (like strawberry or peach!).
- Sweetener: Maple syrup or agave nectar can easily replace the honey.
- Different Fruits: Small fruits work best! Try raspberries, blackberries, or even chunks of banana (though bananas might brown slightly). Make sure any fruit is dry before coating.
- Boost of Flavor: Stir a tiny pinch of cinnamon or cardamom into the yogurt mixture before coating the berries.
- Extra Crunch/Texture: Before freezing, sprinkle a few finely chopped nuts, shredded coconut, or chia seeds over the coated blueberries on the baking sheet.
Tips for Success
A few little pointers to make sure your frozen bites turn out perfectly:
- Dry Berries are Key: Seriously, moisture is the enemy of yogurt coating! Wash and dry your blueberries thoroughly before you start.
- Work in Batches: Don’t overcrowd the bowl when coating the berries. This ensures each one gets a good, even layer without clumping up.
- Parchment Paper: Do NOT skip this step! They will stick to an unlined baking sheet.
- Single Layer Freezing: Freezing them in a single layer initially is important so they don’t freeze into a giant lump.
- Prep Ahead: These are the ultimate make-ahead snack! Whip up a big batch and keep them in the freezer for whenever a craving strikes.
How to Store It
Once your frozen yogurt-dipped blueberries are solid, transfer them from the baking sheet to an airtight container or a heavy-duty freezer bag. Stored properly in the freezer, they should keep well for up to 2-3 months. Though, honestly, I doubt they’ll last that long!
FAQs
- Can I use regular yogurt? Greek yogurt works best because it’s thicker and coats the berries better. Regular yogurt might be too thin and drip off.
- Can I use frozen blueberries? I wouldn’t recommend it. Frozen blueberries will have too much surface moisture and will likely just create an icy mess when mixed with the yogurt. Start with fresh berries.
- Is this healthy? While they are a treat, these are a much healthier option than many other sweet snacks! They’re packed with antioxidants from the blueberries and protein/calcium from the yogurt.
- Can kids help make these? Absolutely! This is a fantastic recipe for getting little hands involved. Mixing the yogurt, adding the berries (gently!), and placing them on the baking sheet are all kid-friendly steps.
Easy & Healthy Frozen Yogurt Dipped Blueberries
Equipment
- medium-sized bowl
- spoon or whisk
- whisk optional, or spoon
- Spatula optional, or spoon
- fork for lifting coated berries
- baking sheet
- parchment paper for lining the baking sheet to prevent sticking
- airtight container for storage
- freezer-safe zip-top bag for storage
Ingredients
Hauptzutaten
- 1 cup vanilla Greek yogurt full-fat for maximum creaminess, but any vanilla Greek yogurt works
- 1 pint blueberries washed and dried thoroughly; key for yogurt to stick properly
- 2 tablespoons honey or maple syrup, agave nectar
Instructions
- First things first, grab a medium-sized bowl. Spoon in your lovely vanilla Greek yogurt.
- Pour the honey right into the yogurt. Now, take a spoon or a whisk and stir it all together until it’s beautifully smooth and the honey is completely mixed in. Give it a little taste – sweet enough?
- Now for the fun part – coating the blueberries! Add a handful of your dry blueberries into the yogurt mixture. Don’t dump them all in at once; working in smaller batches makes it easier to get an even coating on each berry. Gently fold them into the yogurt using a spoon or spatula until they are completely covered.
- Using a fork (this is my favorite tool for this job!), carefully lift each yogurt-coated blueberry out of the bowl. Let the excess yogurt drip back into the bowl for a second or two. You want a nice coat, but not a huge glob.
- As you lift them out, place the coated blueberries in a single layer on a baking sheet that you’ve lined with parchment paper. The parchment paper is your best friend here – it prevents them from sticking! Make sure they aren’t touching each other too much, or they’ll freeze into one big clump.
- Once your baking sheet is full, carefully place it in the freezer. Leave them uncovered for at least 2 hours. You want them to be completely solid and firm. This step is crucial for getting that perfect frozen bite!
- Once they are frozen solid, you can transfer them off the baking sheet into an airtight container or a freezer-safe zip-top bag for longer storage. This frees up your baking sheet for the next batch (if you’re making more!) or just gets them into a more permanent home in your freezer.
- When you’re ready to enjoy your delicious frozen bites, just grab a few from the freezer. I like to let them sit out at room temperature for just about 1 minute. This makes them slightly less hard on your teeth and brings out the flavors a little more.