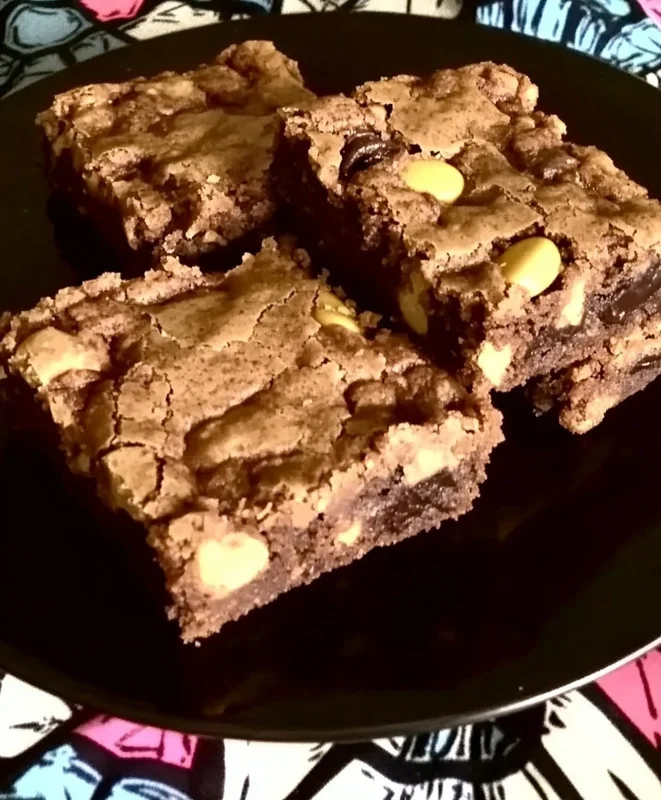
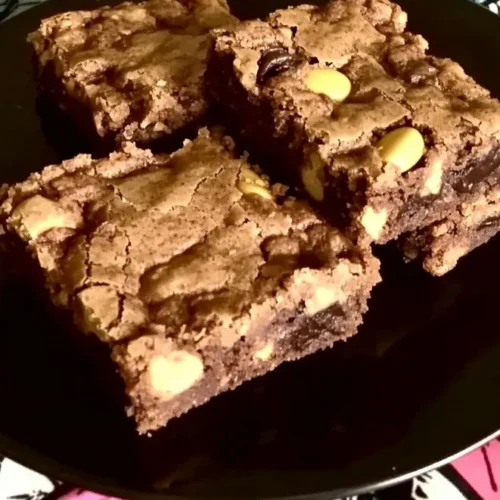
Ah, Halloween! The crisp autumn air, the spooky decorations, the excited little ghosts and goblins knocking at your door… and then, the inevitable mountain of leftover candy. We’ve all been there, right? You’re left with a giant pile of mini chocolate bars, fruity chews, and everything in between. While a candy stash is fun for a day or two, eventually it starts staring at you from the pantry, begging for a purpose beyond a sugar rush. Well, my friend, I’m here to tell you I’ve found the most gloriously delicious solution: transform that candy haul into these unbelievably easy and utterly irresistible Leftover Halloween Candy Bar Blondies!
This recipe isn’t just about using up candy; it’s about creating a warm, chewy, buttery bar that’s absolutely packed with pockets of melted chocolate and caramel goodness. It’s a quick, no-fuss baking project that turns those random trick-or-treat treasures into a dessert so memorable, you might just start buying extra candy just for this recipe next year. Trust me, these blondies are a game-changer!
Why You’ll Love Leftover Halloween Candy Bar Blondies
- Fast: From mixing bowl to oven in under 15 minutes!
- Easy: No fancy equipment, just simple steps.
- Giftable: Wrap them up for friends, neighbors, or teachers – everyone loves a homemade treat.
- Crowd-pleasing: Who can say no to chewy blondies studded with their favorite candy?
Ingredients
You probably have most of these pantry staples on hand already, which makes whipping up a batch of these beauties even easier!
- 2 cups brown sugar, packed: This is the secret to that super moist, chewy blondie texture we all crave. Don’t skimp on packing it down!
- ½ cup butter, at room temperature: Unsalted butter is usually my go-to for baking, but if all you have is salted, just reduce the added salt by a tiny bit (about ¼ teaspoon). Make sure it’s softened for easy creaming!
- 2 eggs, beaten: Our binders! They add richness and help everything hold together beautifully.
- 2 teaspoons vanilla extract: A classic flavor enhancer that truly makes all the difference in baked goods. Don’t skip it!
- 1 ½ cups all-purpose flour: The backbone of our blondies, giving them structure.
- 2 teaspoons baking powder: Gives our blondies a lovely lift without making them too cakey.
- 1 teaspoon salt: Crucial for balancing all that sweetness and bringing out the other flavors.
- 1 cup chopped chocolate candy bar pieces: This is where the Halloween magic happens! Think Snickers, Reese’s, Twix, Milky Way, M&Ms… any chocolate candy you love will work perfectly.
How to Make Leftover Halloween Candy Bar Blondies
Alright, let’s get baking! You’re just a few simple steps away from warm, gooey, candy-filled perfection.
- Get Ready: First things first, go ahead and preheat your oven to a cozy 350 degrees F (175 degrees C). While it’s warming up, grab a 9×13-inch glass baking pan. Trust me on this one – you’ll want to grease it well so those delicious blondies pop right out later. I sometimes even line mine with parchment paper for extra easy lifting!
- Cream the Goodness: In a large mixing bowl, combine that packed brown sugar and your softened butter. Beat them together until they’re light and fluffy – this creates air pockets for a tender blondie. Then, add in your beaten eggs and that wonderful vanilla extract. Stir it all up until everything is beautifully combined and looks smooth.
- Dry Meets Wet: In a separate, medium-sized bowl, whisk together your all-purpose flour, baking powder, and salt. This ensures all your leavening agents and salt are evenly distributed. Now, add this dry mixture to your wet egg and sugar mixture. Stir just until everything is incorporated. Seriously, resist the urge to overmix! Overmixing can lead to tough blondies, and we want them perfectly tender.
- Candy Time! This is the fun part! Gently fold in your glorious chopped candy bar pieces. Make sure they’re pretty evenly distributed throughout the thick batter. It’s okay if the batter is a little stiff; that’s exactly how it should be. You could even use a mix of your favorite M&M cookies inspiration here to get ideas for different candy combinations.
- Spread and Bake: Spoon the thick batter into your prepared 9×13-inch pan and spread it out evenly with a spatula. Pop it into the preheated oven on the center rack. You’ll bake these beauties for about 25 minutes. To know they’re perfectly done, insert a toothpick into the center – it should come out clean, maybe with a few moist crumbs clinging to it, but no wet batter. Don’t overbake, or they’ll lose that signature chewiness!
- Cool Down: The hardest part! Let your blondies cool in the pan for at least 10 minutes before you even think about slicing into them. This helps them set up and makes for cleaner cuts. If you can wait longer, they’ll be even better!
Substitutions & Additions
These blondies are wonderfully adaptable, so feel free to get creative with what you have on hand or what your taste buds are craving!
- Candy Swaps: Don’t limit yourself to just chocolate bars! M&M’s, Reese’s Pieces, Butterfingers, Skittles (for a fruity twist!), or even crunchy pretzels can be fantastic additions.
- Nutty Boost: Add ½ cup of chopped pecans or walnuts to the batter for extra crunch and a lovely nutty flavor.
- Chocolate Overload: If you’re a serious chocolate lover (and who isn’t?), consider adding ½ cup of chocolate chips (milk, dark, or white!) along with your candy bar pieces.
- Sweet Drizzle: Once cooled, these blondies are amazing with a drizzle of caramel sauce, homemade hot fudge sauce, or even a simple powdered sugar glaze.
- Spice it Up: For a fall-inspired twist, add ½ teaspoon of cinnamon or a pinch of nutmeg to the dry ingredients.
Tips for Success
- Room Temperature Butter: Make sure your butter is truly at room temperature. This allows it to cream beautifully with the brown sugar, creating that light, airy base for your blondies.
- Don’t Overmix: I can’t stress this enough! Once you add the flour, mix just until no dry streaks remain. Overmixing develops the gluten, leading to tough, cake-like blondies instead of soft, chewy ones.
- Chop Your Candy: For best results and even distribution, chop your candy bars into roughly ½-inch pieces. Smaller pieces melt and distribute better throughout the batter.
- Check for Doneness: Blondies can go from perfectly chewy to dry in a flash. Start checking at 20-22 minutes. You want a toothpick inserted into the center to come out clean or with just a few moist crumbs, not wet batter. The edges should be set, but the center should still look a little soft. They will continue to set as they cool.
- Patience is a Virtue: As tempting as it is, let them cool! Slicing into hot blondies can make them crumble. Giving them 10-15 minutes (or more!) to cool and set will result in perfectly formed squares. If you’re a fan of other easy bar desserts, you might also enjoy these easy cake mix toffee bars for another simple treat!
How to Store Leftover Halloween Candy Bar Blondies
If you manage to have any leftovers (a big “if”!), here’s how to keep them fresh and delicious:
- At Room Temperature: Store your cooled blondies in an airtight container at room temperature for up to 3-4 days. For best freshness, you can place a piece of parchment paper between layers if stacking.
- In the Refrigerator: If you prefer them chilled or want them to last a bit longer, store them in an airtight container in the refrigerator for up to a week. Bring them back to room temperature or warm them slightly in the microwave for a few seconds before serving for that ultimate gooey texture.
- Freezing for Later: Yes, you can freeze them! Once completely cooled, slice the blondies and wrap individual pieces tightly in plastic wrap, then place them in a freezer-safe bag or container. They’ll keep well for up to 2-3 months. Thaw at room temperature or gently warm.
FAQs
Q: Can I use different kinds of candy?
A: Absolutely! The beauty of this recipe is its versatility. Any chocolate-based candy bar works wonderfully, but feel free to experiment with things like M&Ms, caramels, or even chopped cookies. Just be mindful that some candies might melt differently.
Q: How do I prevent my blondies from becoming dry?
A: The key is not to overbake them. Start checking for doneness a few minutes before the recipe states. You want a toothpick inserted into the center to come out clean or with just a few moist crumbs, not wet batter. The edges should be set, but the center should still look a little soft. They will continue to set as they cool.
Q: Can I double the recipe?
A: Yes, you can easily double this recipe! You would likely need to use a larger baking dish, such as a 12×17-inch sheet pan, and you might need to adjust the baking time slightly. Keep an eye on them!
Q: What’s the difference between a blondie and a brownie?
A: While similar in texture, the main difference is the absence of cocoa powder in blondies. Blondies get their rich, buttery flavor from brown sugar and vanilla, whereas brownies are characterized by their deep chocolate flavor from cocoa or melted chocolate.
If you loved this recipe, make sure to follow us on Pinterest for more delicious treats and inspiration!
Easy Leftover Halloween Candy Bar Blondies
Equipment
- oven
- 9x13-inch glass baking pan
- Large mixing bowl
- medium-sized bowl
- whisk
- Spatula
- Toothpick
Ingredients
- 2 cups brown sugar packed
- 0.5 cup butter at room temperature (unsalted preferred; if salted, reduce added salt by ¼ tsp); softened for easy creaming
- 2 eggs beaten
- 2 tsp vanilla extract
- 1.5 cups all-purpose flour
- 2 tsp baking powder
- 1 tsp salt
- 1 cup chopped chocolate candy bar pieces e.g., Snickers, Reese's, Twix, Milky Way, M&Ms; any chocolate candy works perfectly
Instructions
- Step 1: Get Ready. Preheat your oven to 350 degrees F (175 degrees C). Grease a 9x13-inch glass baking pan well; optionally, line it with parchment paper for easy lifting.
- Step 2: Cream the Goodness. In a large mixing bowl, combine the packed brown sugar and softened butter. Beat them together until light and fluffy. Then, add the beaten eggs and vanilla extract. Stir until everything is beautifully combined and smooth.
- Step 3: Dry Meets Wet. In a separate, medium-sized bowl, whisk together the all-purpose flour, baking powder, and salt. Add this dry mixture to your wet egg and sugar mixture. Stir just until everything is incorporated; resist the urge to overmix to ensure tender blondies.
- Step 4: Candy Time! Gently fold in your chopped candy bar pieces, making sure they are pretty evenly distributed throughout the thick batter. It’s okay if the batter is a little stiff.
- Step 5: Spread and Bake. Spoon the thick batter into your prepared 9x13-inch pan and spread it out evenly with a spatula. Pop it into the preheated oven on the center rack. Bake for about 25 minutes. To check for doneness, insert a toothpick into the center – it should come out clean, maybe with a few moist crumbs clinging to it, but no wet batter. Do not overbake.
- Step 6: Cool Down. Let your blondies cool in the pan for at least 10 minutes before slicing into them. This helps them set up and makes for cleaner cuts. If you can wait longer, they'll be even better!