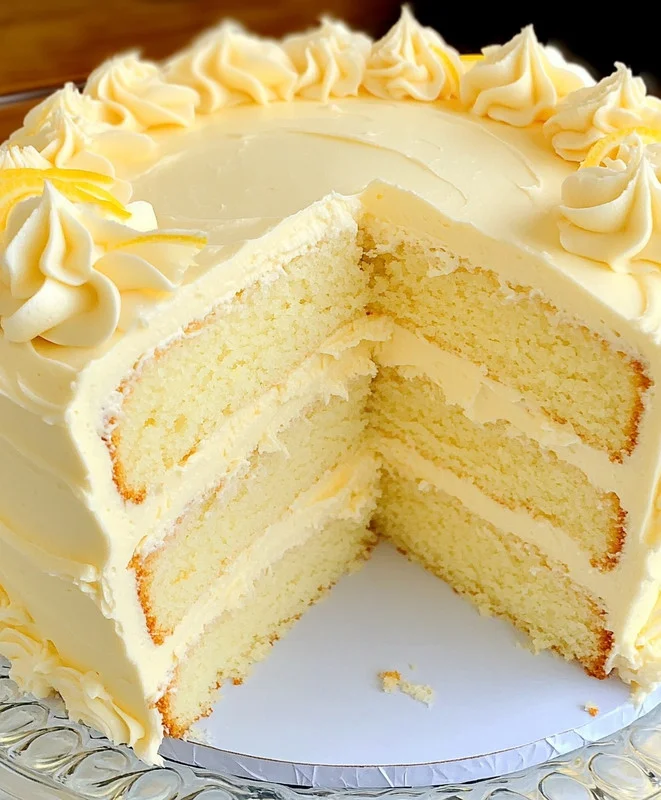
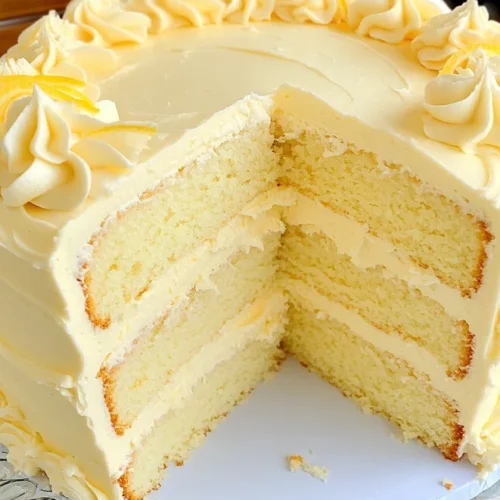
Oh, friend, do you ever get a craving for something that just screams “summer afternoon” – bright, zesty, and utterly comforting all at once? I certainly do! There’s nothing quite like the refreshing tang of a tall glass of homemade lemonade to transport you back to carefree days. But what if I told you that same joyous feeling could be baked into the most incredibly moist, tender, and downright dreamy cake? Get ready, because this Heavenly Lemonade Cream Cheese Layer Cake isn’t just a dessert; it’s a little slice of sunshine that’s about to become your new favorite memory-maker.
I’ve whipped up countless cakes in my kitchen, but this one holds a special place in my heart. It’s got that perfect balance of sweet and tart, with a texture that’s light as air and a frosting that’s pure decadence. Plus, it looks absolutely stunning, making it perfect for any gathering, big or small. You’re going to be amazed at how simple it is to bring such a show-stopping dessert to life!
Why You’ll Love Heavenly Lemonade Cream Cheese Layer Cake
- Fast: Surprisingly quick to put together for a layer cake, making it perfect even on busier days.
- Easy: With straightforward steps, even beginner bakers will feel like pros.
- Giftable: Who wouldn’t want a beautiful, homemade cake as a gift? It’s a sure-fire way to brighten someone’s day.
- Crowd-pleasing: The vibrant lemon flavor paired with creamy frosting appeals to just about everyone!
Ingredients
Gathering your ingredients is the first fun step! Here’s what you’ll need to create this masterpiece, with a few little notes from me:
Lemonade Cake
- 8 oz (226g) cream cheese, softened: Make sure this is super soft – it’ll blend so much better with the butter.
- 1 ½ sticks (168g) unsalted butter, softened: Again, room temperature is your friend here for that smooth, creamy base.
- 2 cups (400g) granulated sugar: Just the right amount of sweetness to balance the lemon.
- 4 large eggs, room temperature: Room temperature eggs incorporate into the batter much more smoothly, leading to a lighter cake.
- 3 cups (342g) cake flour: This is key for that delicate, tender crumb!
- 2 teaspoons (8g) baking powder: Our leavening agent for a beautiful rise.
- ½ teaspoon (3g) baking soda: Works with the acidity of the lemon and cream cheese for extra lift.
- ½ teaspoon (3g) salt: Don’t skip this! It enhances all the flavors.
- ½ cup (175g) milk: Any milk will do, just make sure it’s at room temperature too.
- ½ cup frozen lemonade concentrate, thawed: The star of our show! That intense lemon flavor comes from this.
- ¼ cup (54g) vegetable oil: Adds moisture and keeps the cake tender.
- Zest of one lemon (optional): For an extra pop of fresh lemon aroma and flavor – I highly recommend it!
- 1 tablespoon lemon extract: Amp up that lemony goodness even further.
- Yellow food coloring gel (optional): For that cheerful sunshine hue, if you’re feeling it.
Lemon Cream Cheese Frosting
- 3 sticks (339g) unsalted butter, softened: Yes, more butter! It’s frosting, after all.
- 16 oz (454g) cream cheese, softened: This makes our frosting rich and tangy.
- 1 teaspoon (4g) vanilla extract: A classic pairing with lemon and cream cheese.
- 1 teaspoon (4g) lemon extract: Doubles down on the lemon flavor.
- ½ teaspoon (2g) salt: To balance the sweetness.
- 7 cups (805g) powdered sugar: Sifted, if you want extra smooth frosting!
- Yellow food coloring gel (optional): Again, for that bright lemon look.
Optional Lemon Glaze
- Reserved lemonade concentrate: Just a little brush over the layers for extra moisture and zing!
How to Make Heavenly Lemonade Cream Cheese Layer Cake
Alright, let’s get baking! Don’t be intimidated by the layers; we’ll take it one simple step at a time.
Prepare the Cake
- Preheat the Oven: First things first, get your oven ready! Preheat it to 325°F (163°C). Then, grab three 8-inch round cake pans. Generously grease and flour them, and don’t forget to line the bottoms with parchment paper circles – this makes sure your beautiful cakes come out perfectly every time.
- Dry Ingredients: In a medium bowl, whisk together your cake flour, baking powder, baking soda, and salt. Give it a good whisk to ensure everything is evenly distributed. Then, set this bowl aside.
- Wet Ingredients: In another bowl, combine the milk, vegetable oil, ½ cup of thawed lemonade concentrate, lemon extract, and that lovely lemon zest (if you’re using it!). Stir it all together and set it aside.
- Cream Butter & Cream Cheese: Now for the magic! In your stand mixer, fitted with the paddle attachment, beat the softened butter and softened cream cheese on medium speed. You want this to be super smooth and creamy, with no lumps, so keep beating until it looks perfectly combined.
- Add Sugar: Gradually add the granulated sugar to the butter and cream cheese mixture. Beat this for a good 2–3 minutes. You’re looking for it to become light, fluffy, and noticeably paler in color. This step is crucial for incorporating air!
- Add Eggs: Beat in the eggs one at a time. Mix each egg just until its yolk disappears into the batter. Be careful not to overmix here! If you’re adding yellow food coloring, now’s a great time to drop it in and let the mixer blend it.
- Combine Wet and Dry Mixtures: Reduce your mixer speed to low. Now, you’re going to alternate adding your dry mixture and your wet mixture. Start with a third of the dry mixture, mix until just combined, then add half of the wet mixture, mix until just combined. Repeat, ending with the last third of the dry mixture. Remember, mix only until just combined to keep your cake tender.
- Bake: Divide your beautiful batter evenly among the three prepared cake pans. Pop them into your preheated oven and bake for 28–30 minutes. You’ll know they’re done when a toothpick inserted into the center comes out clean or with just a few moist crumbs.
- Cool: Let those golden layers rest in their pans for 5–10 minutes. This helps them firm up a bit before you try to move them. Then, carefully turn them out onto a wire rack to cool completely. Patience is a virtue here – frosting a warm cake is a recipe for disaster!
Make the Lemon Cream Cheese Frosting
- Beat butter in your stand mixer until it’s wonderfully soft and smooth.
- Add cream cheese to the butter and beat them together on medium speed until they are fully combined and creamy. No lumps allowed!
- Mix in vanilla extract, lemon extract, and salt. Beat until everything is well incorporated.
- Gradually add powdered sugar. Start on low speed until the sugar is incorporated (you don’t want a sugar cloud!), then increase to medium speed and mix until your frosting is smooth, light, and wonderfully creamy. If you adore citrus desserts as much as I do, you might also love my easy 3-ingredient lemon fudge for another quick treat.
- Tint with yellow gel color, if desired. This adds to the sunny vibe!
- Adjust consistency: If your frosting feels a little too thick, don’t fret! Add a small splash of milk or a tiny bit more lemonade concentrate until you reach your desired piping or spreading consistency. This luscious cream cheese frosting is so versatile; it’s even fantastic on my blueberry cream cheese frosting recipe.
Assemble the Cake
The moment of truth – assembling your masterpiece!
- Place your first cooled cake layer on your serving plate or cake stand.
- Lightly brush the top of this layer with a little bit of that reserved lemonade concentrate. This adds an extra burst of lemon and keeps the cake incredibly moist.
- Spread a generous, even layer of your dreamy lemon cream cheese frosting over the top.
- Repeat with the second and third layers, remembering to brush each with a bit of lemonade concentrate before frosting.
- Now for the crumb coat! Apply a thin, even layer of frosting to the outside of the entire cake. Don’t worry about perfection; this is just to trap any loose crumbs. Pop the cake into the freezer for about 10 minutes to let this crumb coat firm up. This step is a game-changer for a clean final finish!
- Once the crumb coat is firm, apply the final, thicker layer of frosting. Smooth it out with an offset spatula for a sleek look, or use the back of a spoon to create pretty swirls and textures.
- If you’re feeling fancy, grab a 1M piping tip and pipe a lovely decorative border around the top and bottom edges of your cake. For another show-stopping dessert that’s surprisingly simple, you might want to try my easy classic cream puff cake.
Substitutions & Additions
Part of the fun of baking is making a recipe your own! Here are some ideas to play with:
- Different Citrus: While this is a lemonade cake, feel free to experiment! You could try lime concentrate and zest for a Key Lime vibe, or even orange for a creamsicle feel.
- Flour Power: If you don’t have cake flour, you can make your own by removing 2 tablespoons of all-purpose flour from each cup and replacing it with 2 tablespoons of cornstarch, then sifting well. It works in a pinch!
- Berry Good: Fold in about ½ cup of fresh blueberries or raspberries into the batter for a fruity burst.
- Extract Variations: Don’t have lemon extract? You can use extra lemon zest (about 2 tablespoons per 1 tsp extract) and a bit more fresh lemon juice in the wet ingredients for a more natural lemon flavor.
- Glaze Options: Instead of just concentrate, you can whisk powdered sugar with the lemonade concentrate for a thicker, more traditional glaze to drizzle over the top.
Tips for Success
A few little tricks I’ve learned along the way to ensure your cake turns out perfectly every time:
- Room Temperature is Key: I can’t stress this enough! Softened butter, cream cheese, and room temperature eggs and milk are essential for a smooth, emulsified batter that bakes evenly.
- Don’t Overmix: Once you add the dry and wet ingredients, mix only until just combined. Overmixing develops gluten, which can lead to a tough, dense cake.
- Pans & Parchment: Properly greasing and flouring your pans, plus using parchment paper circles on the bottom, ensures your cakes release easily and beautifully.
- Cool Completely: Frosting a warm cake will lead to a melty, sliding mess. Be patient! Your cakes must be completely cool to the touch.
- The Crumb Coat: This thin initial layer of frosting is your best friend for a professional-looking finish. It locks in all those pesky crumbs.
- Prep Ahead: You can bake the cake layers a day in advance. Once cooled, wrap them tightly in plastic wrap and store them at room temperature. You can also make the frosting a day ahead and store it in the fridge; just let it come to room temperature and re-whip it briefly before frosting.
How to Store Heavenly Lemonade Cream Cheese Layer Cake
Since this cake features a delicious cream cheese frosting, proper storage is important to keep it fresh and safe!
- Refrigerate: Always store this cake in an airtight container in the refrigerator. The cream cheese in the frosting needs to be kept cold.
- Shelf Life: Stored correctly in the fridge, your cake will stay fresh and delicious for 3-4 days.
- Serving Tip: For the best flavor and texture, I recommend letting the cake sit at room temperature for about 30 minutes before serving. This allows the frosting to soften slightly and the cake layers to become extra tender.
- Freezing: You can absolutely freeze this cake! Wrap individual slices or the whole cake (if unfrosted) tightly in plastic wrap, then aluminum foil. It will keep well in the freezer for up to 2-3 months. Thaw overnight in the refrigerator before serving.
FAQs
Got questions? I’ve got answers!
Q: Can I use all-purpose flour instead of cake flour?
A: Yes, you can! Your cake will still be delicious, but cake flour gives it a noticeably lighter and more tender crumb. If using all-purpose, I recommend sifting it for a bit more airiness.
Q: My cake turned out a bit dense. What went wrong?
A: The most common culprits are overmixing the batter (which develops gluten and makes the cake tough) or not having your butter, cream cheese, and eggs at room temperature. Ensure your ingredients are properly softened and mix only until just combined!
Q: Can I make this as a sheet cake instead of layers?
A: Absolutely! You can pour the entire batter into a greased and floured 9×13 inch baking pan. The baking time will be slightly longer, likely around 35-45 minutes. Just keep an eye on it and use the toothpick test!
Q: How much lemonade concentrate should I reserve for the optional glaze?
A: A small amount, usually 2-3 tablespoons per cake layer, is perfect for brushing. You’re just looking for a light moistening, not soaking!
I hope you love baking and enjoying this Heavenly Lemonade Cream Cheese Layer Cake as much as I do! It truly brings a burst of sunshine to any day.
For more delicious recipes and baking inspiration, be sure to follow us on Pinterest!
Heavenly Lemonade Cream Cheese Layer Cake
Equipment
- Stand Mixer
- Paddle attachment
- large bowl
- Medium bowl
- Three 8-inch round cake pans
- parchment paper
- Wire rack
- Offset spatula
- 1M piping tip (optional)
Ingredients
For the Lemonade Cake
- 8 oz cream cheese softened
- 1.5 sticks unsalted butter softened
- 2 cups granulated sugar
- 4 large eggs room temperature
- 3 cups cake flour
- 2 tsp baking powder
- 0.5 tsp baking soda
- 0.5 tsp salt
- 0.5 cup milk
- 0.5 cup frozen lemonade concentrate thawed
- 0.25 cup vegetable oil
- 1 lemon zest optional
- 1 tbsp lemon extract
- Yellow food coloring gel optional
For the Lemon Cream Cheese Frosting
- 3 sticks unsalted butter softened
- 16 oz cream cheese softened
- 1 tsp vanilla extract
- 1 tsp lemon extract
- 0.5 tsp salt
- 7 cups powdered sugar Sifted, if you want extra smooth frosting!
- Yellow food coloring gel optional
For the Optional Lemon Glaze
- Reserved lemonade concentrate
Instructions
- Step 1: Preheat the Oven: First things first, get your oven ready! Preheat it to 325°F (163°C). Then, grab three 8-inch round cake pans. Generously grease and flour them, and don’t forget to line the bottoms with parchment paper circles – this makes sure your beautiful cakes come out perfectly every time.
- Step 2: Dry Ingredients: In a medium bowl, whisk together your cake flour, baking powder, baking soda, and salt. Give it a good whisk to ensure everything is evenly distributed. Then, set this bowl aside.
- Step 3: Wet Ingredients: In another bowl, combine the milk, vegetable oil, ½ cup of thawed lemonade concentrate, lemon extract, and that lovely lemon zest (if you’re using it!). Stir it all together and set it aside.
- Step 4: Cream Butter & Cream Cheese: Now for the magic! In your stand mixer, fitted with the paddle attachment, beat the softened butter and softened cream cheese on medium speed. You want this to be super smooth and creamy, with no lumps, so keep beating until it looks perfectly combined.
- Step 5: Add Sugar: Gradually add the granulated sugar to the butter and cream cheese mixture. Beat this for a good 2–3 minutes. You’re looking for it to become light, fluffy, and noticeably paler in color. This step is crucial for incorporating air!
- Step 6: Add Eggs: Beat in the eggs one at a time. Mix each egg just until its yolk disappears into the batter. Be careful not to overmix here! If you’re adding yellow food coloring, now’s a great time to drop it in and let the mixer blend it.
- Step 7: Combine Wet and Dry Mixtures: Reduce your mixer speed to low. Now, you’re going to alternate adding your dry mixture and your wet mixture. Start with a third of the dry mixture, mix until just combined, then add half of the wet mixture, mix until just combined. Repeat, ending with the last third of the dry mixture. Remember, mix only until just combined to keep your cake tender.
- Step 8: Bake: Divide your beautiful batter evenly among the three prepared cake pans. Pop them into your preheated oven and bake for 28–30 minutes. You’ll know they’re done when a toothpick inserted into the center comes out clean or with just a few moist crumbs.
- Step 9: Cool: Let those golden layers rest in their pans for 5–10 minutes. This helps them firm up a bit before you try to move them. Then, carefully turn them out onto a wire rack to cool completely. Patience is a virtue here – frosting a warm cake is a recipe for disaster!
- Step 10: Make the Lemon Cream Cheese Frosting – Beat butter in your stand mixer until it’s wonderfully soft and smooth.
- Step 11: Add cream cheese to the butter and beat them together on medium speed until they are fully combined and creamy. No lumps allowed!
- Step 12: Mix in vanilla extract, lemon extract, and salt. Beat until everything is well incorporated.
- Step 13: Gradually add powdered sugar. Start on low speed until the sugar is incorporated (you don’t want a sugar cloud!), then increase to medium speed and mix until your frosting is smooth, light, and wonderfully creamy.
- Step 14: Tint with yellow gel color, if desired. This adds to the sunny vibe!
- Step 15: Adjust consistency: If your frosting feels a little too thick, don’t fret! Add a small splash of milk or a tiny bit more lemonade concentrate until you reach your desired piping or spreading consistency.
- Step 16: Assemble the Cake: Place your first cooled cake layer on your serving plate or cake stand.
- Step 17: Lightly brush the top of this layer with a little bit of that reserved lemonade concentrate. This adds an extra burst of lemon and keeps the cake incredibly moist.
- Step 18: Spread a generous, even layer of your dreamy lemon cream cheese frosting over the top.
- Step 19: Repeat with the second and third layers, remembering to brush each with a bit of lemonade concentrate before frosting.
- Step 20: Now for the crumb coat! Apply a thin, even layer of frosting to the outside of the entire cake. Don’t worry about perfection; this is just to trap any loose crumbs. Pop the cake into the freezer for about 10 minutes to let this crumb coat firm up. This step is a game-changer for a clean final finish!
- Step 21: Once the crumb coat is firm, apply the final, thicker layer of frosting. Smooth it out with an offset spatula for a sleek look, or use the back of a spoon to create pretty swirls and textures.
- Step 22: If you’re feeling fancy, grab a 1M piping tip and pipe a lovely decorative border around the top and bottom edges of your cake.