
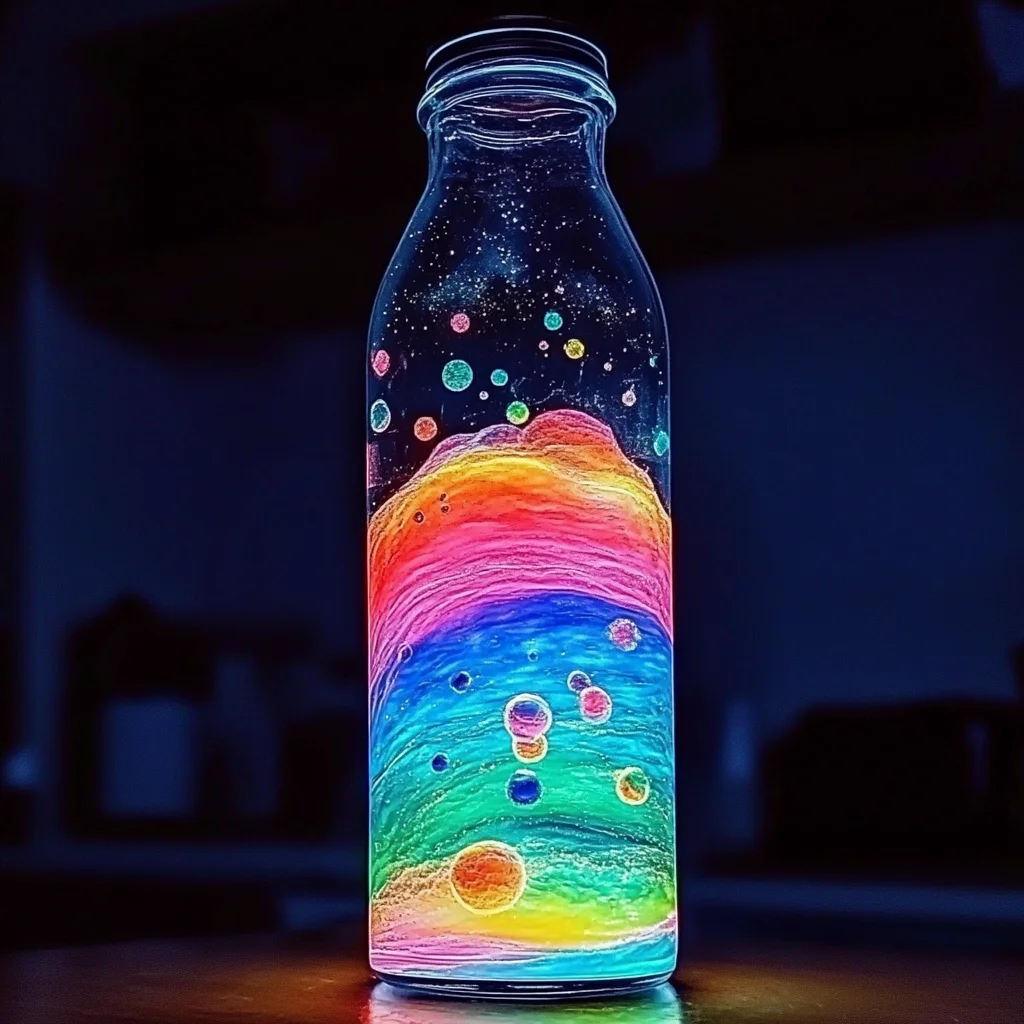
Imagine a cozy evening, soft music playing in the background, and the gentle glow of a colorful lava lamp casting a warm light across the room. There’s something undeniably magical about watching vibrant colors swirl and dance in mesmerizing patterns. Today, I’m excited to share with you a delightful DIY project that will not only brighten your space but also provide a wonderful opportunity for creativity and connection. Get ready to create your very own Rainbow Glow Lava Lamp!
Why You’ll Love Rainbow Glow Lava Lamp
- Beginner-friendly
- Budget-friendly
- Creative and fun
- Great for kids and families
- Perfect for gifts or decorations
- Customizable
The Heart Behind This DIY
Crafting your Rainbow Glow Lava Lamp is more than just a fun project; it’s a chance to engage with your senses and embrace the joy of creating something unique. You’ll find that the simple act of mixing colors and watching them come alive can be incredibly therapeutic. This project promotes mindfulness, allowing you to focus on the present moment as you observe the beautiful reactions between the ingredients. Plus, it’s a fantastic way to bond with family or friends, sharing laughter and creativity as you work together to bring your lava lamp to life.
A Gentle Look at the Process
As we embark on this colorful journey, you can expect to experience the thrill of transformation. You will start with simple ingredients, gradually layering them in a clear bottle, and before you know it, you will witness a captivating spectacle of bubbles, colors, and sparkles. The anticipation builds as you drop in the Alka-Seltzer, watching the magic unfold. It’s a simple yet enchanting experience that anyone can enjoy.
Materials You’ll Need
- Clear plastic bottle: This will be the main vessel for your lava lamp, showcasing all the vibrant colors.
- Vegetable oil: The key ingredient that creates the mesmerizing separation with water.
- Water: The base of your lava lamp, providing a medium for the bubbling action.
- Food coloring (various colors): To add a rainbow of colors to your creation.
- Alka-Seltzer tablets: The magic ingredient that creates the bubbling effect.
- LED tea light (optional): For an extra glow, illuminating your lamp from below.
- Glitter (optional): To add a touch of sparkle to your swirling masterpiece.
Step-by-Step Directions
Step 1
Begin by filling your clear plastic bottle about one-quarter full with water. As you pour, take a moment to appreciate the clarity and calmness of the water, setting the stage for your colorful creation.
Step 2
Add a few drops of your chosen food coloring to the water. I love to mix different colors; the vibrant hues will transform your lamp into a stunning visual delight. Stir gently to mix, watching as the colors swirl together.
Step 3
Now it’s time to pour in the vegetable oil. Fill the bottle until it is nearly full, leaving a little space at the top. As you pour, notice how the oil and water separate, creating a beautiful layered effect. It’s fascinating to see the two liquids coexist in harmony!
Step 4
If you want a little extra flair, sprinkle in a small amount of glitter. This will catch the light and add a magical touch as it dances with the bubbles.
Step 5
Break an Alka-Seltzer tablet into smaller pieces and drop them into the bottle one at a time. You’ll see the bubbling action begin almost immediately as the tablet interacts with the water. It’s like a mini fireworks show inside your lamp!
Step 6
For an enhanced glow, place an LED tea light underneath the bottle. The warm light will illuminate your colorful creation, making it a stunning centerpiece for any room.
Step 7
Finally, sit back and enjoy your beautiful homemade Rainbow Glow Lava Lamp. Watch as the colors swirl and bubble, creating a mesmerizing display that’s sure to bring a smile to your face.
Creative Ways to Use Rainbow Glow Lava Lamp
Your new lava lamp can serve many purposes. Place it on your nightstand for a calming night light, use it as a decorative piece in your living room, or even gift it to a friend who loves unique home decor. It can also be a fun addition to a party, sparking conversations and delighting guests with its colorful display. The possibilities are endless!
How to Store, Preserve, or Reuse Rainbow Glow Lava Lamp
If you want to preserve your lava lamp, keep it in a cool, dry place away from direct sunlight. The mixture should last for a long time, but if the colors start to fade or the bubbling effect diminishes, feel free to refresh the ingredients. You can also reuse the bottle for different color combinations or themes, making it a versatile addition to your crafting repertoire.
Creative Variations and Customizations
- Try different color combinations to match your room decor.
- Create themed lamps for holidays, such as red and green for Christmas or pastel colors for Easter.
- For a fun twist, add scented oils to create an aromatic experience along with the visual.
- Involve kids by allowing them to pick their favorite colors and glitter.
- For advanced crafters, experiment with adding different shapes or sizes of bottles for unique designs.
Tips for Success
- Avoid overfilling the bottle with oil, as it can overflow when you add the Alka-Seltzer.
- Always supervise young children during this project, especially when using small materials.
- Prepare your workspace with newspaper or a towel to catch any spills during the pouring process.
- For easy cleanup, use a funnel when pouring liquids into the bottle.
- Feel free to experiment and adjust ingredients based on your preferences!
FAQs About Rainbow Glow Lava Lamp
Can beginners make this?
Absolutely! This project is beginner-friendly and perfect for anyone looking to explore their creative side.
Can children participate?
Yes, this project is great for kids. Just be sure to supervise them, especially during the pouring and mixing steps.
How long does it last?
Your lava lamp can last for weeks or even months, depending on how often you use it. Just refresh the ingredients as needed.
Can I customize it?
Definitely! You can adjust the colors, add glitter, or even include scented oils for a personalized touch.
A Final Creative Note
Crafting your Rainbow Glow Lava Lamp is a wonderful way to express yourself and bring a little extra joy into your life. As you watch the colors swirl and the bubbles rise, remember that every creation is a reflection of your unique creativity. So gather your materials and start crafting today! For more delicious recipes, check out these blueberry lemon ricotta pancakes or these easy key lime pie cookies for treats you will love! And if you’re looking for more DIY inspiration, be sure to follow Pinterest for endless ideas.
Garlic Butter Chicken Bites with Creamy Parmesan Pasta
Equipment
- Large skillet
- Large Pot
- Tongs or Spatula
Ingredients
For the Garlic Butter Chicken Bites
- 1 lb boneless chicken breasts cut into bite-sized pieces
- 2 tbsp olive oil
- 3 tbsp unsalted butter
- 3 cloves garlic minced
For the Creamy Parmesan Pasta
- 12 oz fettuccine or linguine
- 1.5 cups heavy cream
- 1 cup Parmesan cheese grated
Instructions
- Step 1: Cook pasta in a large pot of salted water until al dente. Reserve 1/2 cup of pasta water. Drain and set aside.
- Step 2: In a skillet, heat olive oil over medium-high. Season chicken with paprika, Italian seasoning, salt, and pepper. Sear for 3-4 minutes per side until golden and cooked through. Remove and set aside.
- Step 3: In the same skillet, melt butter and add minced garlic. Saute for 1 minute. Return chicken to the pan and toss in garlic butter.
